

Sometimes it is necessary to add contact sets into a SOLIDWORKS Simulation to control how bodies react with one another. In this scenario we have two solid body mounts which are connected together via a sheet metal body. These bodies are not in contact with each other, there would normally be a gasket between them, but for this example we are assuming these gaskets are outside of scope and therefore not included in the study. I will assume that the gasket will have no stay in how the model deforms and there we will apply a bonding link between the gaps.
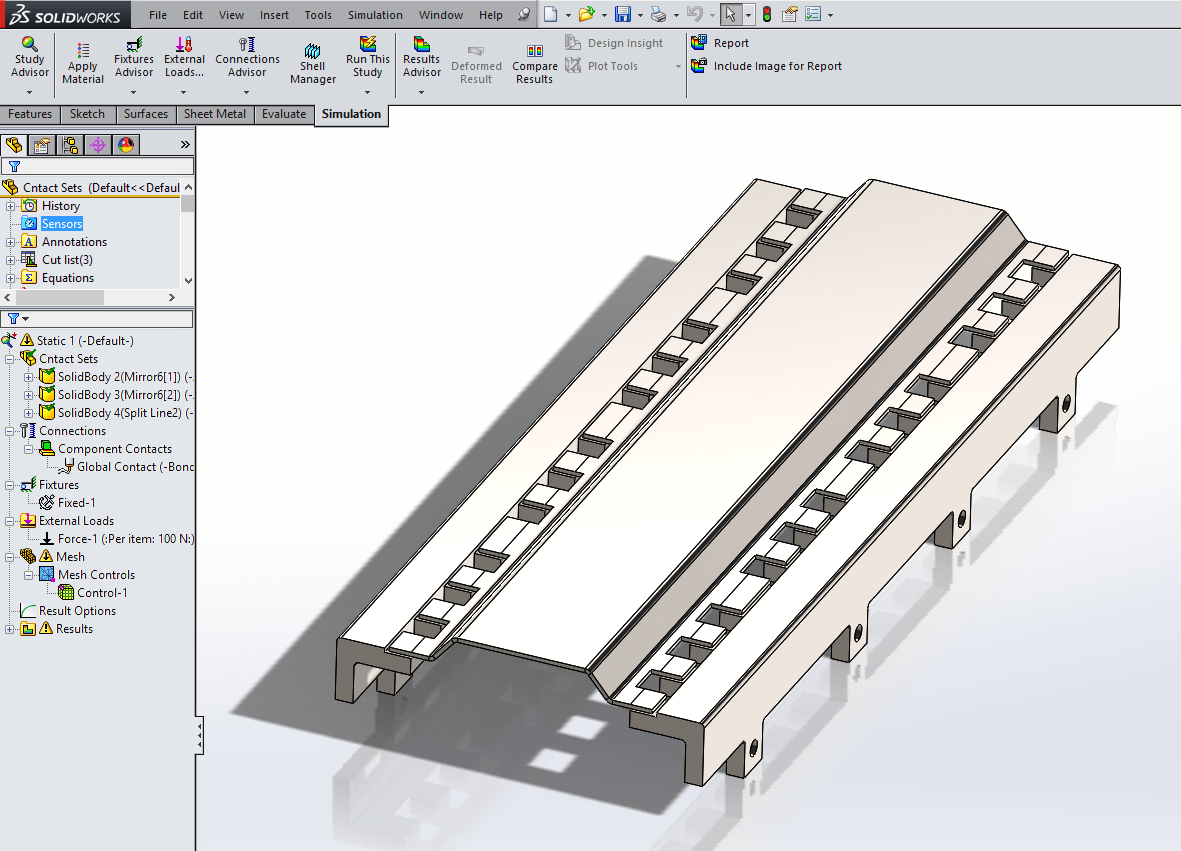
As there are no faces touching when the study is first run, the global contact set will not be applied to any faces. Therefore contact sets will have to be set up to create a link between the sheet metal body and the two mount bodies. If the link is not created the sheet metal body will just fly off when the study is run.

There are 26 gaps which will need bonded contact sets applied to them. We could do this individually, but I would take some time to do. A better approach would be the automatic settings within the contact set command to find and add all 26 in one go.
To do this, start a new contact set and assign the contact type “Automatically find contact sets”. In this case the faces are not touching, so under ‘options’, non-touch faces will be selected.
When this option is engaged, a minimum and maximum range has to be set. Faces that fall within this gap range will be added. Under ‘components’ select the components that need to have the contact sets applied to, you can select the entire assembly if required.
In this case the range will be set between 0.1mm and 1mm, there are some additional gaps within the assembly which are 2mm. We don’t want to include these gaps, so it’s important that we keep the range below this number.
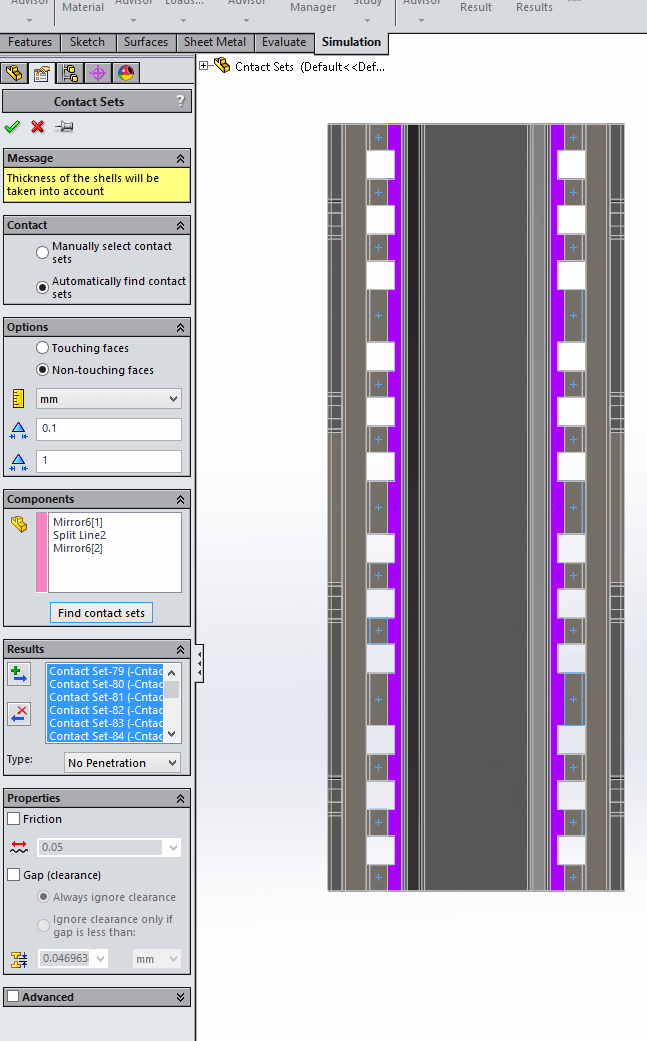
It’s important that once it has found all the contact sets, you select all of them using the shift select. Make sure they are all highlighted, then select the type of contact. In this case we will select ‘bonded’. The last step is to hit the ‘add’ button, this will create the contacts and add them to the study.
Following this approach will allow you to save time when applying contact sets and also makes sure you don’t miss any.
We hope you found that useful!
Have you seen our blog archive where we have posted plenty of helpful articles? We also have a fantastic video library filled with easy-to-follow videos on a number of topics inspired by other SOLIDWORKS users – take a look.
Also, don’t forget to follow us on twitter for daily bite size SOLIDWORKS tips, tricks and videos.


