
If you find yourself continually using the same set of features to produce your geometry, you’ll know it can be very time consuming, especially if you’re doing it by hand every time. The Library feature in SOLIDWORKS offers you a quick and easy way to place saved features anywhere on your designs. You can save individual or groupings of features for reuse simply by dragging and dropping them onto your model.
The trick when creating these library features is to make sure you use as few external references as possible. When we say external reference, we mean other geometry or sketches which are not created from the features you’re saving out. SOLIDWORKS will ask you to specify the location of these references when you add a library feature to a new part file, and the more references you have, the longer it takes to position the library feature before fully defining it.
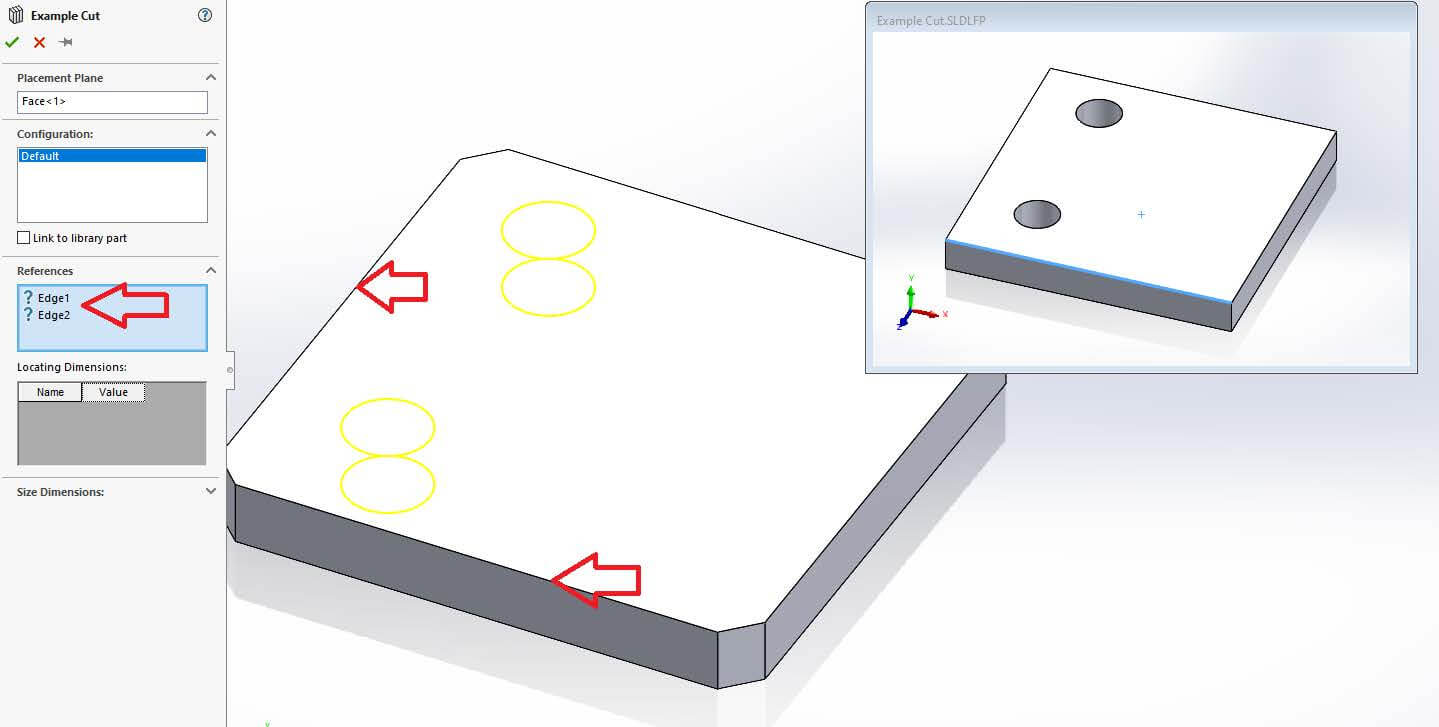
As an example, let’s consider a 2D sketch which creates a cut extrude. This 2D sketch has to be placed on a plane or face to be able to function correctly. When dragging a Library Feature into your design, you must first select this face/plane before it can be successfully added.
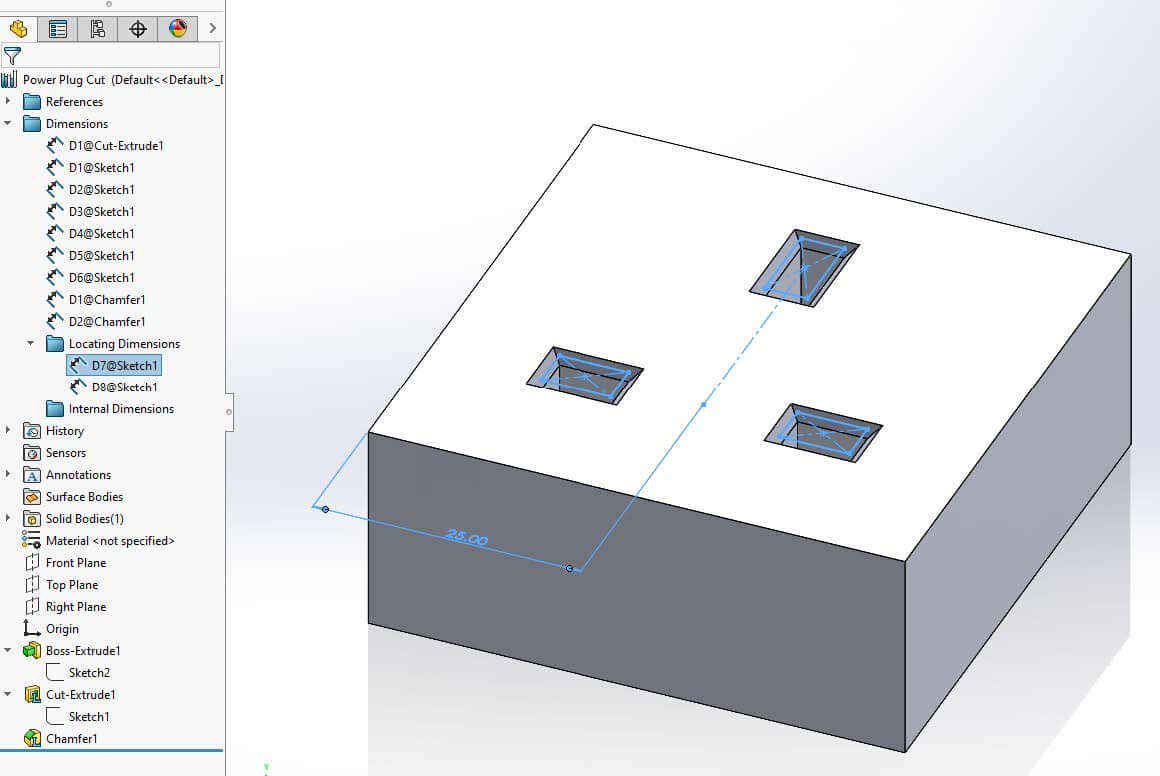
In this example, we’ve added two dimensions to the edges of a plate which locate the position of the cut within this 2D sketch.
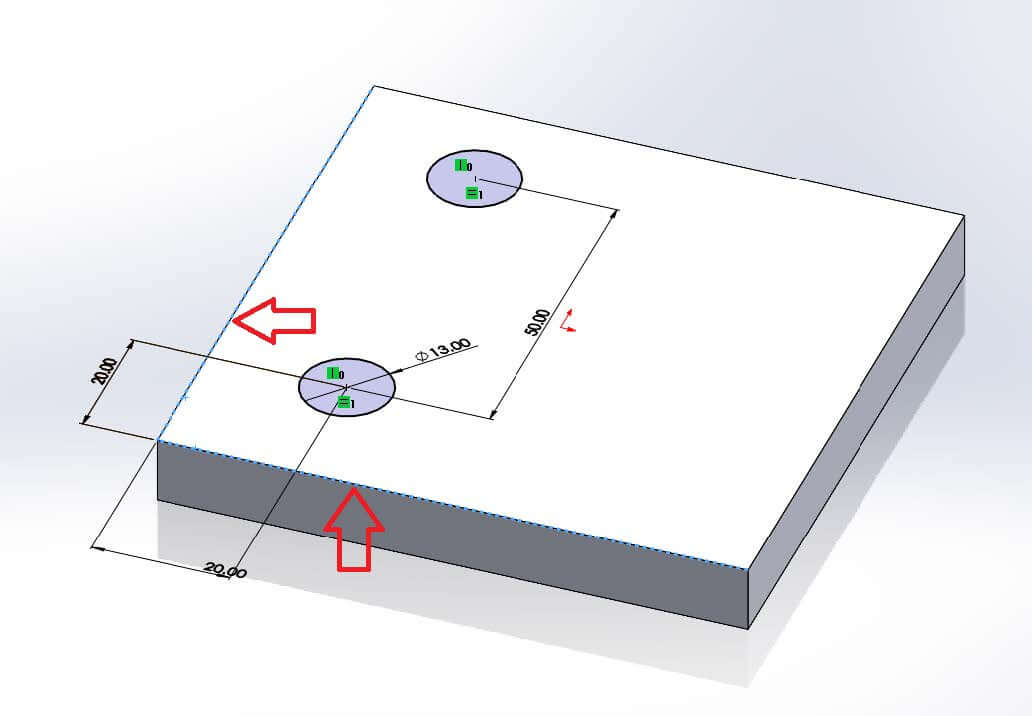
If we drag in the Library Feature again, we’ll be asked to locate the plane/face, as well as the two edges for the dimensions. As you can imagine this could snowball if we’re not careful, a long list of references can be produced that need to be selected when we add our Library Feature.
It’s worth spending some time limiting how many external references you have within your features. This can be done by trying to share external references as much as possible. e.g. edges or planes.
How to create a Library Feature in SOLIDWORKS
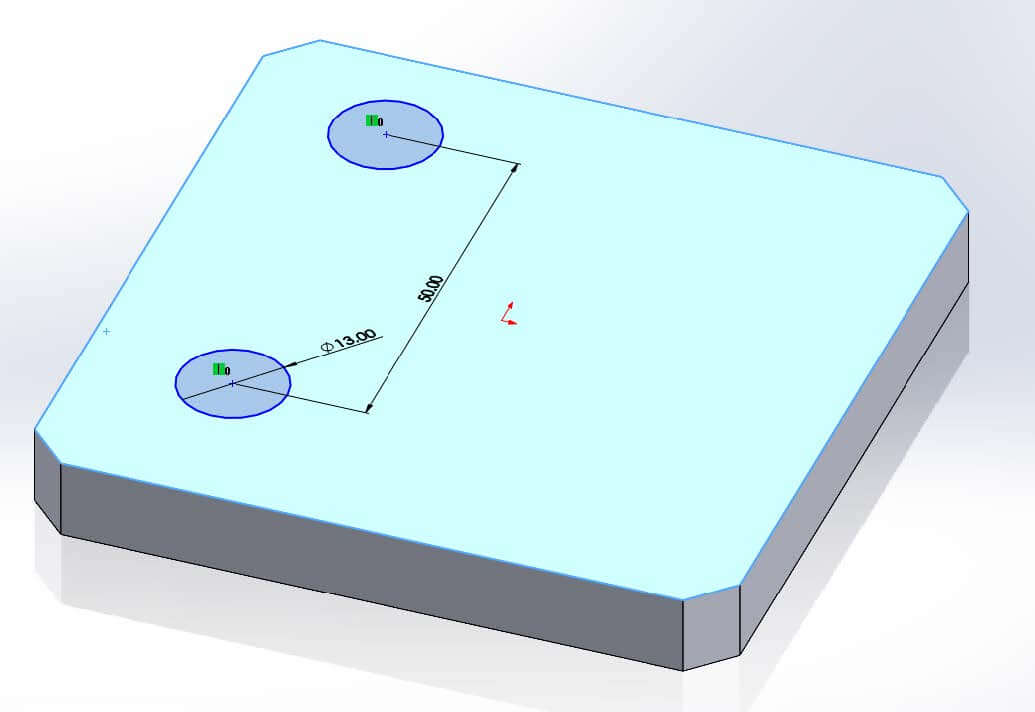
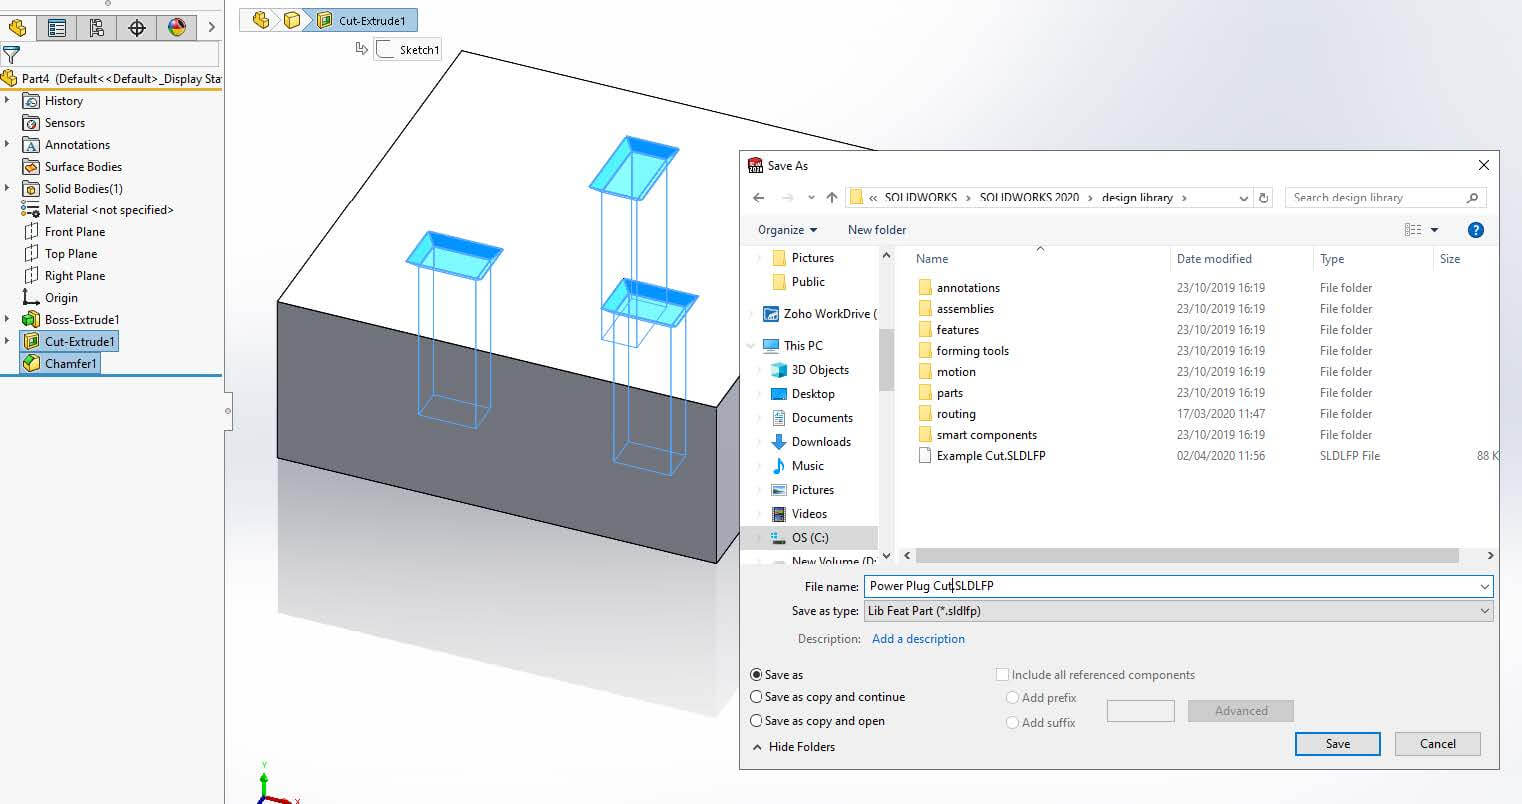
In the below example we have a simple plug socket cut with a chamfer included. We’ll use this model to produce our Library Feature. This set of features includes 3 external references in total:
- The top face of block which is used for the cut extrude sketch and the chamfer command.
- The left edge for horizontal placement.
- The lower edge for vertical placement.

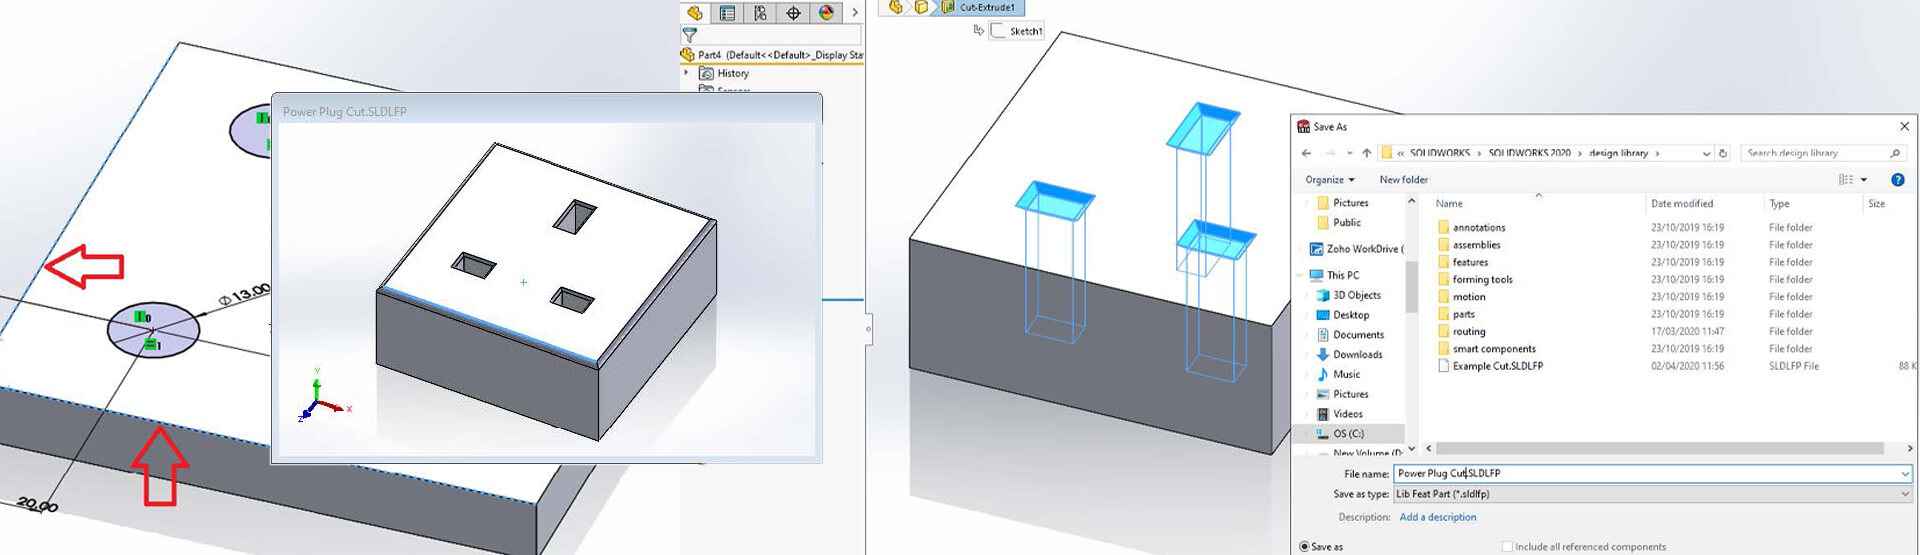
Once we have them selected in the tree, we can go to the File menu > Save as. Then select the save as type as ‘Lib Feat Part’.
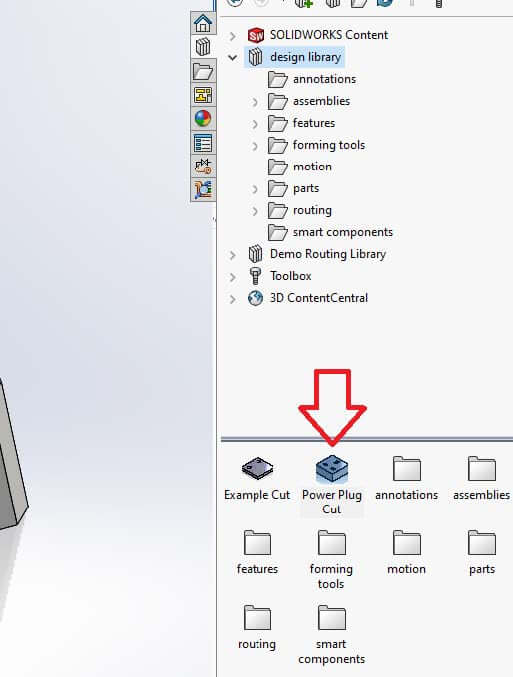
Next browse to the Design Library where you’ll see the saved Library Feature we just created.
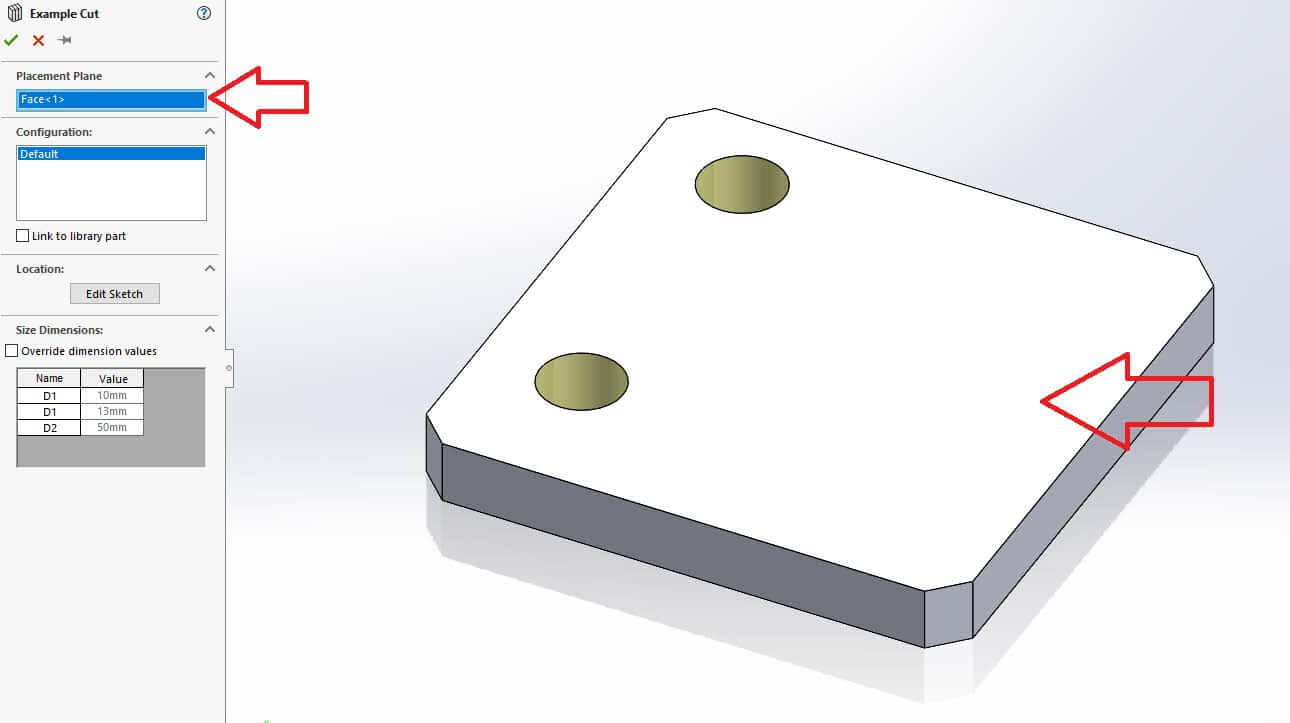
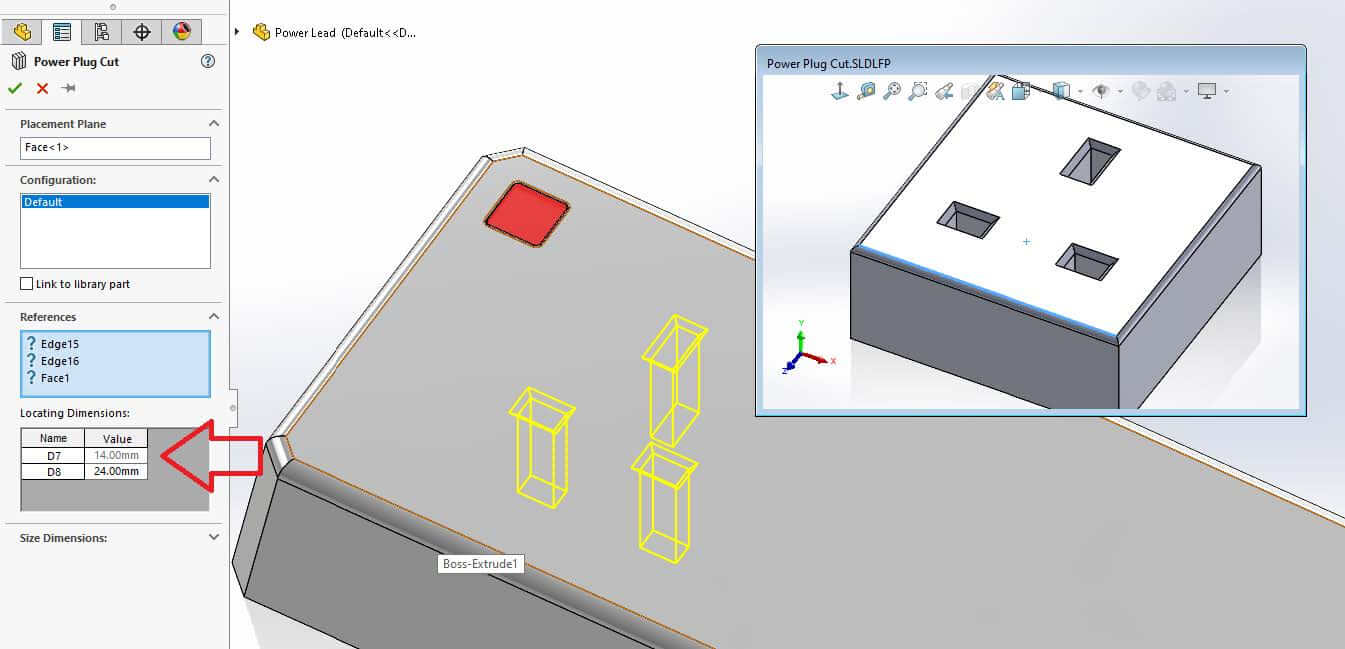
If we now drag and drop it onto a new design, SOLIDWORKS asks us for the external references to locate the part. Once specified, we can successfully add the Library Feature.
Locating Dimensions and adding a secondary configuration to our Library Feature
To do this browse to the design library, locate the Library Feature and right click on it. You’ll now have the option to open the Library Feature part. Once loaded we’ll be able to configure the locating dimension on the left-hand side under the ‘Locating Dimensions’ folder in the design tree. Next, select the two dimensions that locate our plug and drag them into this folder.
Now this is complete we’ll have a handy box section available to edit these dimensions when we drag in and configure our Library Feature.
Adding a configuration
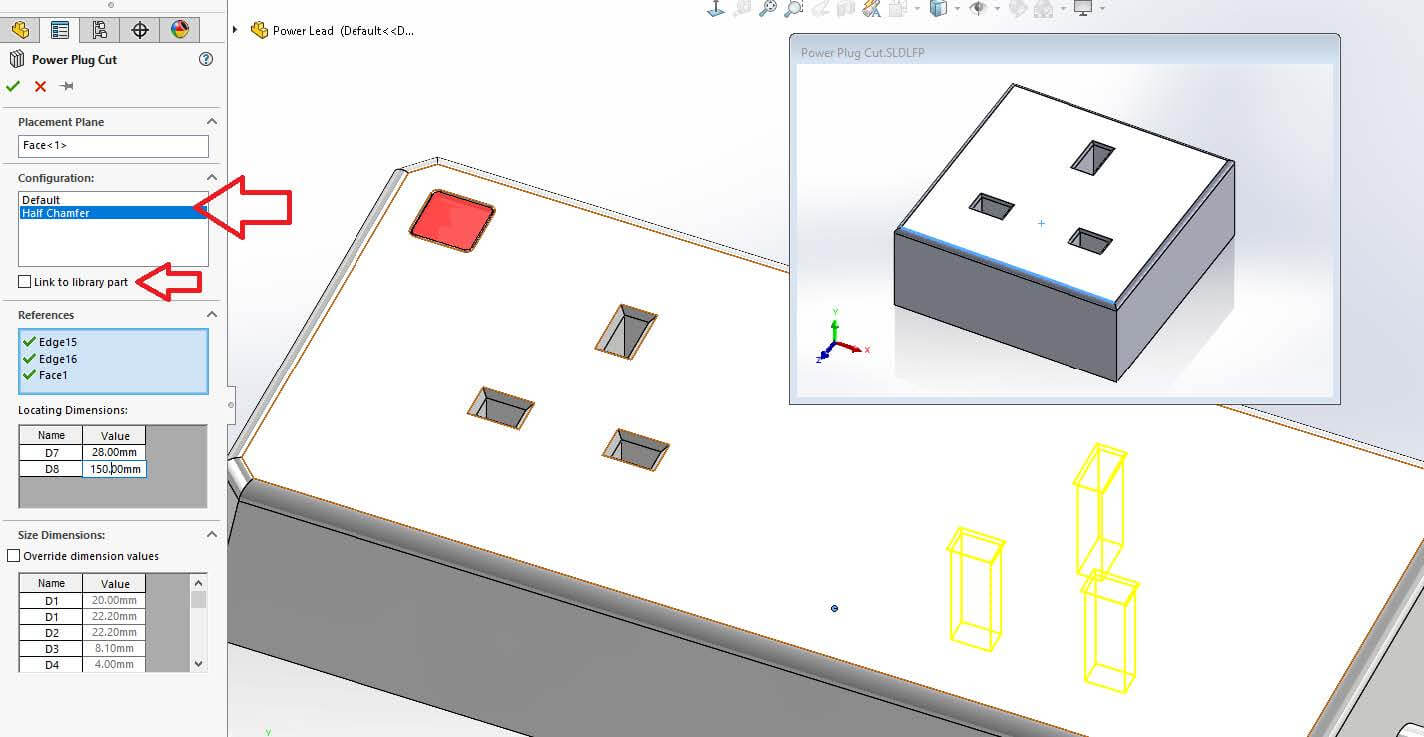
On the configuration tab we’ll add another configuration called “Half chamfer”and we’ll set up our chamfer from this configuration to be half the size of the default.
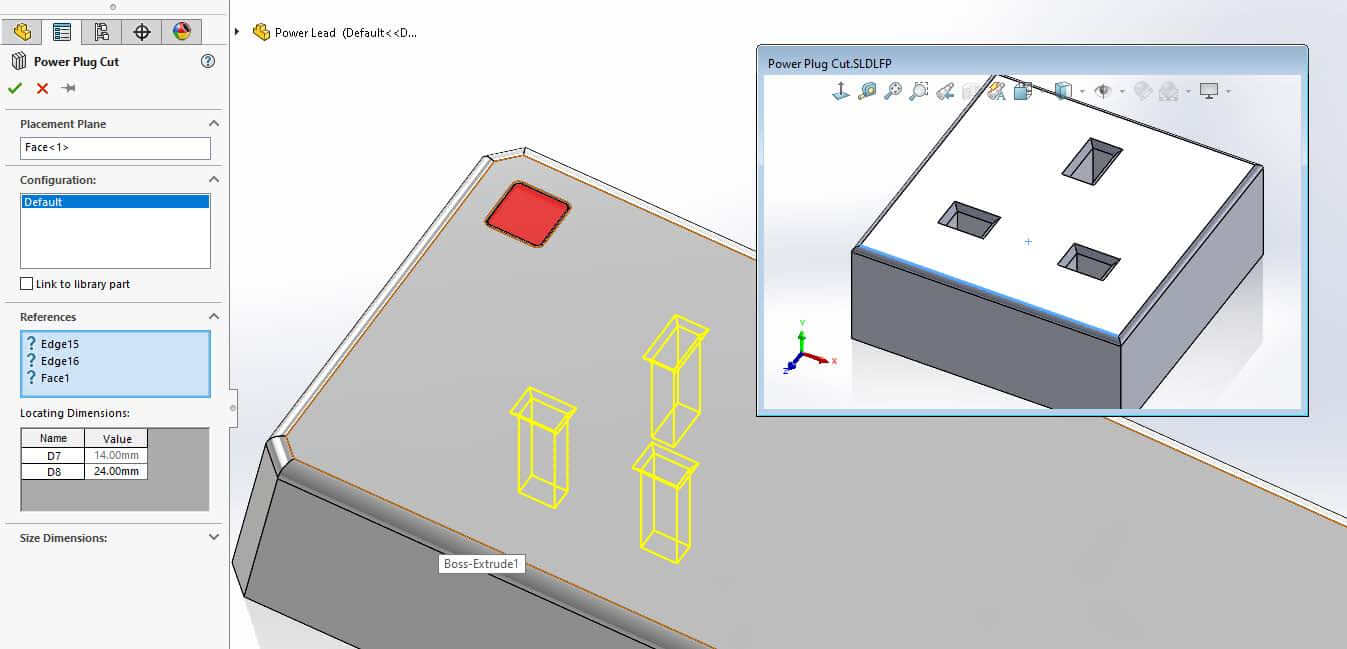
When there are multiple configurations in our Library Feature part, we have the option to select which configuration we wish to add.
Now let’s save and close this Library Feature part and then insert again onto our design. As you can see, you now have the ability to choose a configuration and modify the locating dimensions in the configuration properties. Once we’re happy with the location and configuration, you can choose if you want to maintain a link to the library feature. If we do, you’ll be able to update our Library part and any subsequent changes will carry through into our designs.
Note: Linking can be really useful, but you should always consider scope of change before modifying any library parts.
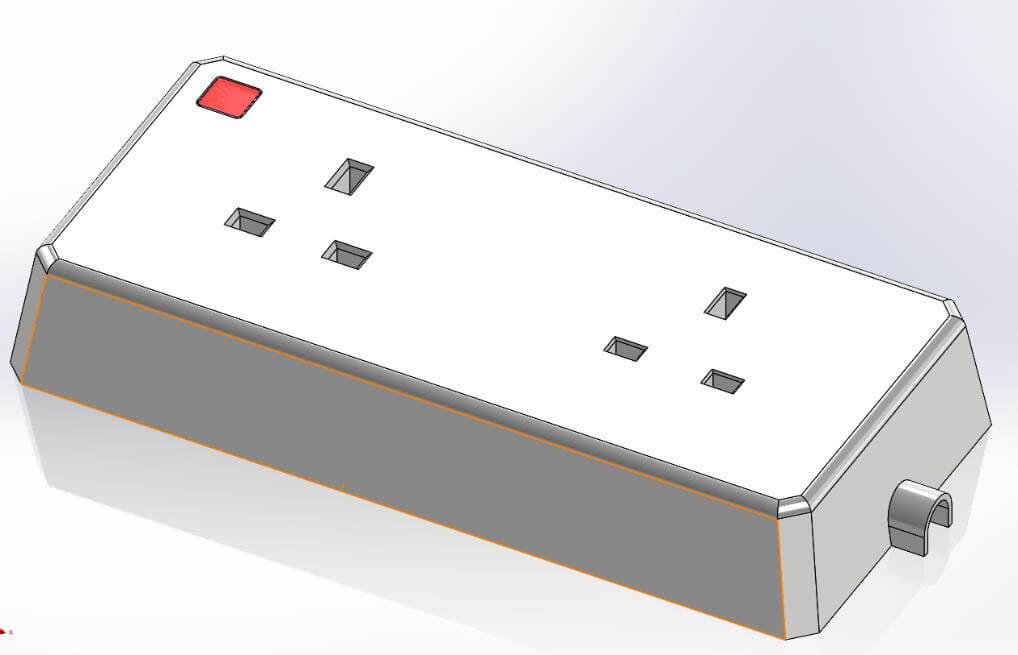
Our SOLIDWORKS Library Feature is complete!
Here’s a finished example with two Library Features added to our power extension lead created in no time at all!
We hope you found that useful!
Have you seen our blog archive where we have posted plenty of helpful articles? We also have a fantastic video library filled with easy-to-follow videos on a number of topics inspired by other SOLIDWORKS users – take a look.
Also, don’t forget to follow us on twitter for daily bite size SOLIDWORKS tips, tricks and videos.


