
The split feature is an extremely useful tool when designing using multi body part techniques in SOLIDWORKS. Let’s look at how the tool functions and what we can do with the bodies once they have been split.
In the below image we have selected the front plane to cut the part which has resulted in splitting the part in to 2 bodies (as shown in the ‘Resulting Bodies’ box).
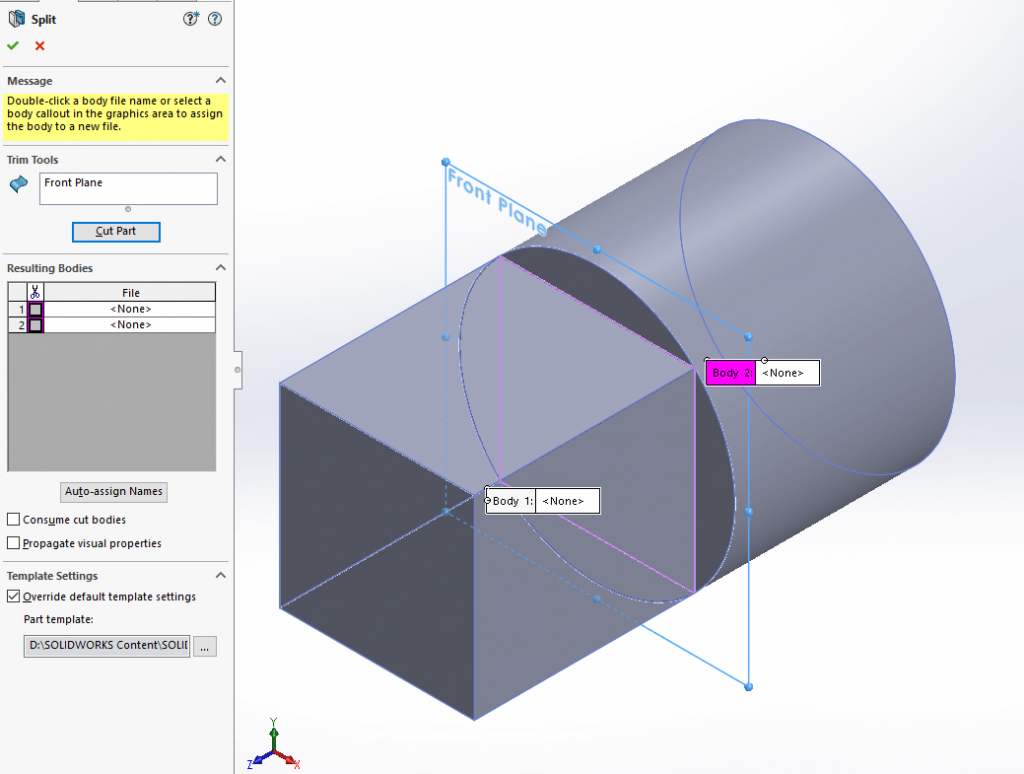
 If you would like to keep either of those bodies, you must check them in the ‘Resulting Bodies’ list.
If you would like to export those bodies to their own individual part files, double click the text box (that currently says ‘<none>’) next to the check box. This will bring up a ‘Save as’ dialogue, where you can choose the name and destination of the saved body.
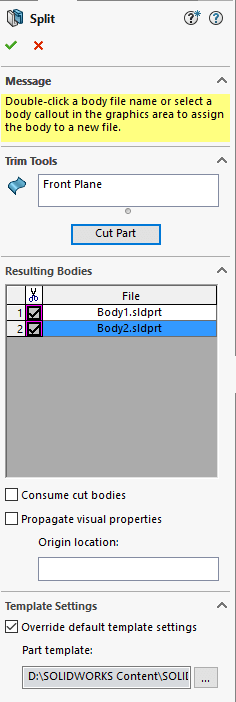
The ‘Consume cut bodies’ check box removes the checked bodies from the current (original) model. The derived part files will still be created as before.
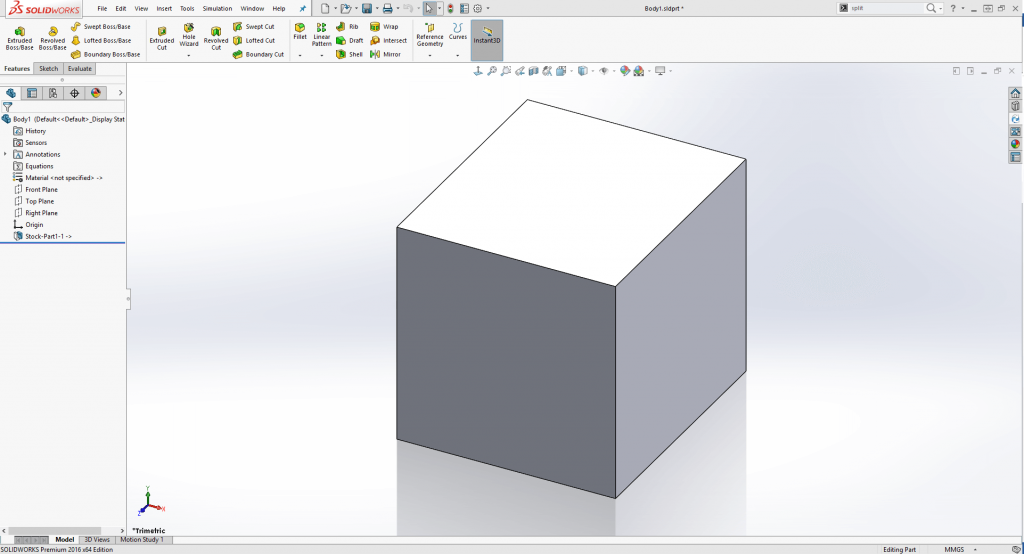
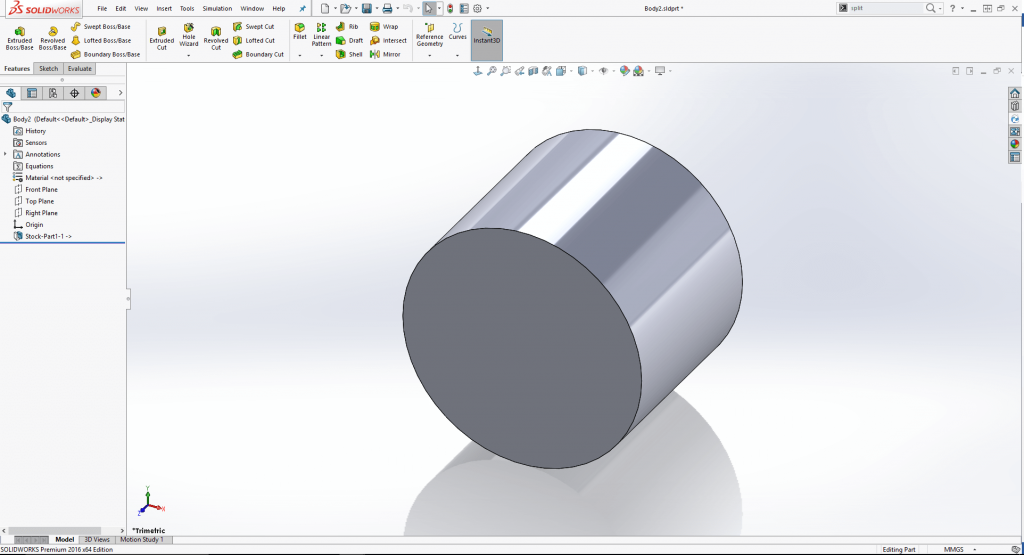
In this example we have decided to keep both of the bodies, save them out as the file name ‘Body1’ & ‘Body2’. By unchecking ‘Consume cut bodies’. These bodies will still be available in our original model.
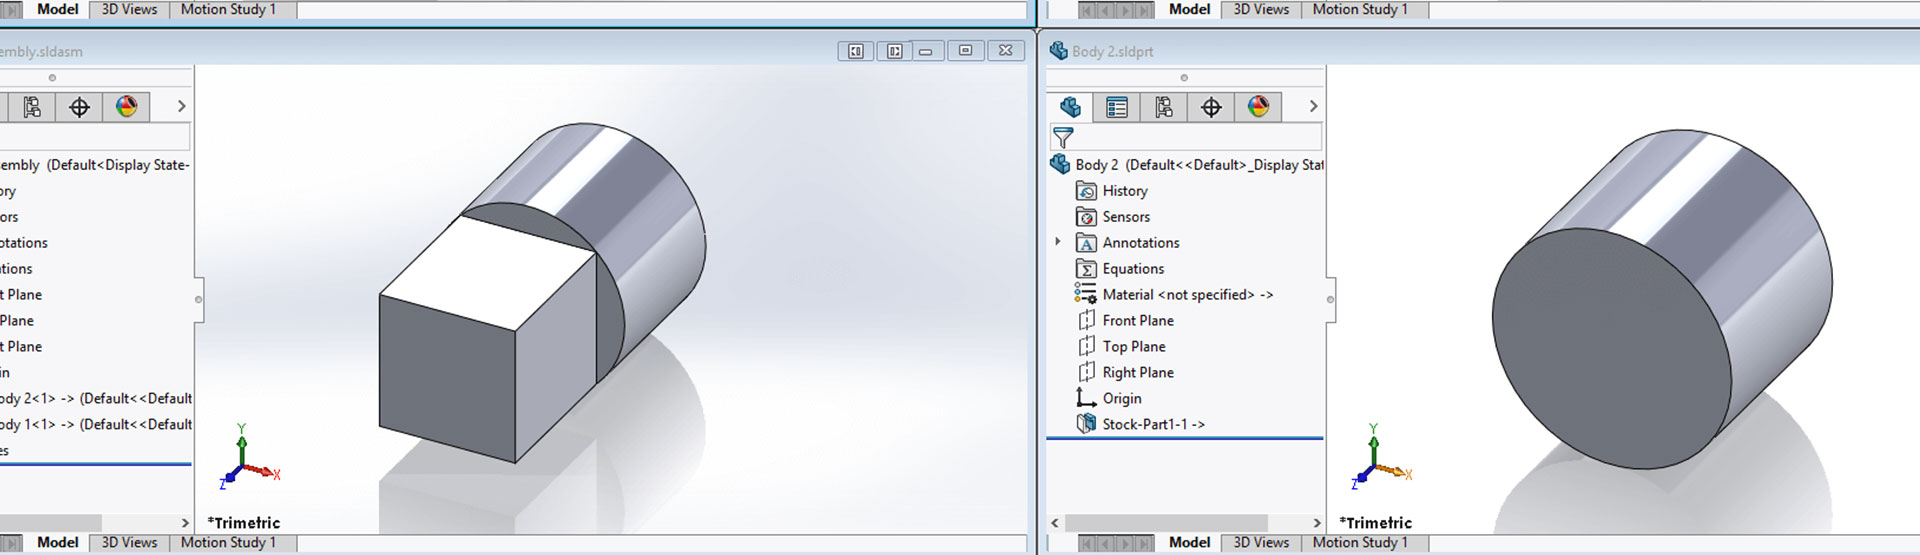
This has left us with 3 files – the original part file and 2 derived part files as per the images below:
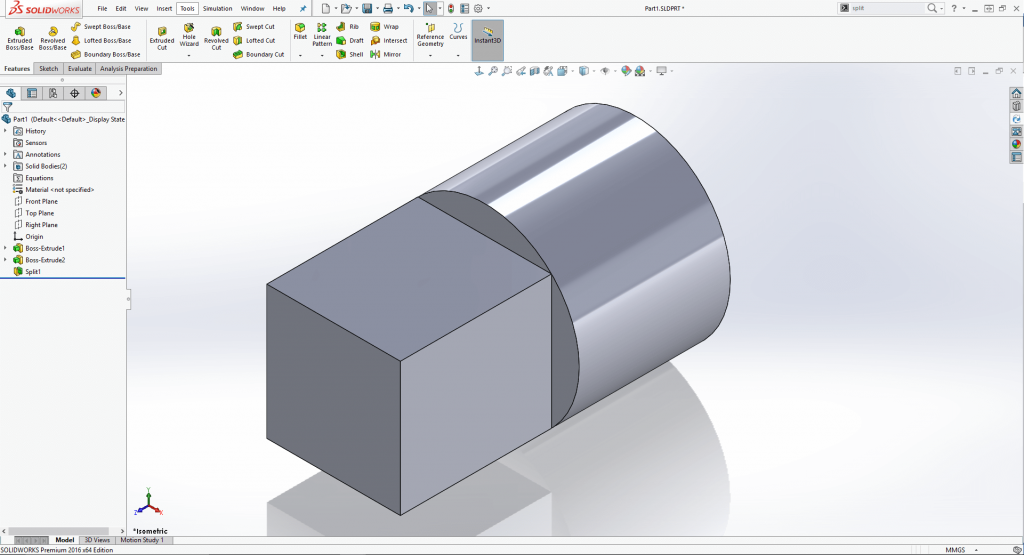
Once the split feature has completed, it will show in the tree of the original model. Any features that you apply to the original model before the split feature will automatically propagate to the derived parts. Any features that come after the split feature exist only in the original model.
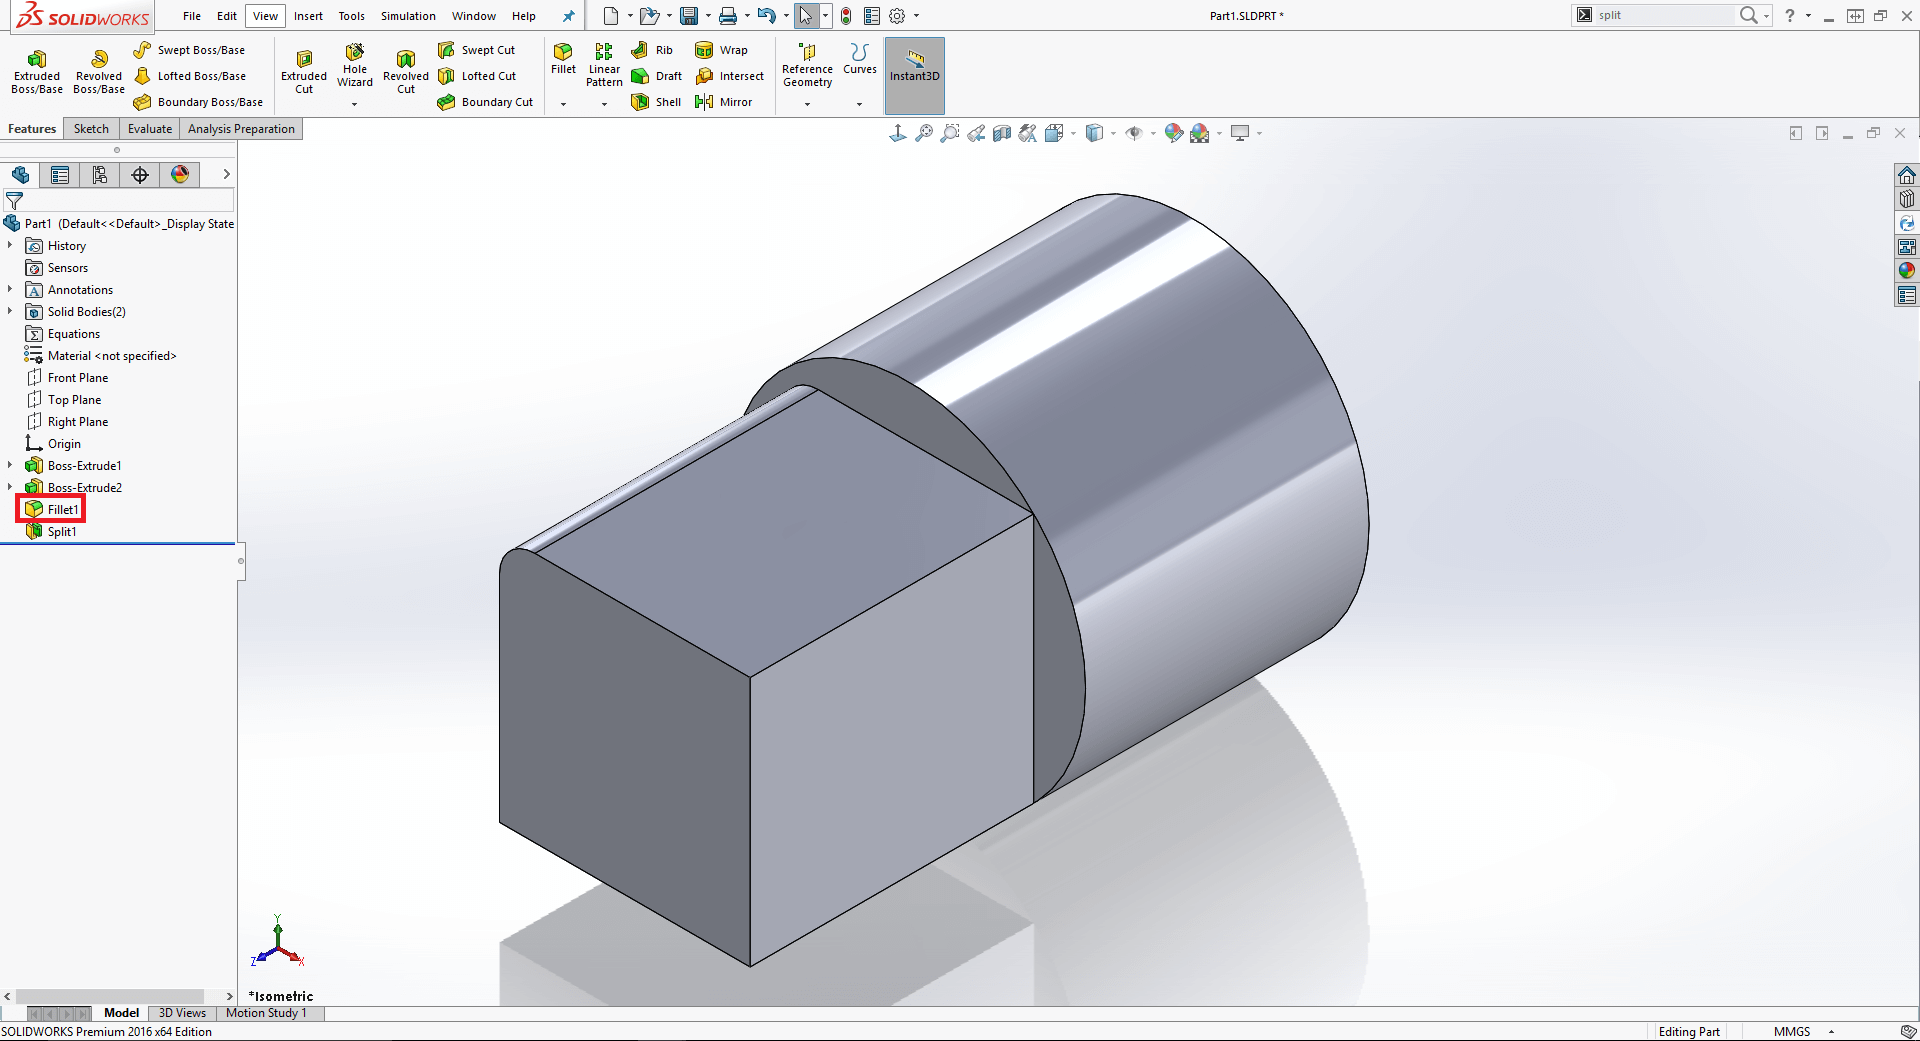

In the above example the fillet was created before the split feature and therefore propagated to the derived part. If we were to drag the fillet feature below split, this would not happen.
The only way to know that the bodies have been saved out is to look in the split feature and see if there is an entry in the file box of the split bodies command.
If you decide not to save your bodies during the split operation (e.g. to do some additional work on the body after its split before exporting it), you can do it a later point in your design using the ‘Save bodies’ command. This will allow you to selectively choose which bodies you wish to save. A ‘Save Bodies’ feature will be created in the tree and any feature applied to a body before the ‘Save Bodies’ feature will be propagated to the derived part, similar to the split feature.
‘Save Bodies’ lets you know that bodies have been saved, because there will be a Saved bodies feature in the tree, but the only way to know which bodies have been saved is to look in the feature.
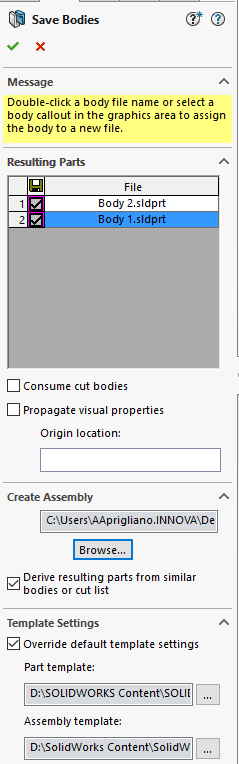
‘Save Bodies’ also gives you the ability to create an assembly from the saved bodies. This option creates a new assembly and places the derived parts into the assembly fixed to the origin – so their positions are correct relative to each other. In this example we will save the 2 bodies as an assembly.
As you can see from the images below we now have 4 files created. The original part, the 2 derived part files containing the individual bodies and the assembly file.

If you decide to create an assembly, you will need to be aware what happens, if in the original part you make a change above the save bodies to affect the amount of solid bodies.
In this example we will add another cut plane (right plane) to our split command:
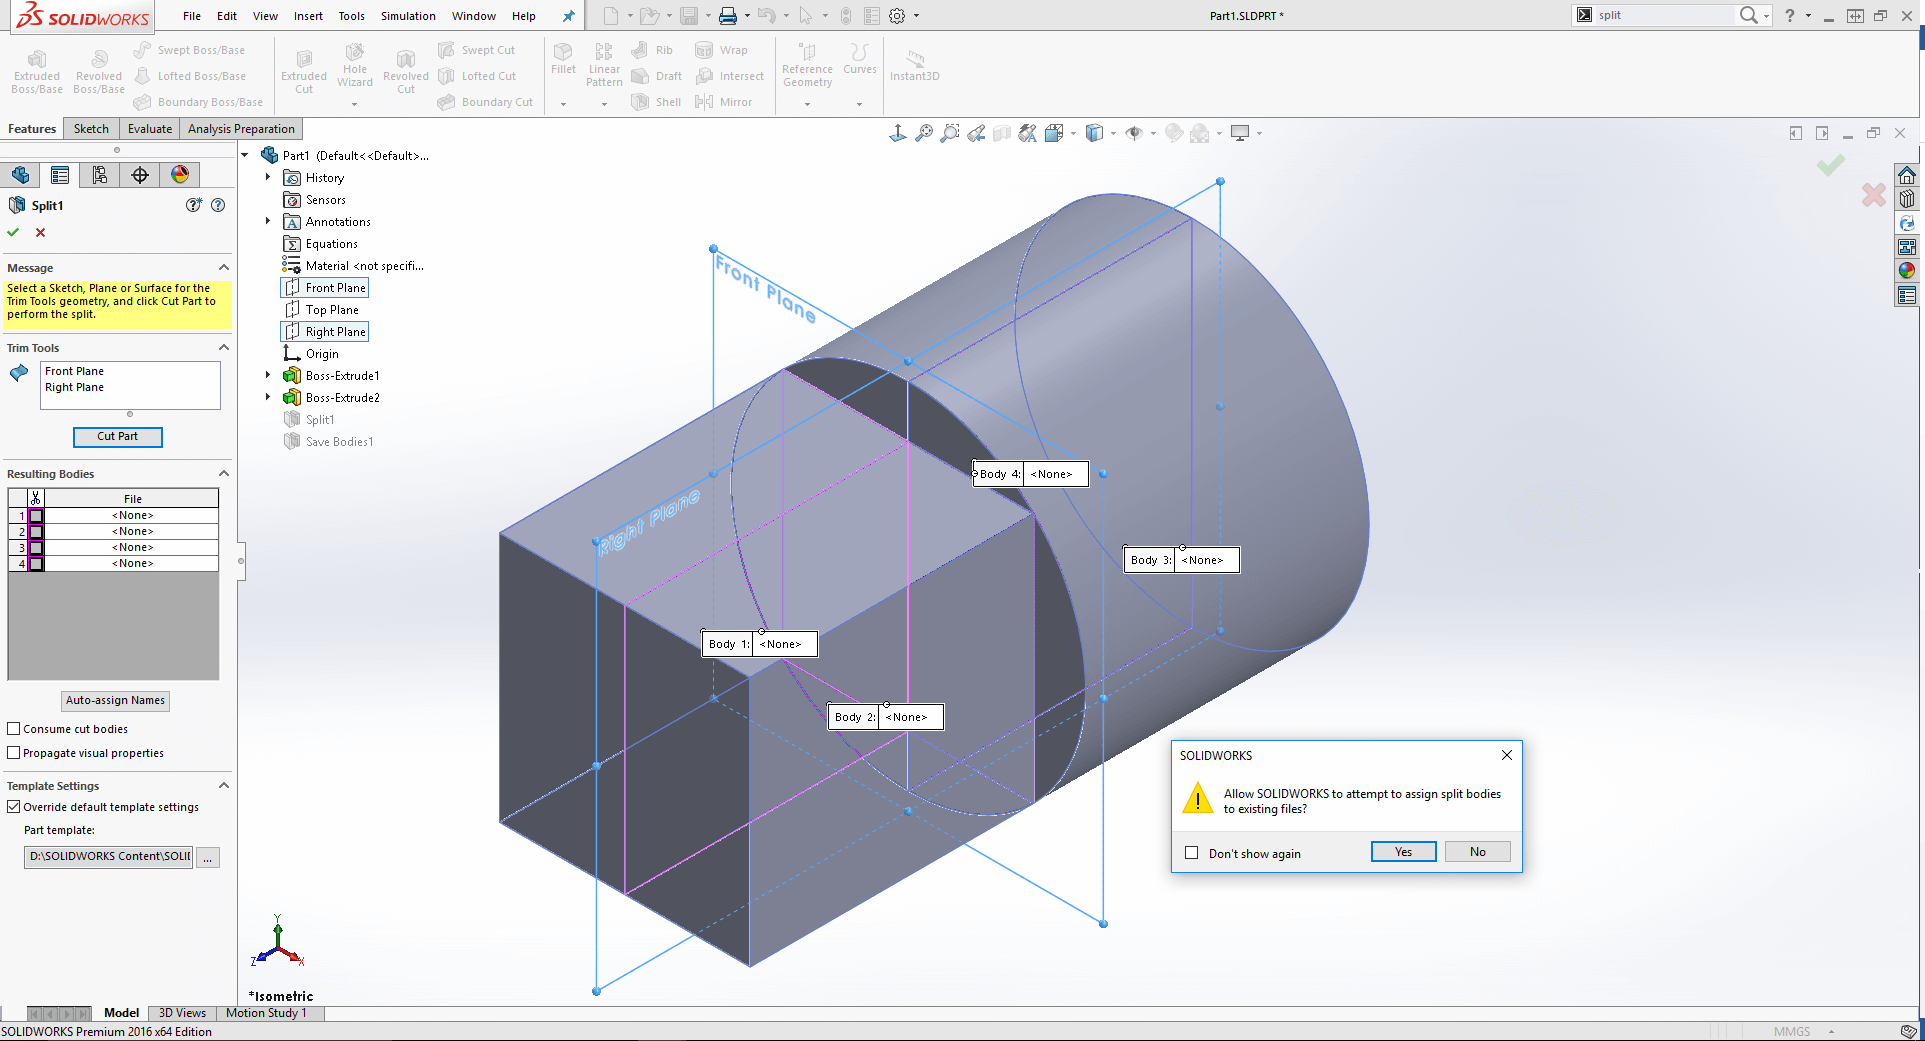
This splits the model in to 4 separate bodies and brings up the message ‘Allow SOLIDWORKS to attempt to assign split bodies to existing files’.
SOLIDWORKS is basically trying to pick 2 bodies from the 4 created and give them the same body i.d as the original 2 so all child features that were related to the original 2 become related to the 2 it chooses. We will also tick to keep the other 2 bodies to keep all 4 bodies.
This leaves us with the result shown here:

As you can see the ‘Save Bodies’ command uses the re assigned bodies for the assembly.
If we want to save the remaining 2 bodies as parts and import them into the assembly, we need to modify the ‘Save Bodies’ command to include the other 2 bodies. This will create the 2 parts but it will not automatically add them to the assembly. This has to be done manually.
We hope you found that useful!
Have you seen our blog archive where we have posted plenty of helpful articles? We also have a fantastic video library filled with easy-to-follow videos on a number of topics inspired by other SOLIDWORKS users – take a look.
Also, don’t forget to follow us on twitter for daily bite size SOLIDWORKS tips, tricks and videos.


