
SOLIDWORKS is a great program for testing the validity of your mechanical designs, the program is built to make designing mechanisms as easy as possible. However, you may find that due to the complexity of some of your designs this can be a time consuming process if designing all the parts one by one.
There is an easier way! Using sketch blocks in the software is an effective way to model the complexity of your mechanisms without having to construct the geometry of your designs.
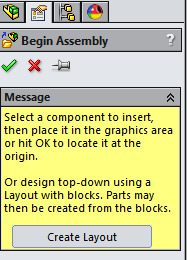
To start off this process you must begin by creating a brand new assembly, once an assembly is open you will see a button which says Create layout within your property manager on the left. A layout is the environment inside of which you will create the blocks.
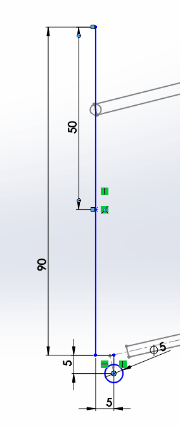
You will notice that the sketch tool is now active, to construct a block you must draw out the basic shape of one of the elements in your design. Adding a good number of sketch points will make it easier to attach the blocks later on. When drawing the block you can add as many relationships and dimensions as you like, relations which define the position of the block become meaningless once the block is created.

To turn the sketch into a block; click the Make Block button on the layout toolbar. Within the menu in the property manager you can select all of the sketch elements you want to join into a single block and hit the tick.
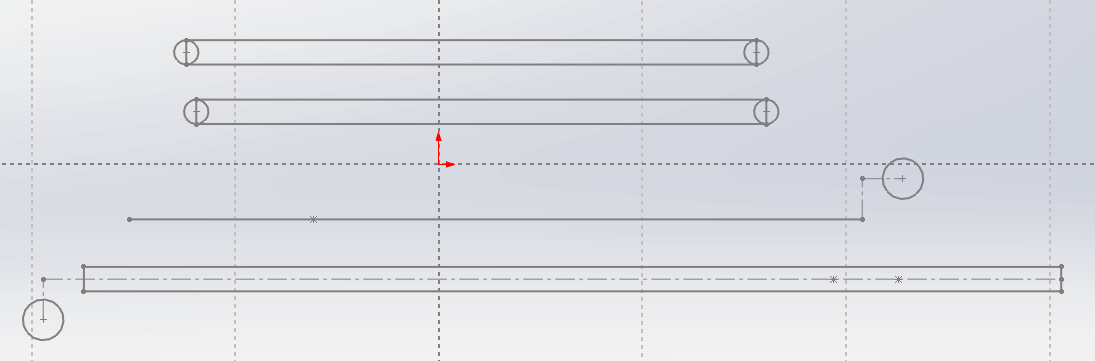
For the second item it is advisable to draw your sketch items away from the first. You will make the mechanical connections later when you have constructed all the Blocks. Follow the process described above to create a number of the other blocks, build enough items so you can create a simple representation of your design.
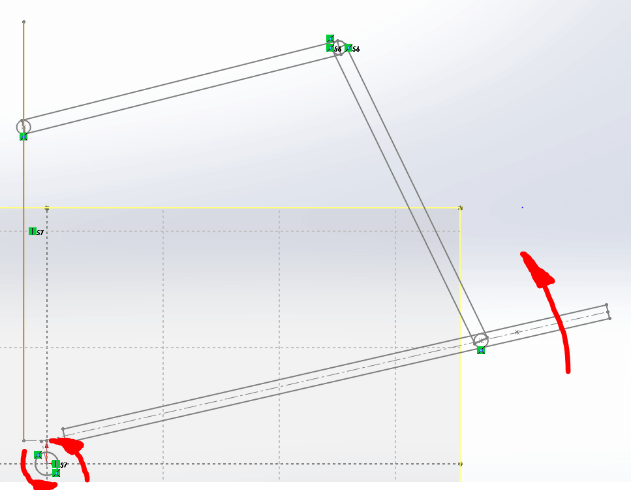
In the below example there are now four blocks ready to go. These items can be joined together using sketch relations. Using coincident to join the different sketch points may well be the most useful. Keep in mind that a block will be totally free to move once created, so the mechanism will need to be jointed to the origin at some point.
Once attached to the origin, and joined at the relevant points you will be able to simulate the movement. This can be done with a simple drag and drop.
You may well find that some of the blocks are too big/small. The advantage of designing with blocks is that they can be easily modified. By right clicking on the block you will see edit block, this will take you back into the original sketch.
Once the edit is complete you can click the edit block button again, you’ll see it on the layout toolbar. You may have to rebuild (Ctrl & Q) in order to update your design once edited.
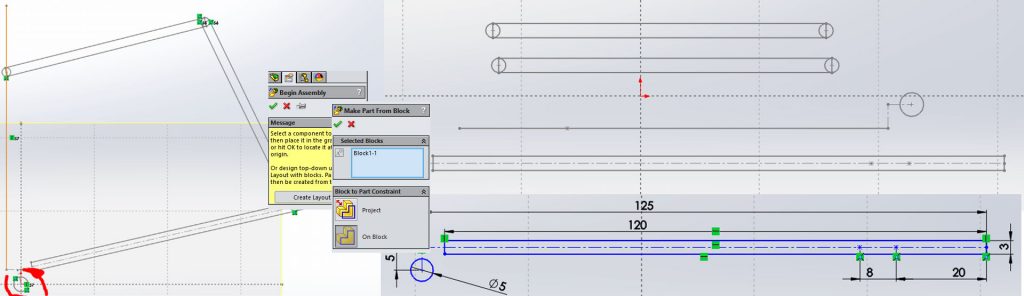
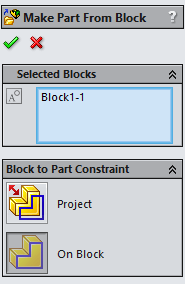
The shape of your design can obviously be tweaked now, until the mechanism runs perfectly. Once this process is done, you may well want to create a part from your blocks. The good news is that this process is fairly easy too! By selecting one of your parts, you will see a button which says Make Part from Block, on the layout toolbar. Select one of your blocks and click this button, SOLIDWORKS will give you the ability to create a part on top of your Block, which uses the same sketch relations for movement.
Clicking the On Block option is recommended, unless you want to define a distance for your part to sit, away from your sketch plane. You should now see that an in context part has been created within your assembly. This part contains the sketch items that were used to create your block. You’ll find that geometry can now be modelled over the top of this sketch. You’ll find the convert entities (Sketch toolbar) a useful tool in this environment, it will allow you to copy sketch geometry from your original block shape to a new sketch to define you geometry.
You can repeat this process for all your blocks, and once complete you should have an assembly which perfectly replicates the movement you’re looking for. This design can be mated into other assemblies and used as part of a wider project.

We hope you found that useful!
Have you seen our blog archive where we have posted plenty of helpful articles? We also have a fantastic video library filled with easy-to-follow videos on a number of topics inspired by other SOLIDWORKS users – take a look.
Also, don’t forget to follow us on twitter for daily bite size SOLIDWORKS tips, tricks and videos.


