
You’ve always been able to customise much of the SOLIDWORKS interface and functions to suit you – keyboard shortcuts, mouse gestures and almost everything else! Setting SOLIDWORKS up how you like it allows for a more streamlined and much more efficient design process, yet a lot of people don’t know how, or don’t have the time or inclination to do so. If you’re yet to do this, you’ll be pleased to hear that it’s really easy to do – let’s take a look at how to get things set up.
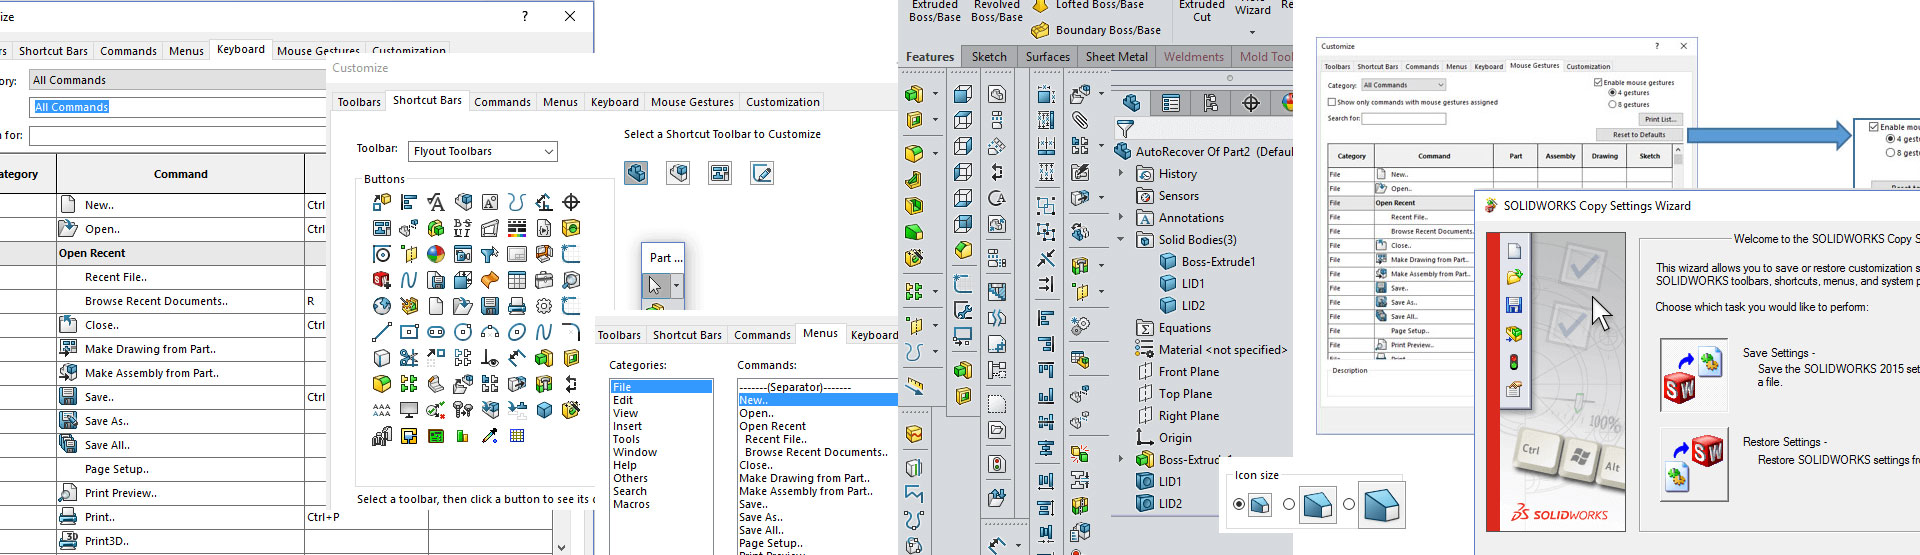
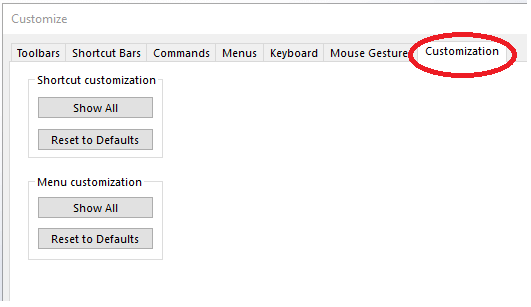
Use the right mouse button (RMB) on the command manager to call up a ‘Customize’ window (see below picture). Here you can customise toolbars, shortcut bars, mouse gestures and more. Alternatively, the same command is available under: ‘Tools > Options’.
It’s worth noting that all settings are specific to each Windows user account, so don’t worry about messing up somebody else’s customisations if you share a PC and have different log ins.
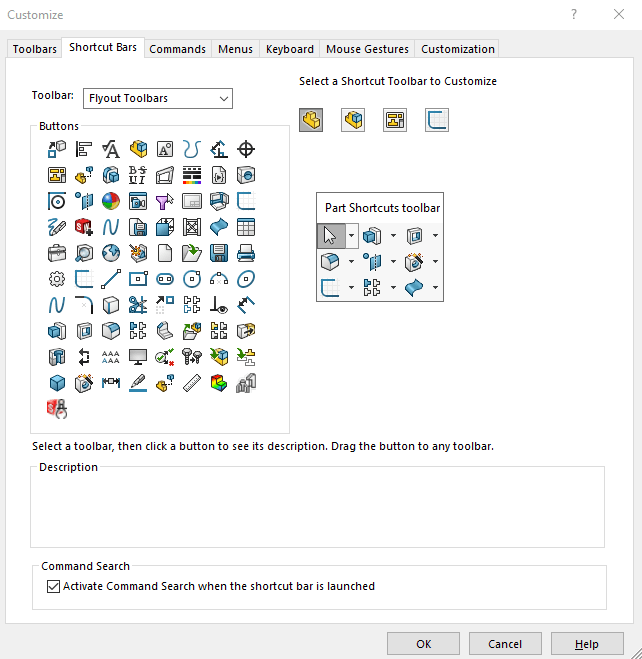
Customise: Shortcut bars
By default, the ‘S’ key is used to display a user defined set of contextual commands next to the cursor for each of the following environments; part, assembly, drawing and sketch. There is a vast library of commands to choose from and the shortcut bar can be edited by simply dragging and dropping the necessary commands into the bar on the right-hand side. The ‘S’ key is also used to activate the command search. Looking at the image below you can also see that you’re not limited to adding individual commands. You can also add flyout toolbars, for example, and the surfaces toolbar can be added to this, allowing access to numerous surfacing commands without overcrowding the ‘S’ Key shortcut box. For more information on this, please see our ‘S Key’ customisation guide here.
Customise: Mouse gestures
Mouse gesture customisation allows you to choose either 2,3,4, 8 or 12 gestures (see below). With a now improved customisation interface, these can be assigned by finding the command, dragging and dropping it from the table to the wheels on the right. To find out more, take a look at our in-depth guide on how to customise mouse gestures for SOLIDWORKS .
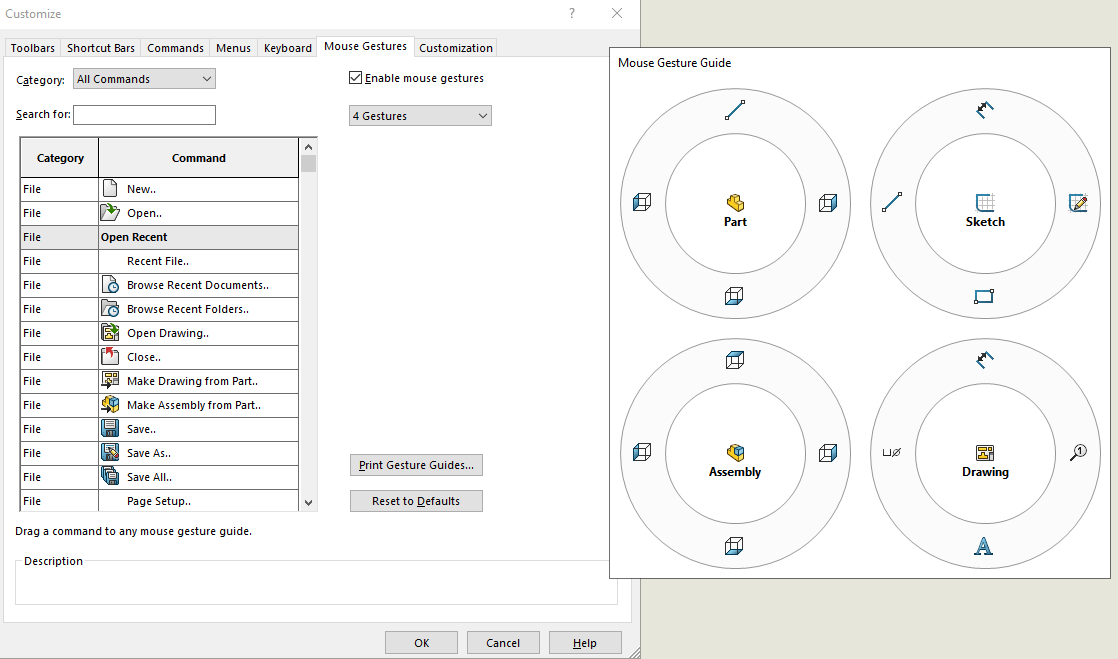
Tip: For maximum customisation, you could always link one of the mouse gestures to the shortcut bar command, which can be found by typing in ‘shortcut’. (Which enables you user to only use one hand, and have an infinite number of commands on one gesture!)
Once these have been assigned, when working within a document all the user has to do is hold down the RMB and move the mouse in a direction (as assigned) and the relevant command will pop up.
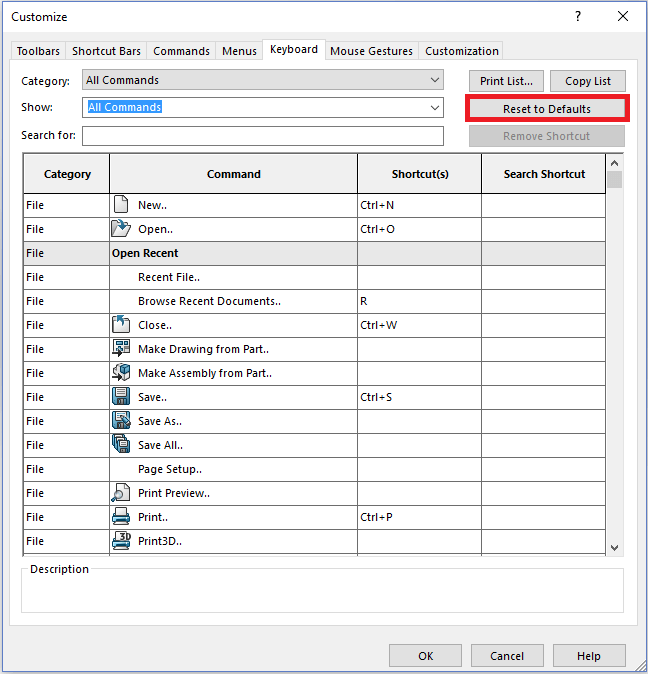
Customise: Keyboard shortcuts
This is very similar to mouse gestures, however instead of selecting a gesture, the user specifies a keyboard selection next to a relevant command. These are controlled globally and not at each level, i.e. part/assy, etc. There are a number of keyboard shortcuts already defined within the install, which can be re-assigned if the “Reset to Defaults” command is selected, as seen in here.
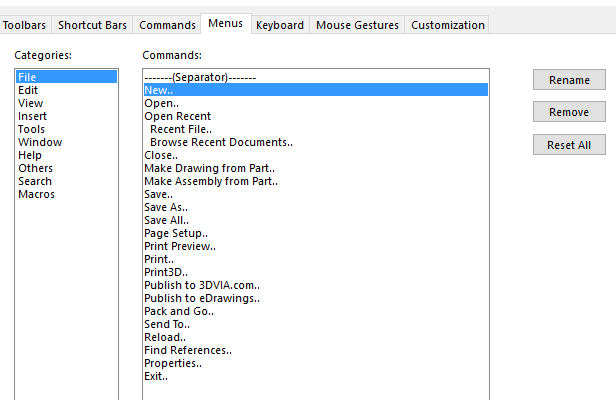
Customise: Menus
The drop down lists are also customisable. Here you can choose which commands appear.

Customise: Toolbars
It used to be common practice for a user to have all of their most commonly used commands ‘to hand’ within the interface for swifter modelling. These can be enabled/disabled via the toolbars tab. The main limitation with this is the reduction of the working environment.
This is a false economy, because of the ability to use all of the other customisable areas in order to obtain the same results whilst not affecting the working area.
The icon size is also adjustable to three different sizes as seen below.
Customise: Drag and drop
Dragging and dropping commands in a specified location enables the user to really customise their design process for their particular needs. They can be dragged from the customise command window onto the interface or just within the interface itself. This enables such things as the heads-up view toolbar and command manager to be rearranged. It is as simple as it sounds!

Customise: Reset to defaults
If you’ve changed any of the above and want to start from scratch, you can easily reset shortcut and interface (menu) customisations. Additionally if a print of the various customisations would be useful this can be obtained via the ‘Show All’ command, as seen here.
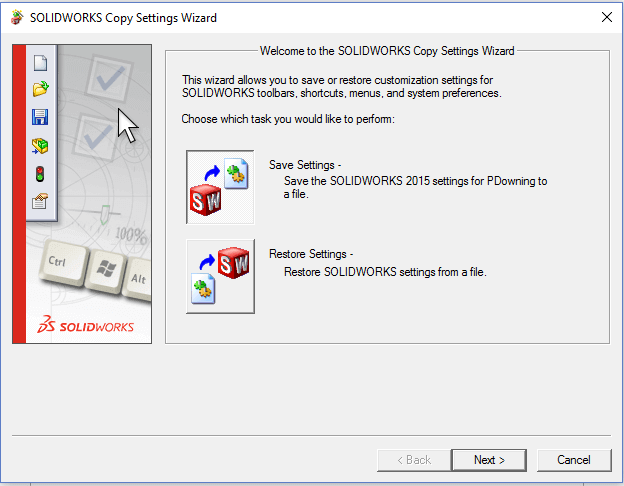
Customise: Copy Settings Wizard
It’s easy to copy your settings across if you’re upgrading SOLIDWORKS, or moving to another machine. Simply fire up and use the Copy Settings Wizard, which can be found within ‘All Programs-SOLIDWORKS Tools’. It’s a very simple program to use, but always ensure that the current settings are saved before attempting to uninstall the software! Failure to do so will result in all of the settings being lost!
We hope you found that useful!
Have you seen our blog archive where we have posted plenty of helpful articles? We also have a fantastic video library filled with easy-to-follow videos on a number of topics inspired by other SOLIDWORKS users – take a look.
Also, don’t forget to follow us on twitter for daily bite size SOLIDWORKS tips, tricks and videos.


