

In part 1 of this SOLIDWORKS tutorial we covered examples of where to obtain models, and how to go about importing a part file into SOLIDWORKS for use in routing. However, the components you need to utilise may only be available as assemblies. If that’s the case you could just save them into part files and proceed as per part 1. There are times where it may be beneficial to keep them as an assembly (e.g. you need to check that there is enough room to operate the valve without fowling other components). So, in this second part we’ll be taking a look at the additional steps involved in importing an assembly.
The methodology for an assembly differs in so far as any connection and routing points required need to be placed both at the component level and at the assembly level. The component points (CPoints and RPoints) are required to locate the assembly points (ACPoints and ARPoints) it is not possible to place the assembly level points in ‘fresh air’.
- First make sure you have the routing add-in active (Tools > Add-Ins)
There’s no need to go through the Routing Library Manager (though you can if you wish), because we have no intention of using the components that make up the valve assembly anywhere other than in that specific assembly. Simply open the relevant part file and add the CPoints and RPoints via Tools>Routing>Routing Tools. Do remember, however, that the assembly points take the properties of part points so it is important to set your choices here.
Next, insert the component points:

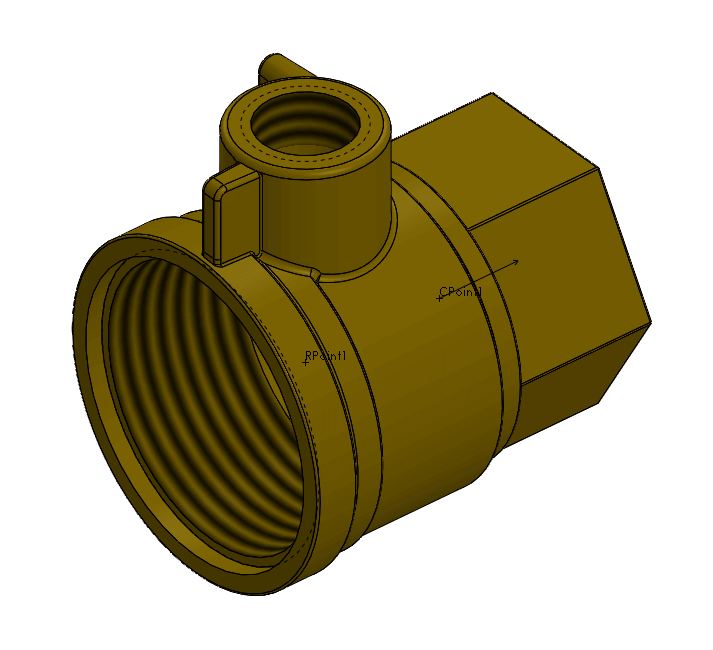
Part 1 requires a CPoint, and an RPoint (you may need to use a sketch to locate this):
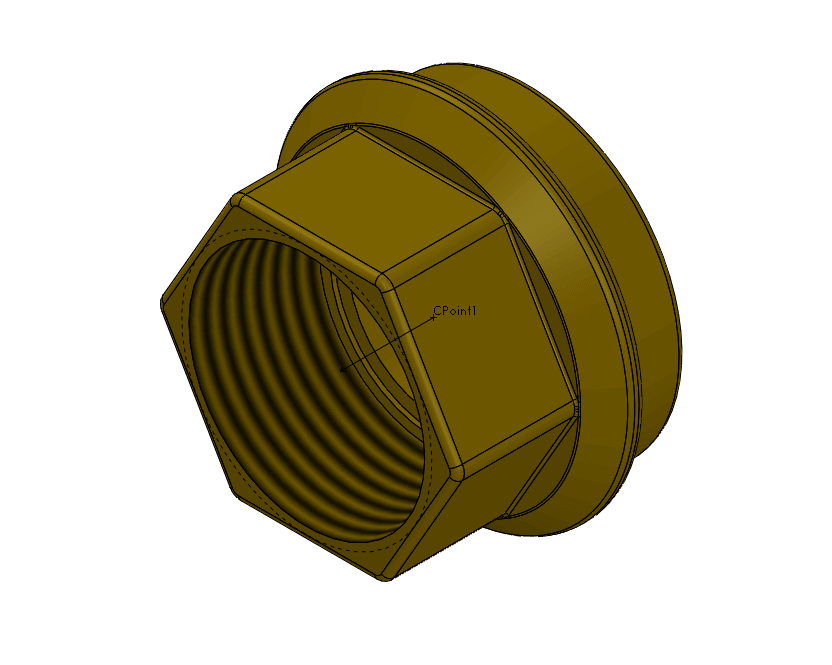
Part 2 only requires a CPoint:
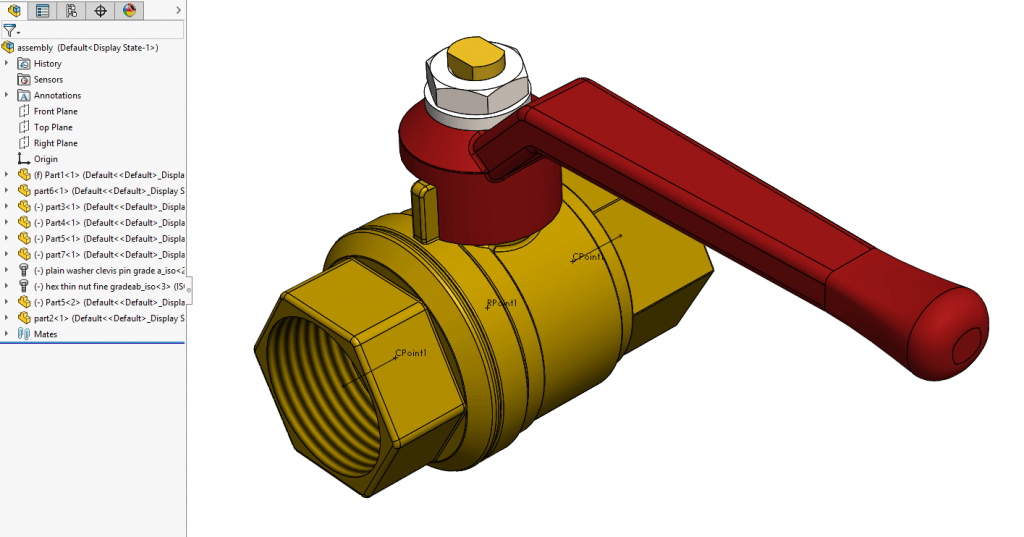
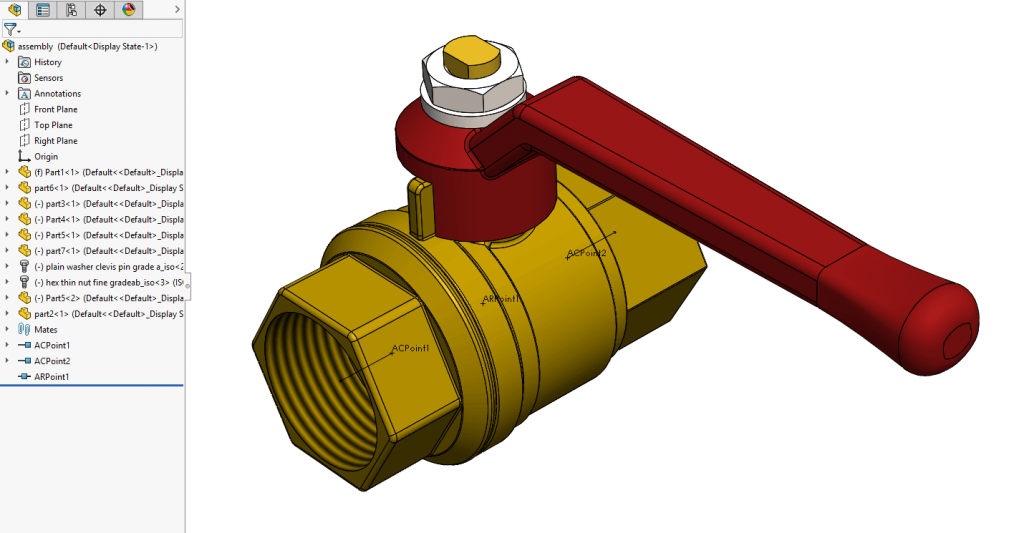
Now we have an assembly comprising of parts that include the C and RPoints:
We can locate the assembly specific points, along with other items similar to those created in the part file used in part 1.
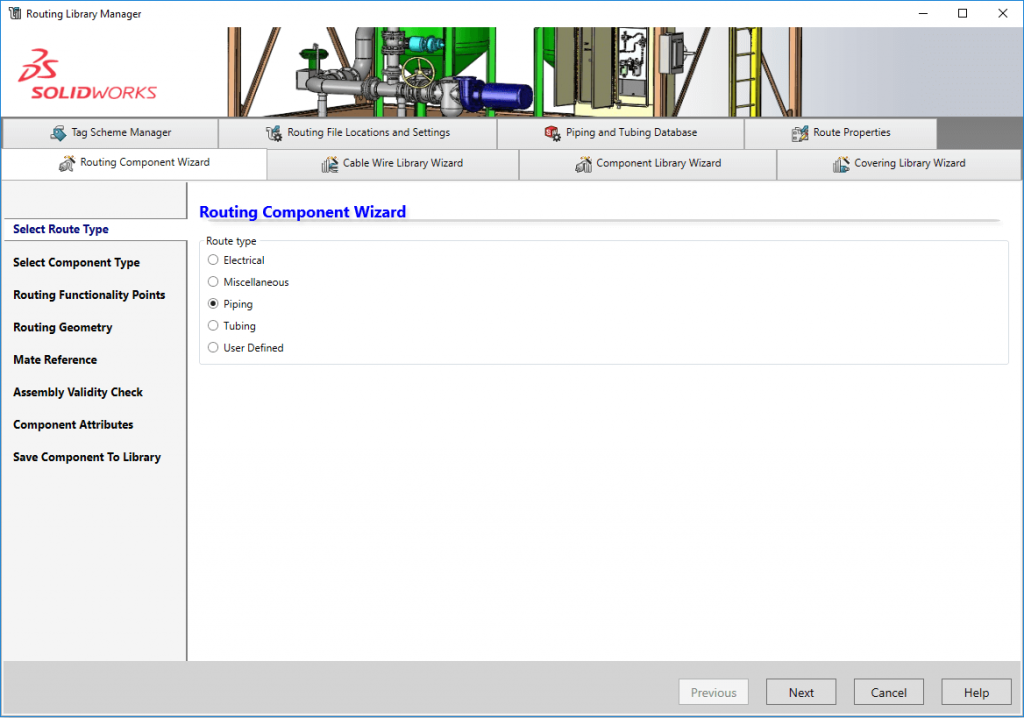
First fire up the Routing Library Manager and select Routing Components Wizard (Tools > Routing Tools > Routing Library Manager).
Select Route Type – the same methodology as the part file (see part 1 if you missed it):
Select Component Type – This one differs; select ‘Assembly Fittings’ and then the component type that best suits from the pull-down menu.
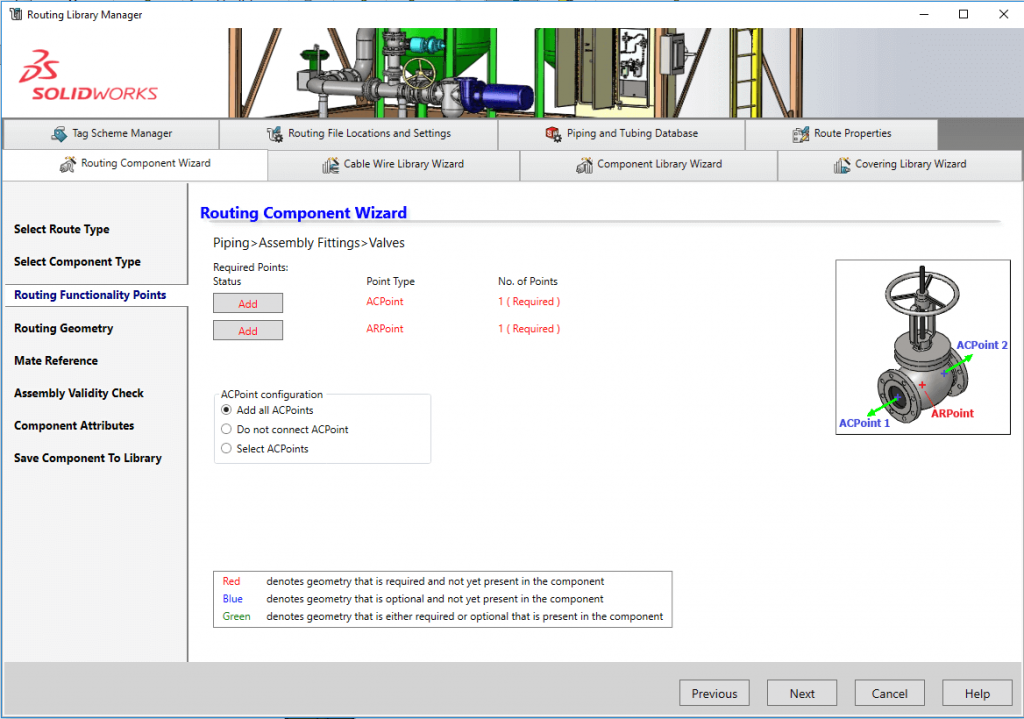
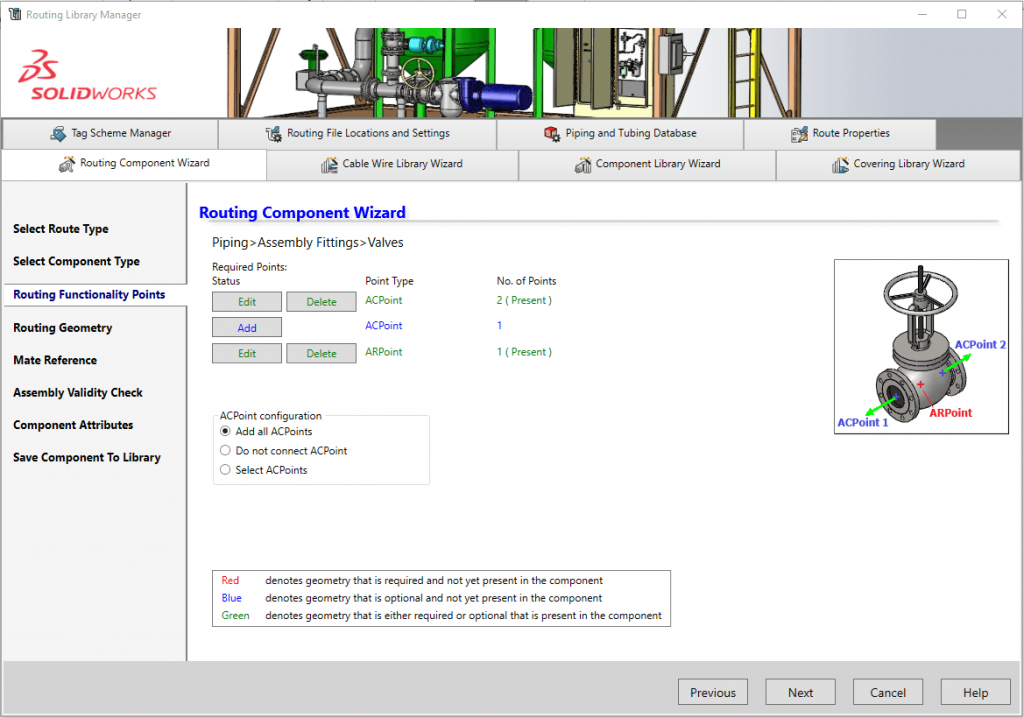
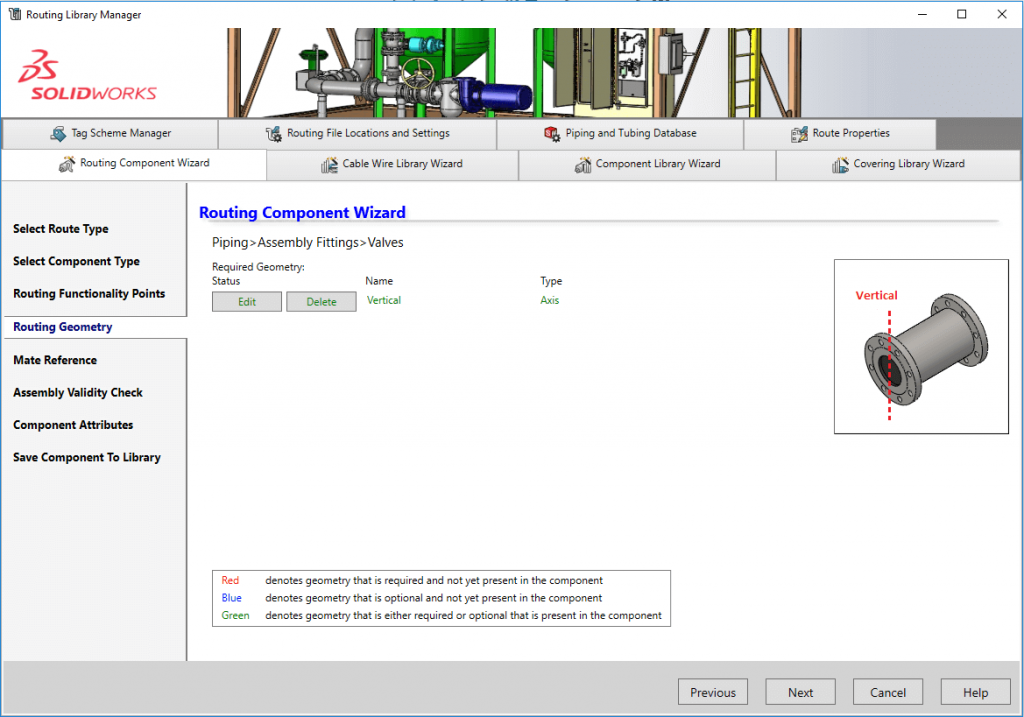
Route Functionality Points – The same but different in so far as the same elements are required but the method of placing then differs; we place the AC and ARPoints on the pre-placed C and RPoints:
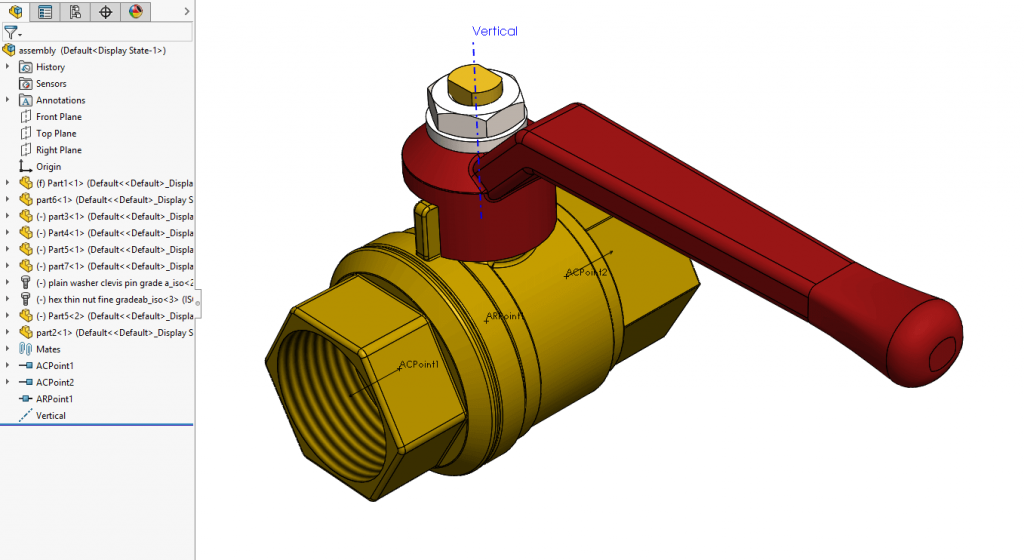
Routing Geometry – Almost no difference from the part file; create a new axis or select an existing one. If you choose an existing axis, please note it needs to be located at the assembly level, rather than at part level:
Mate Reference – This allows you to add mates to the assembly to aid positioning it within the route:
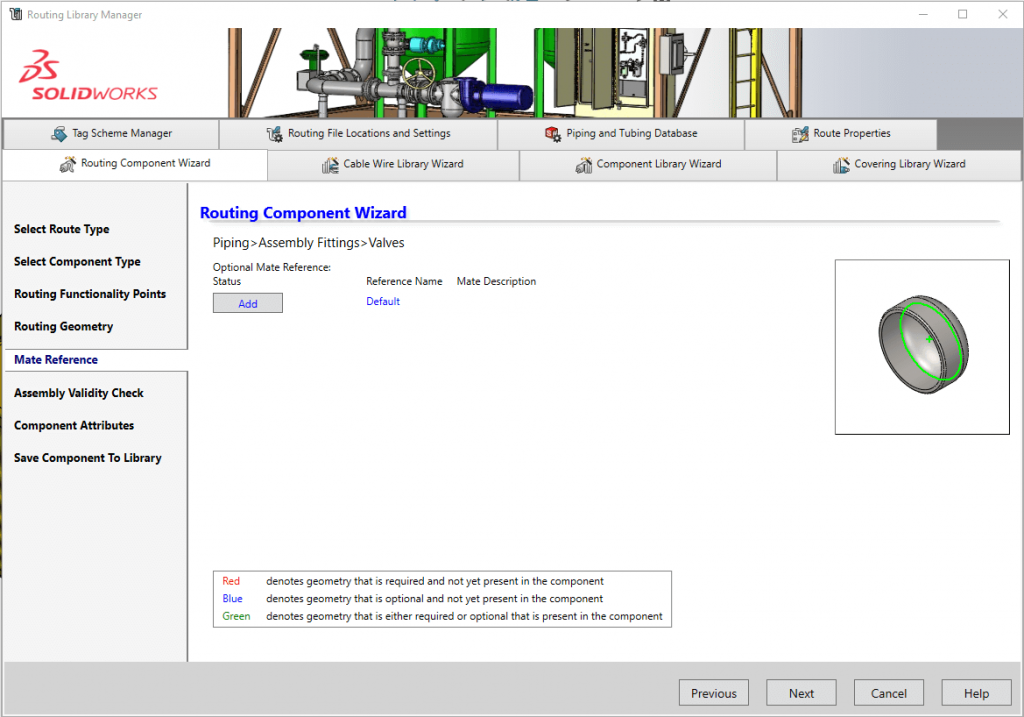
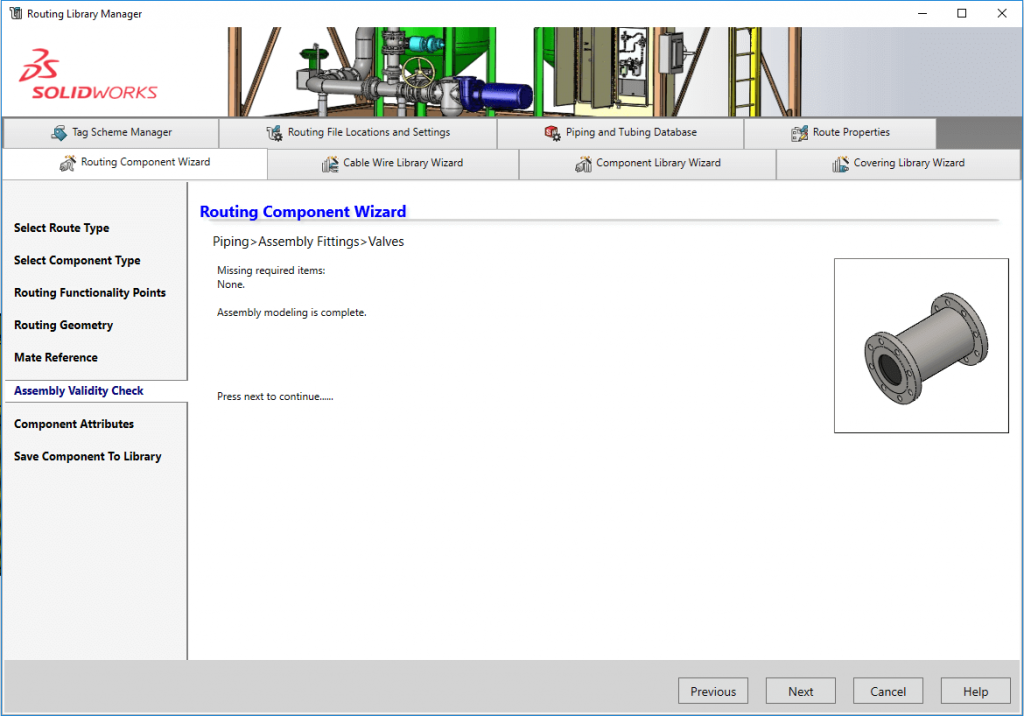
As we’ve chosen to use an in line ball valve similar to that used in part 1 it isn’t necessary – the axis can be used to control the rotation. However if it was a floor standing pump, for example, you could apply a coincident to the feet/base plate to allow mating it to the floor Assembly Validity Check – As the part validity check only for the assembly:
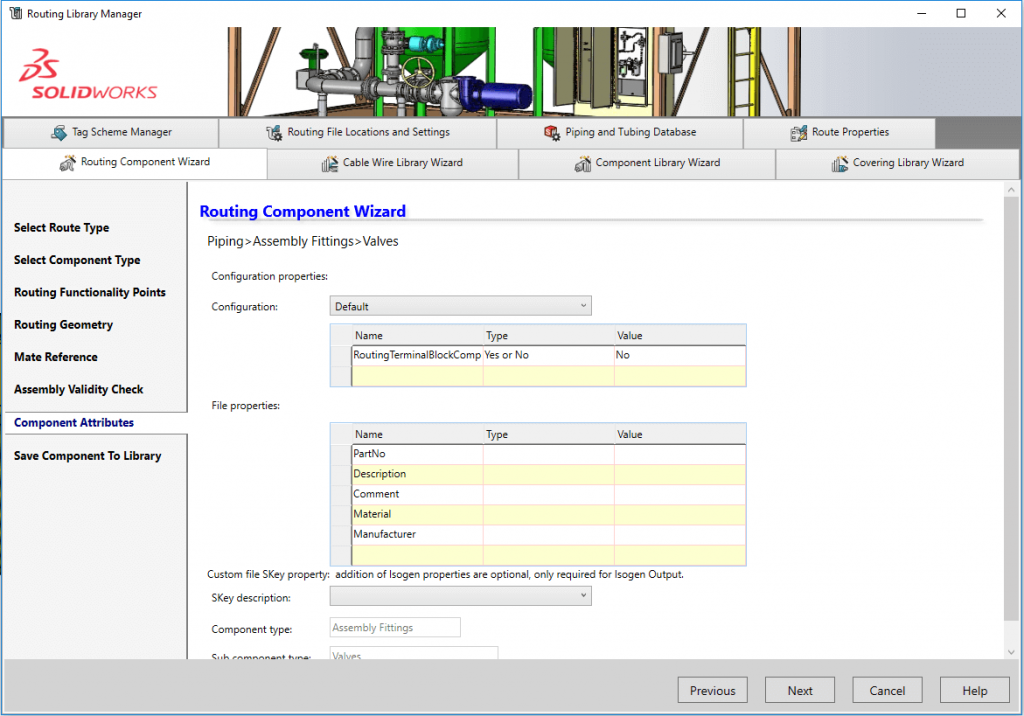
Component Attributes – As the part file: assembly specific, file specific and SKey properties (an SKey is value given to a component if it intended to export routing data as a PCF file to be used in third party piping applications):
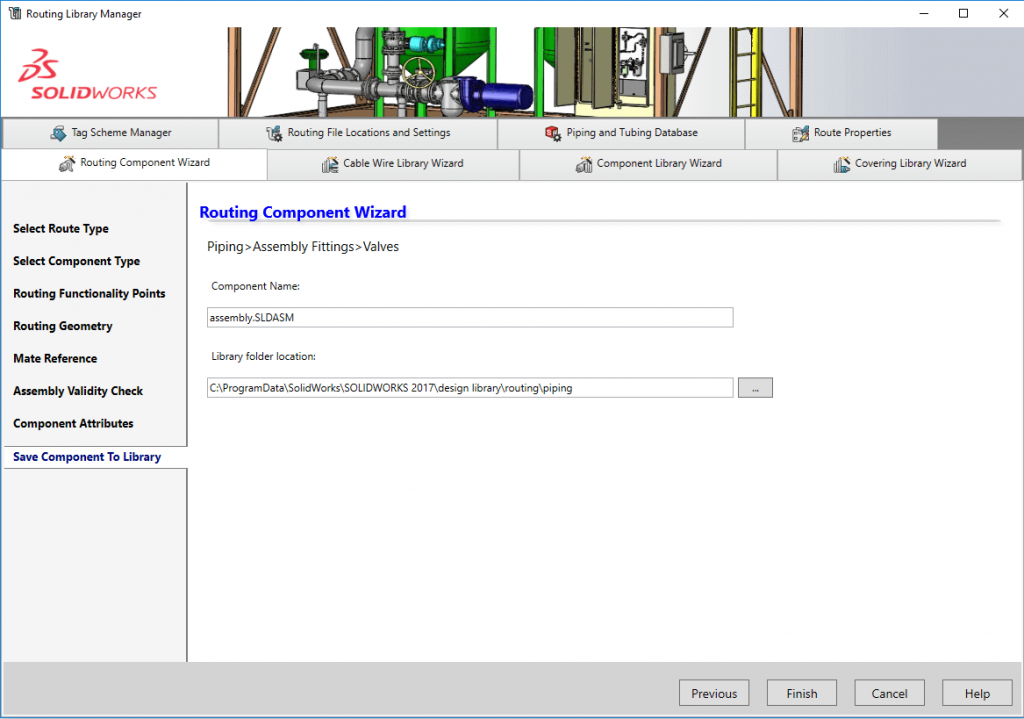
Save Component To Library – Again the same as the part file: confirm the name and the location and select Finish. Again, if you want to use this assembly repeatedly, simply add it to the library, or select ‘no’ in the final step:
You’ve successfully added a handy item for use in your design. Congratulations!
Have you seen our blog archive where we have posted plenty of helpful articles? We also have a fantastic video library filled with easy-to-follow videos on a number of topics inspired by other SOLIDWORKS users – take a look. Also, don’t forget to follow Innova Systems on twitter for daily bite size SOLIDWORKS tips, tricks and videos.


