

Picture the scene: Every morning at 10am, you click your mouse button 30 times, type a part name into your keyboard 5 times, click your left mouse button 10 times and the right button 5 times. That’s going to take you a long time, right? Not only that, it’s the same thing every day – that’s going to get old very fast! That’s where the SOLIDWORKS Macro button comes in. You see ‘Macro‘ is short for “Macroinstruction” – a programmable pattern which translates a sequence of inputs into a user-configured sequence of outputs, saving you time and frustration. With that out of the way, let’s look at how and where you can source one.
Where to get a Macro for SOLIDWORKS
There are several great resources for obtaining or creating a SOLIDWORKS Macro. If you’ve never written a Macro Innova Systems offer a training course, which can also be taken online via your My.SolidWorks account. If you want to dive in or are already competent then there are, of course, the very friendly SOLIDWORKS user forums, where other users can assist and 3D ContentCentral, which has an area for downloading Macros shared by other SOLIDWORKS users. If that sounds like too much hassle, you’ll be pleased to know that Innova Systems can provide consultancy services for Macro writing. Give us a call on 01223 200690 if you’d like to discuss this with our team.
How to add the Macro to a button in SOLIDWORKS
Once you have a Macro, adding a button to the interface to make it easier to run is simple:
Open any file (this process is only possible when a file is open)
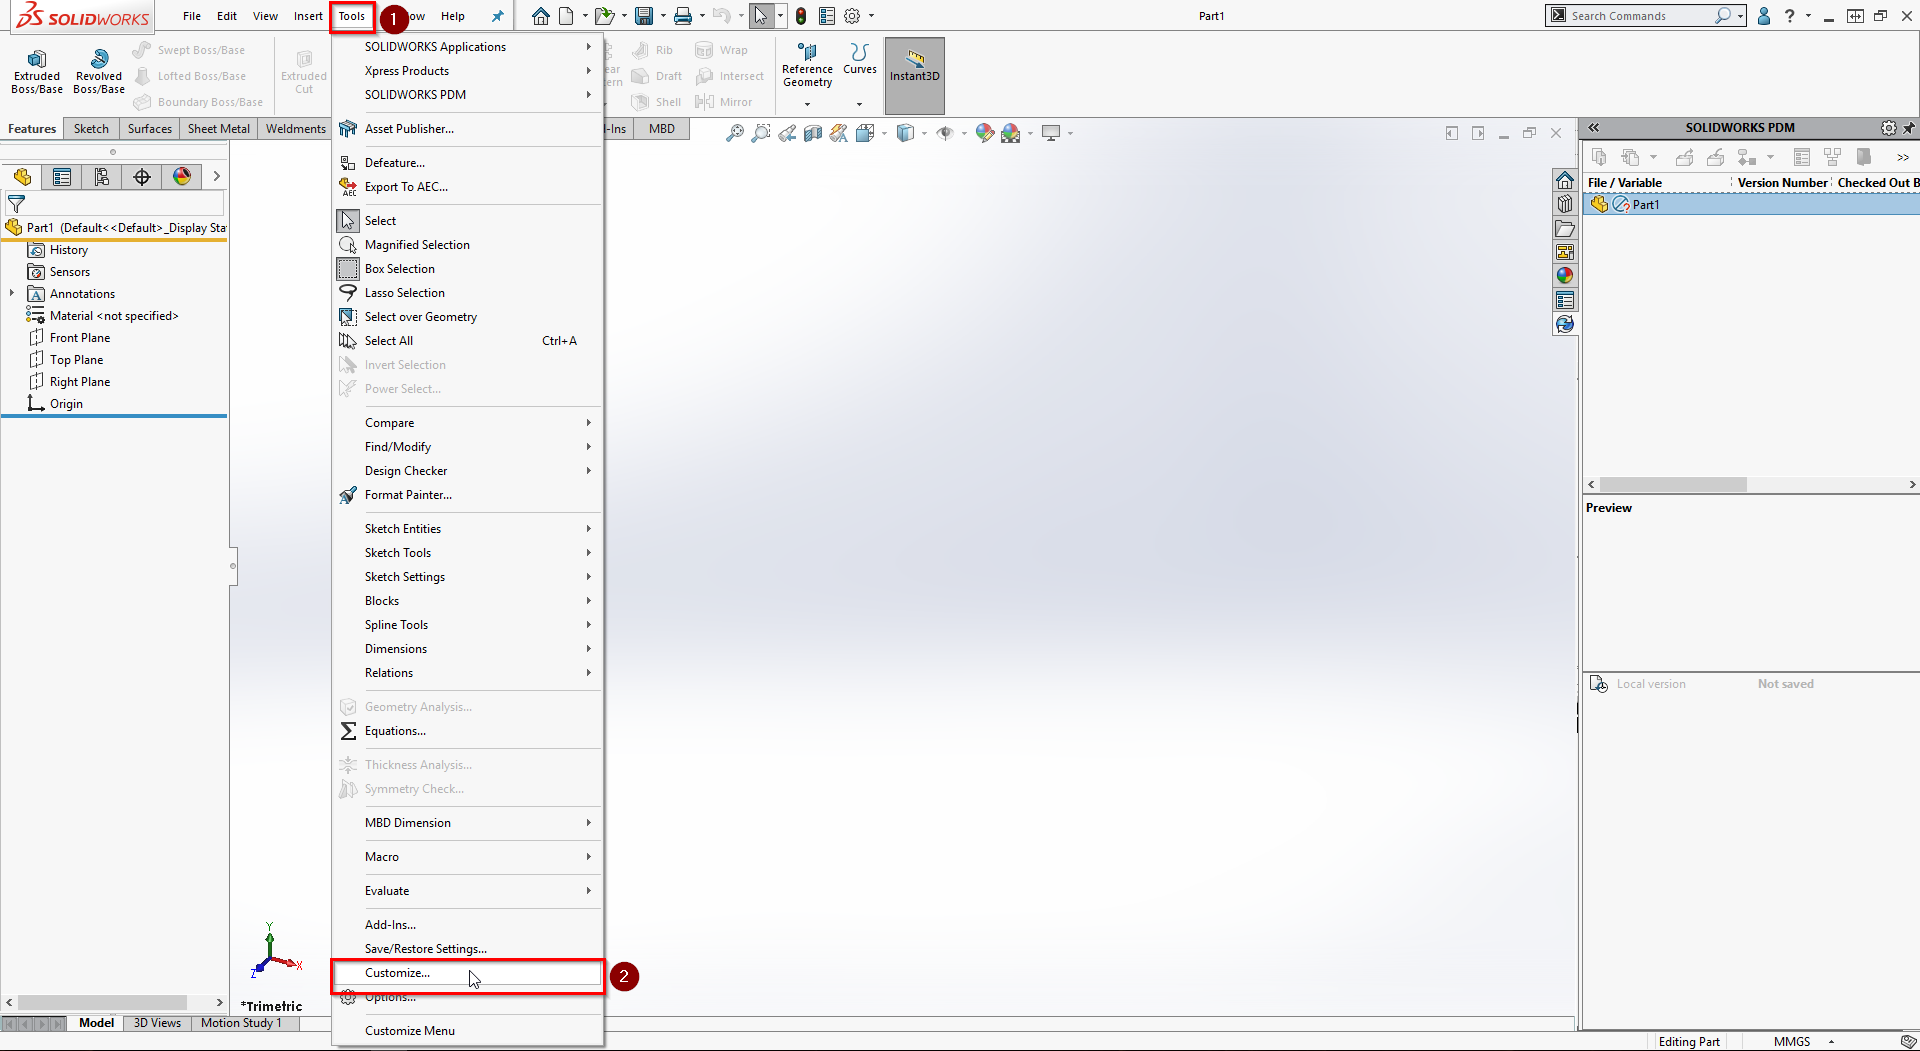
Go to Tools > Customize
Select the Commands tab on the Customize window, and then select Macros from the Categories list.
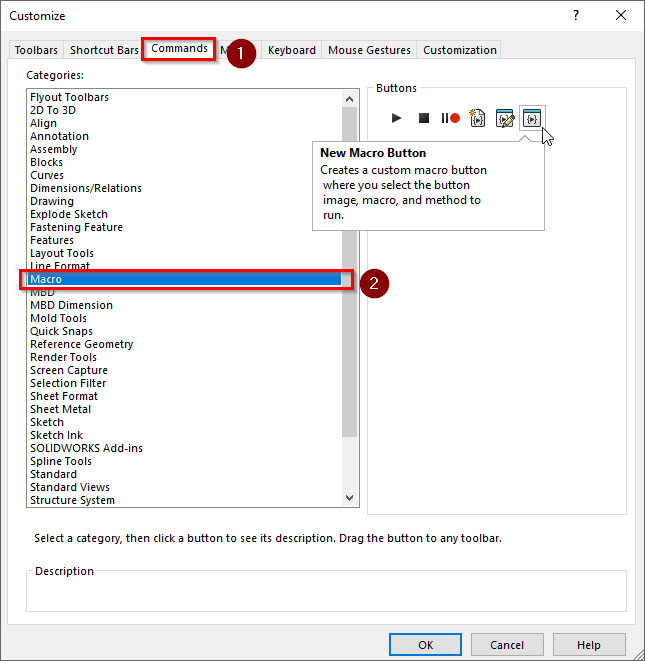
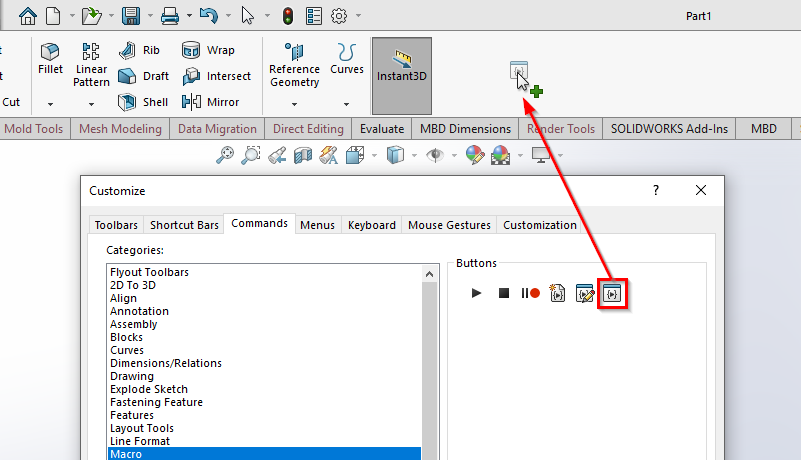
Drag and drop the ‘New Macro Button’ on to any toolbar.
The Customize Macro button box will appear.
Click on the browse button (…) and locate the Macro (SaveDXF v6.swp in this example) wherever it was saved. Select it and click ‘Open’.
![]()
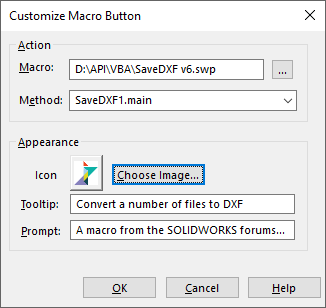
To change the icon, click on the ‘Choose Image’ button and select a bitmap image (either one that came with the Macro or one of your own). You can change the tool tip text and the prompt to something more useful. Click OK to finish and click OK to close the Customize window.
If you ever wish to edit the set-up of the button you need to return to the Customize screen (Tools > Customize) and then right click the Macro button and select “Properties”.
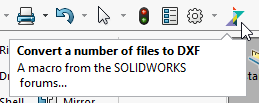
When hovering over the Macro button you will then be shown the tooltip (in bold) and the prompt.
Finally – Simply run the Macro to make sure it’s working. Time to start saving yourself some time on those irritating and repetitive daily tasks.
Before you go…
Speaking of daily tasks, have you seen myCADtools for SOLIDWORKS? It’s available for just £200 from Innova Systems and it provides you with 5o handy tools to save you time. money and boost your SOLIDWORKS productivity. Take a look at our myCADtools page now to find out more.
We hope you found that useful!
Have you seen our blog archive where we have posted plenty of helpful articles? We also have a fantastic video library filled with easy-to-follow videos on a number of topics inspired by other SOLIDWORKS users – take a look.
Also, don’t forget to follow us on twitter for daily bite size SOLIDWORKS tips, tricks and videos.


