
First introduced in SOLIDWORKS 2015, Treehouse is a powerful tool for building and managing assembly structures and is included with every license of SOLIDWORKS 3D CAD. Despite this, it remains relatively unknown to many users. Read on to find out what Treehouse can do for you and why you should be using it…
What can SOLIDWORKS Treehouse do?
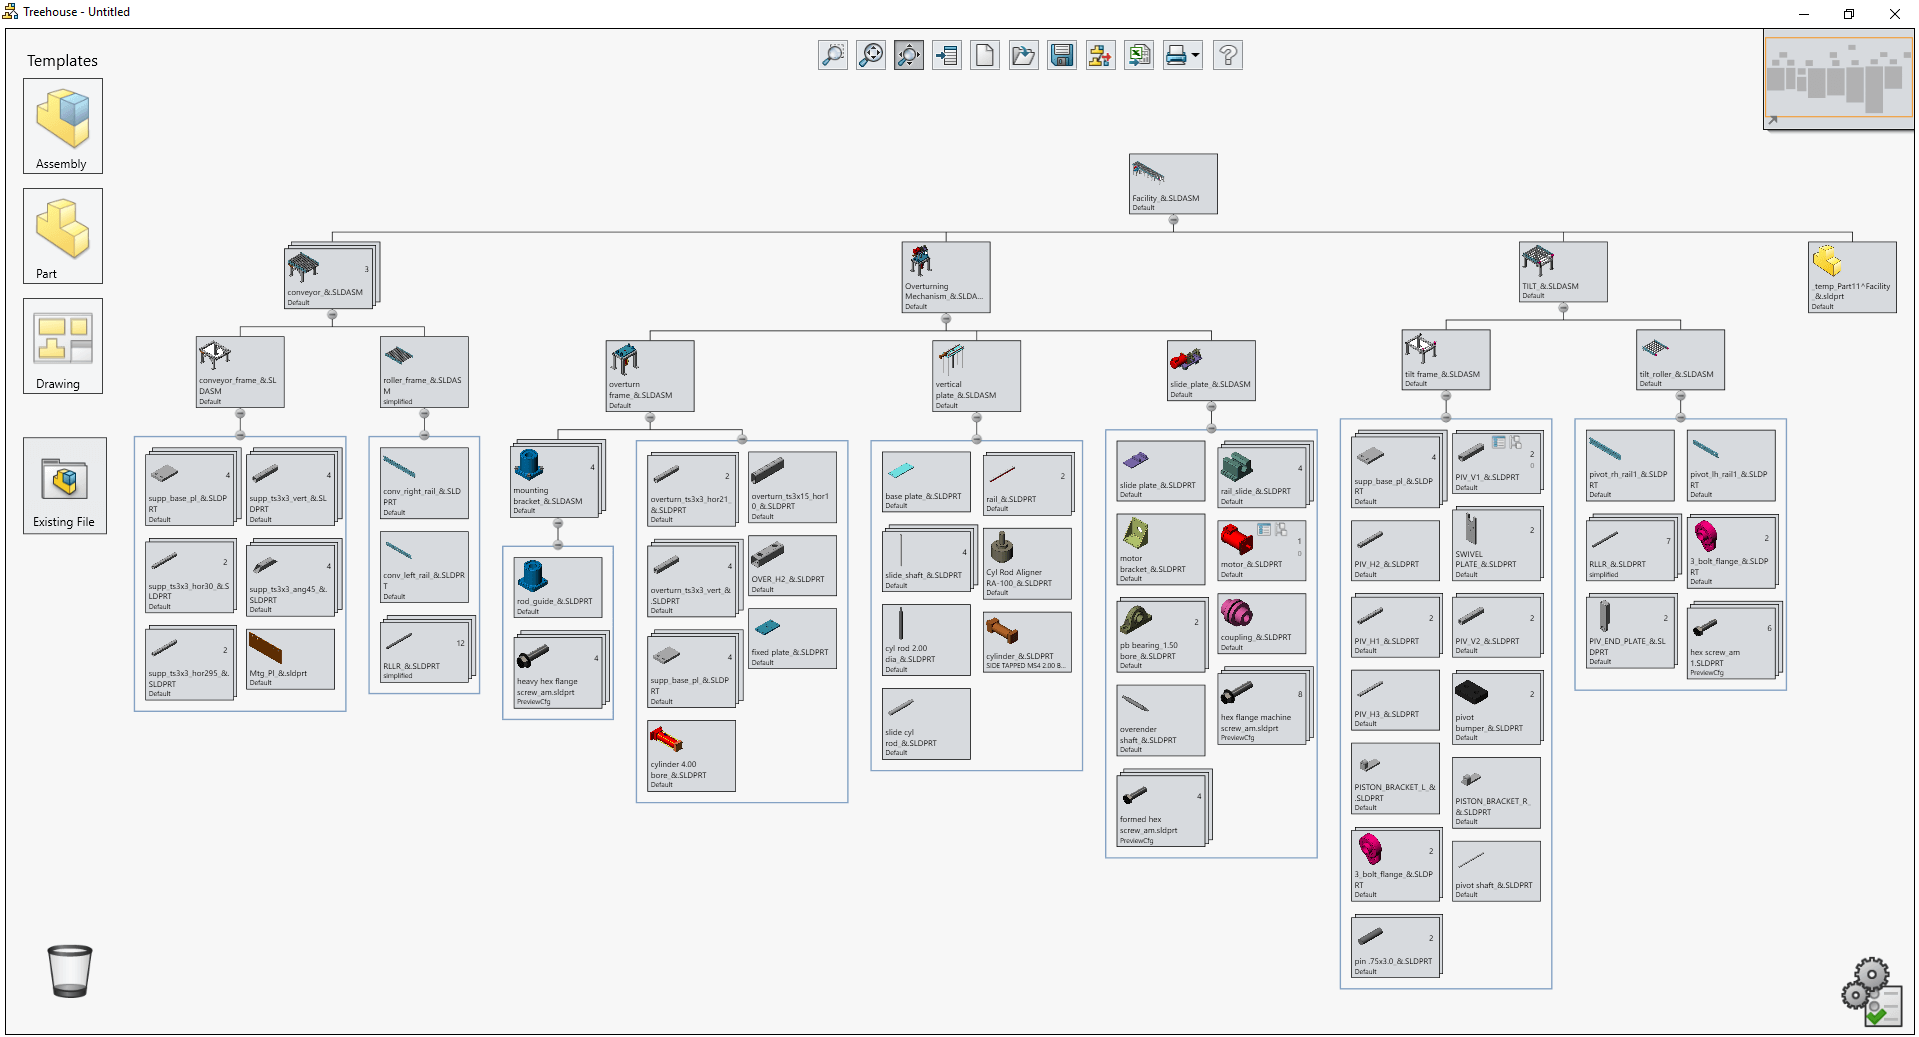
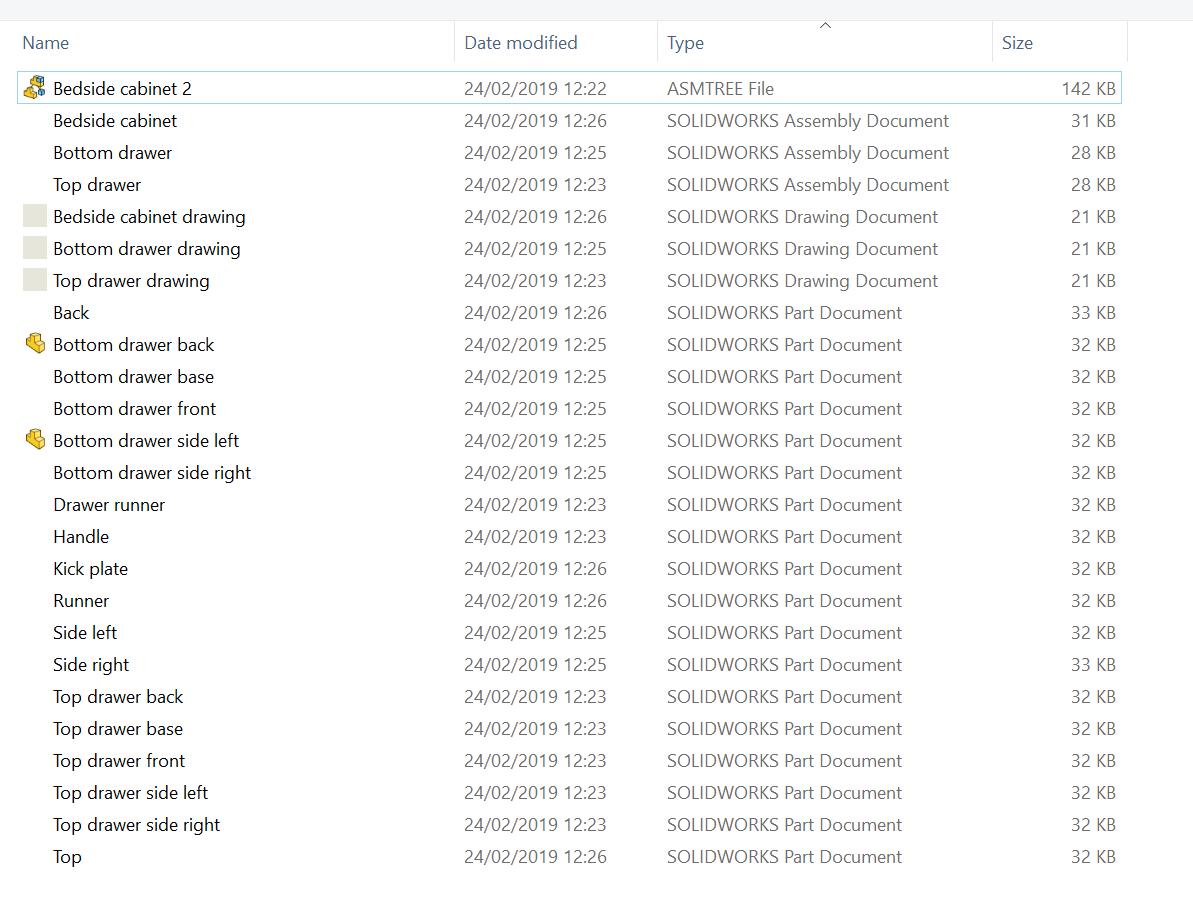
You can use Treehouse to create an assembly structure from scratch, or as a way of managing existing assembly structures. The picture shown below is of an existing assembly, imported into Treehouse for management purposes.
Adding templates
Let’s cover the basic setup of adding templates into Treehouse, the creation of a new assembly hierarchy and also how to open and edit the structure of existing assemblies.
There are two ways to open SOLIDWORKS Treehouse as follows:
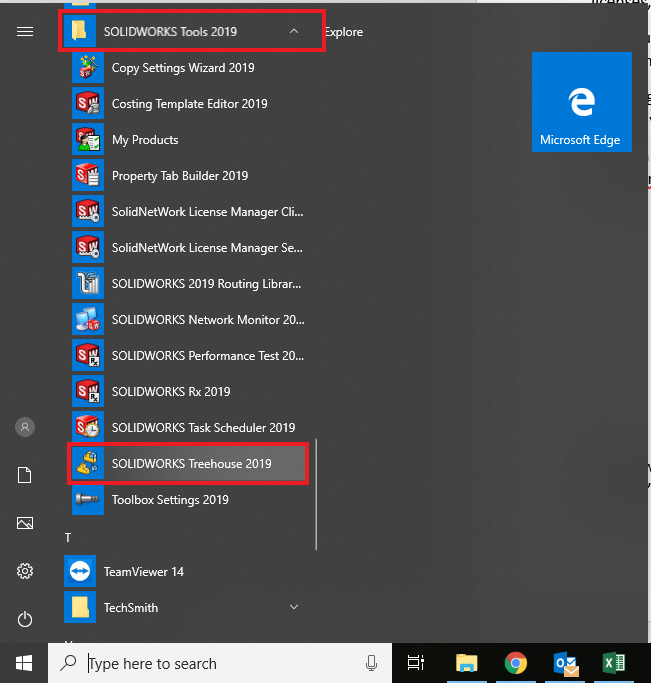
- Using Windows 10, click the start menu, then find, expand and select ‘SOLIDWORKS Tools 20XX’
- Alternatively, use the search bar to find ‘SOLIDWORKS Treehouse 20XX’ and go from there
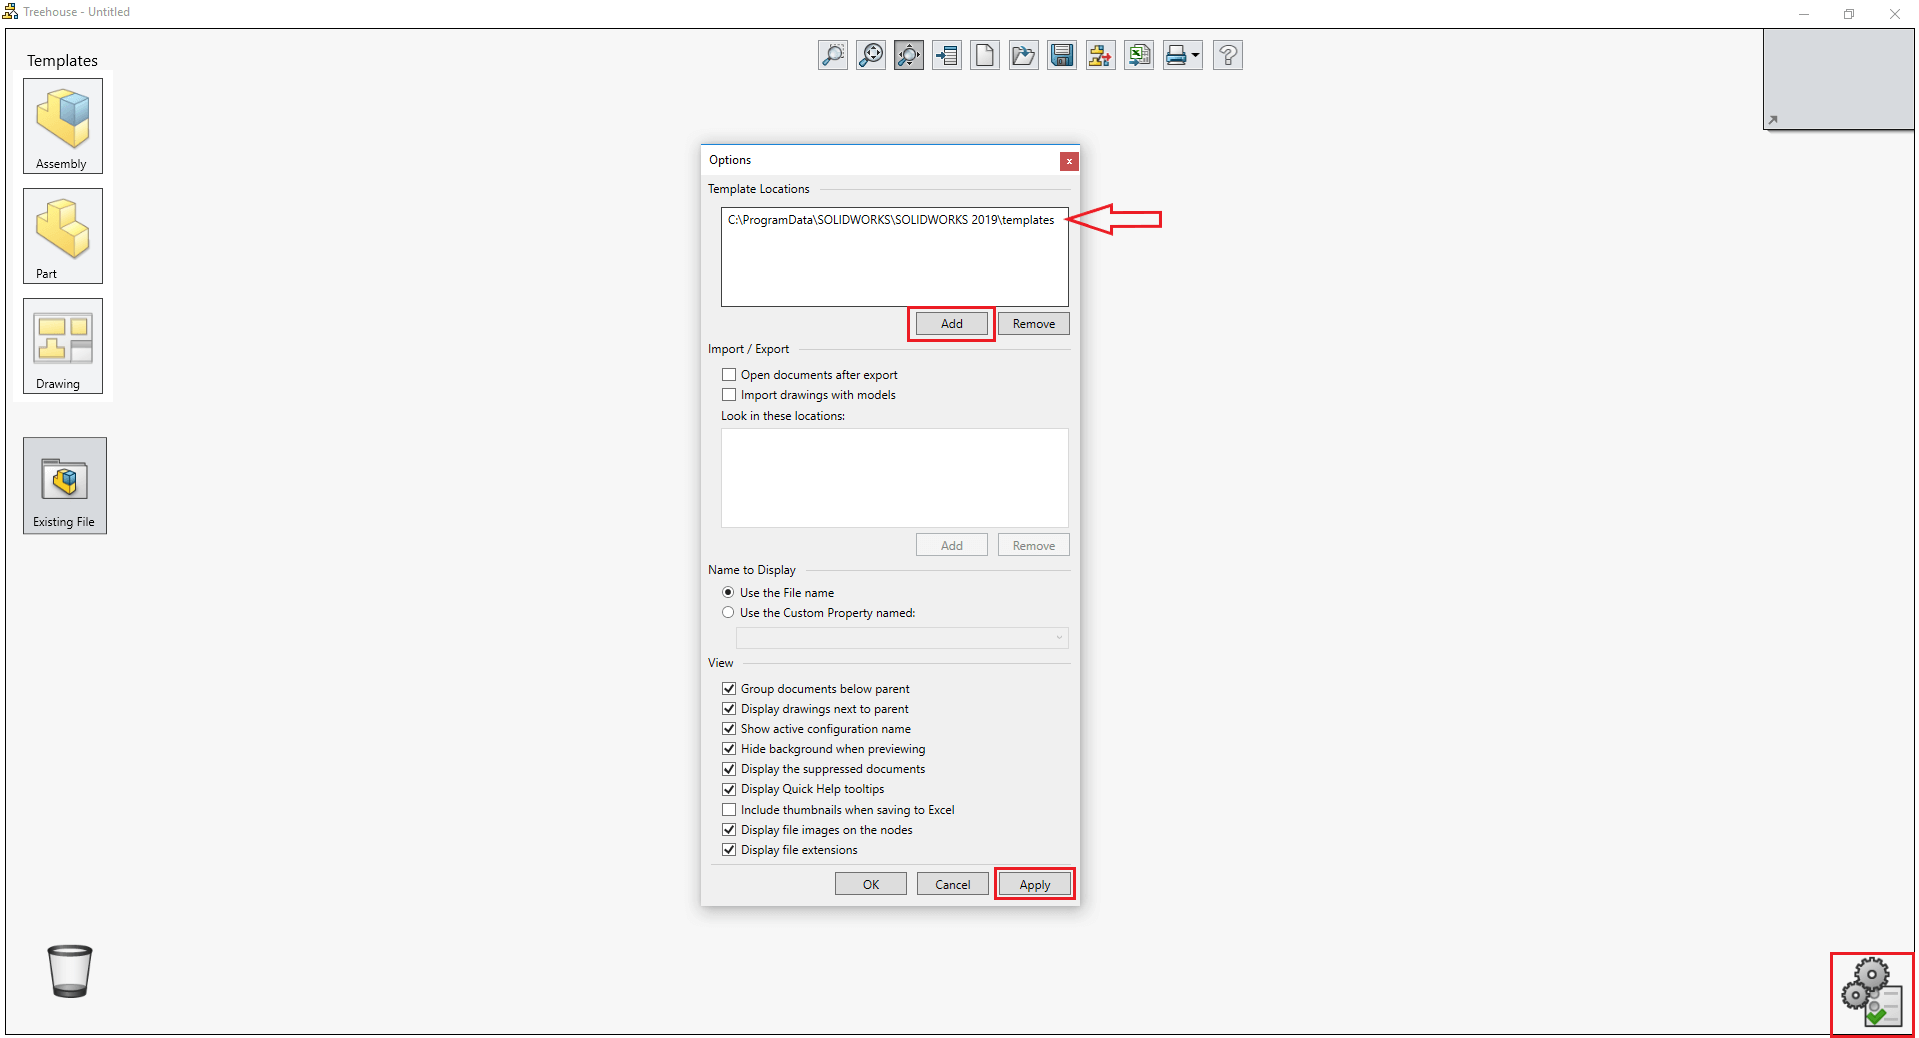
With Treehouse open, you can start to add in your SOLIDWORKS Templates. To do this, click on the Icon in the bottom right corner of the screen (see below) to call up an options window. Under ‘Template Locations’, select ‘Add’ and browse to where your SOLIDWORKS Templates are located. The default location for these is C:\ProgramData\SOLIDWORKS\SOLIDWORKS 20XX\templates – they may be in a different location if you have custom templates.
Your templates can be accessed on the left hand side of the screen as per the below image.
Creating a new assembly structure in Treehouse
You can use your SOLIDWORKS templates to build your assembly structure. Treehouse uses a drag and drop method, so click and drag an assembly template into the blank space to create the top level assembly file…
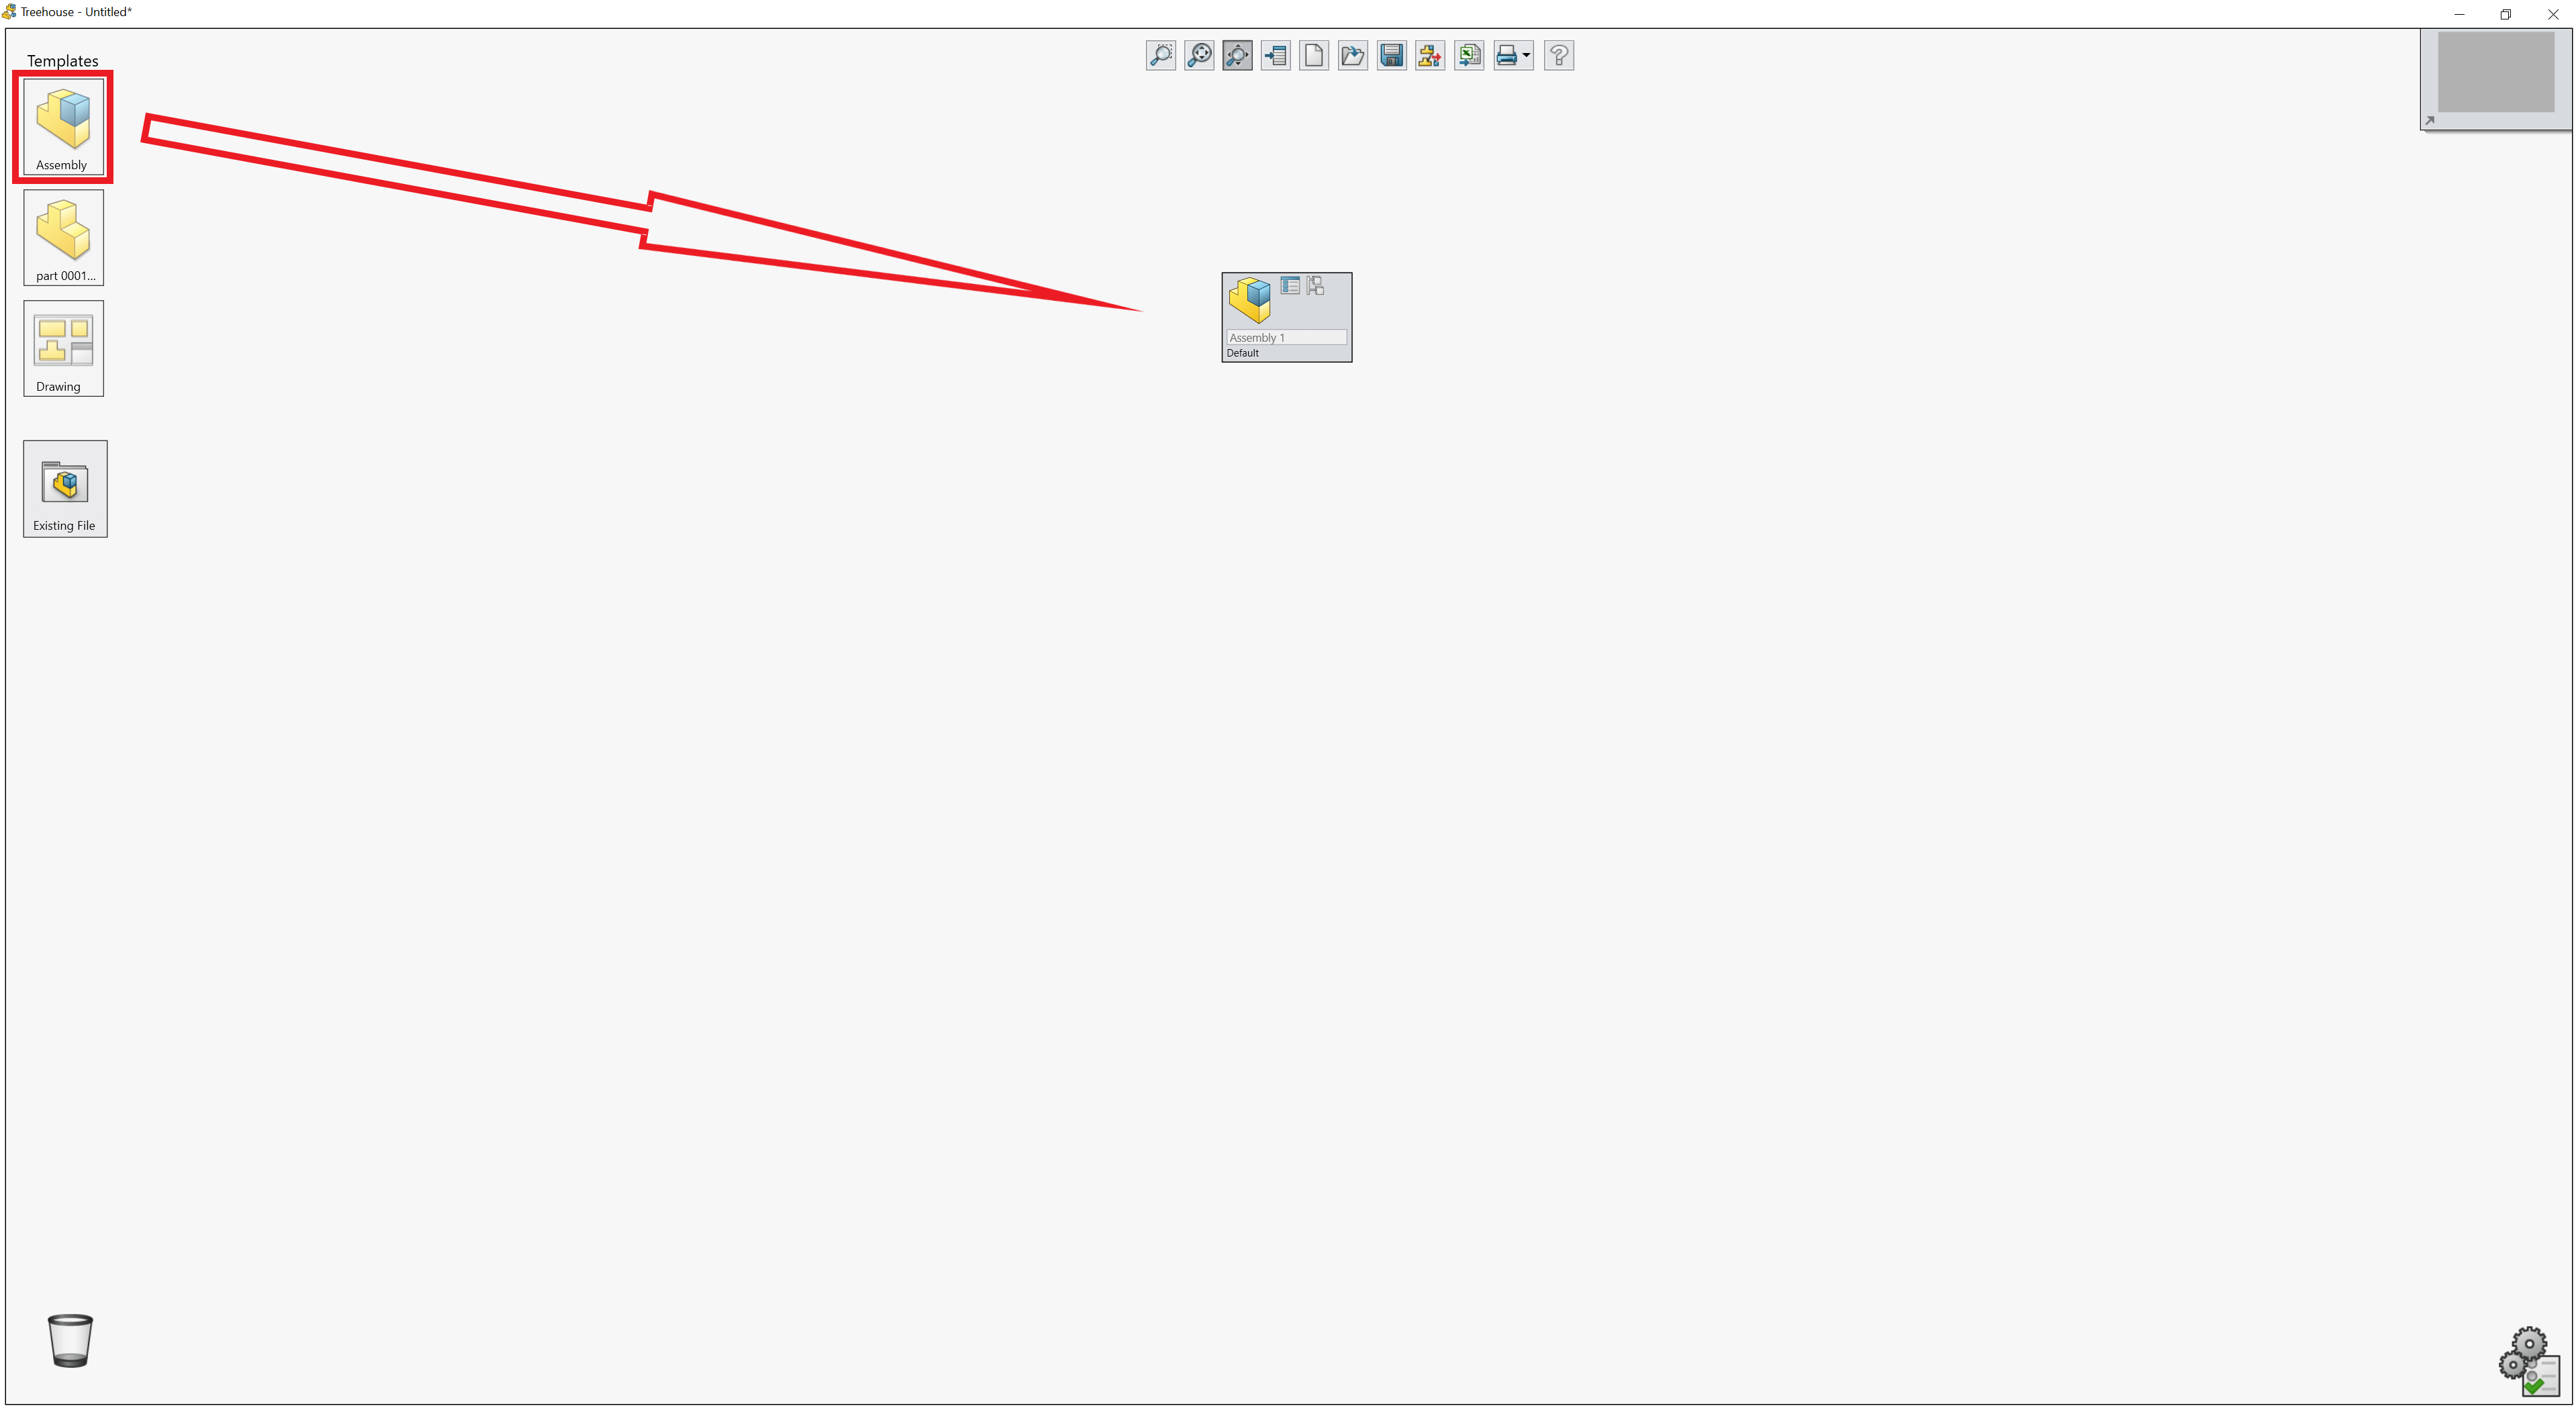
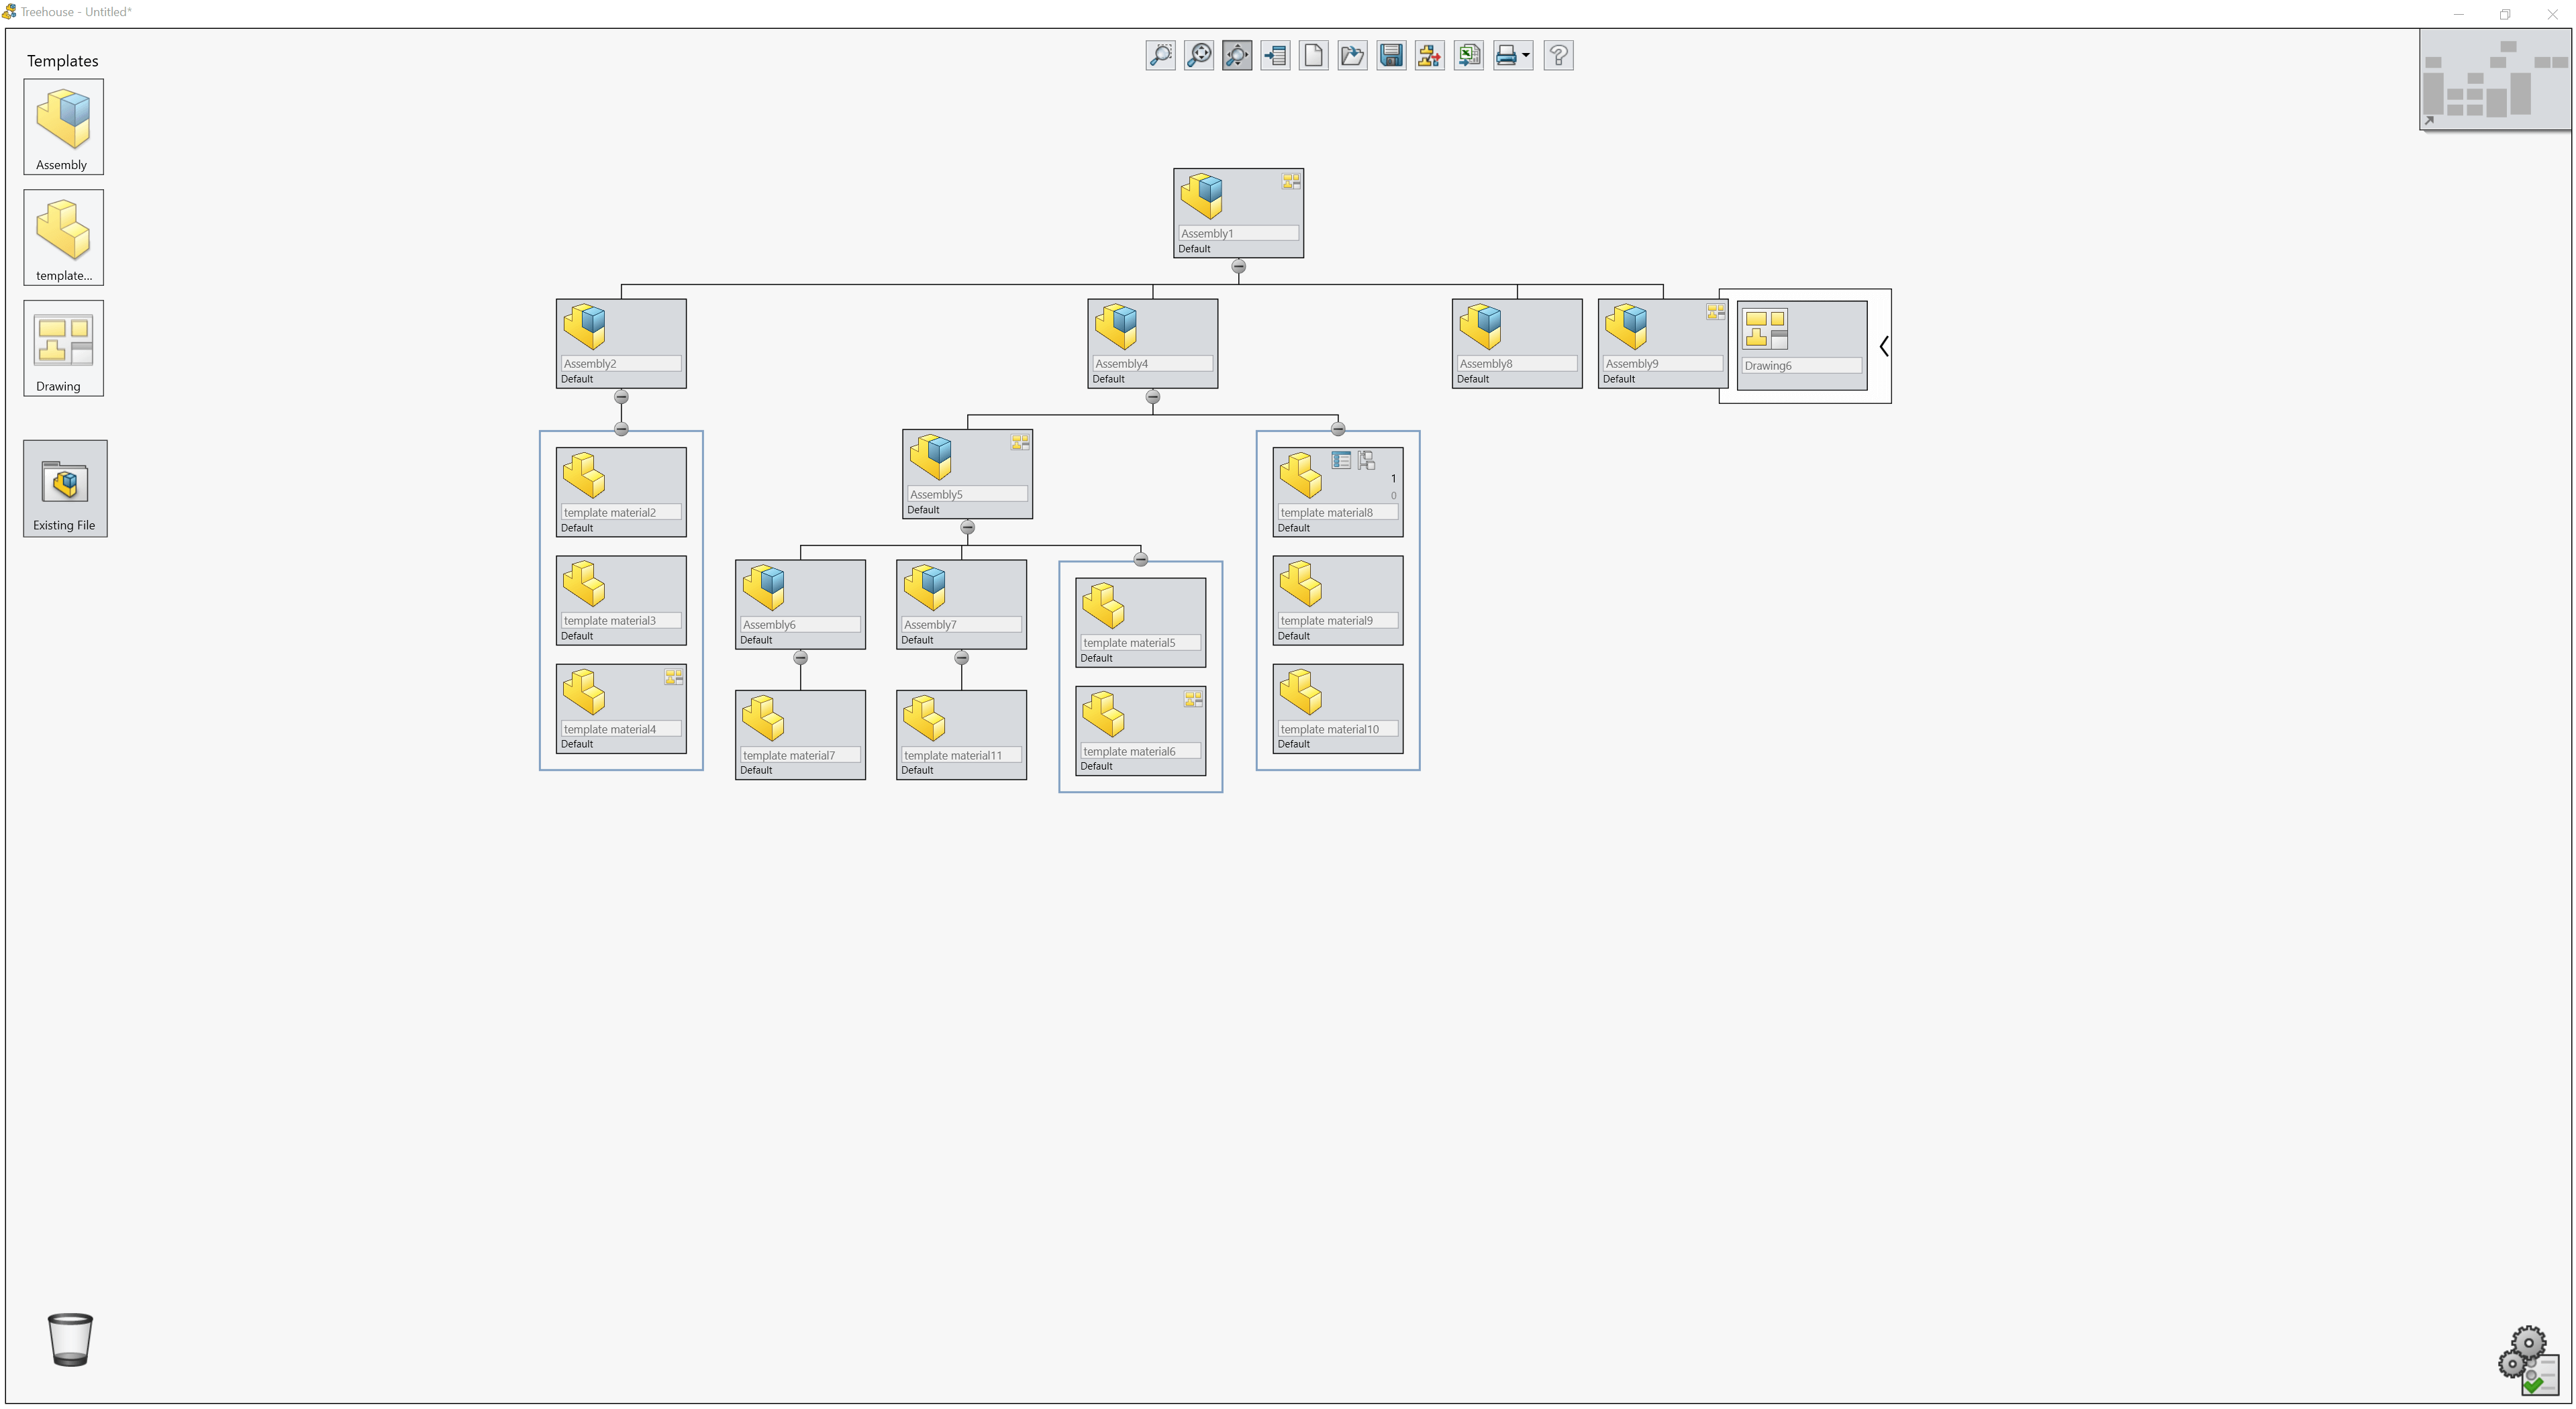
…you can then start to build up your structure by dragging and dropping assembly, part and drawing templates onto existing tiles in the tree. This will make the newly dropped tiles branch off from where they have been dropped onto. You can now start to build up your assembly structure as seen below.
Editing document properties in Treehouse
Assembly structure includes templates that have specific document properties assigned to them (e.g. Custom and Configuration-specific).
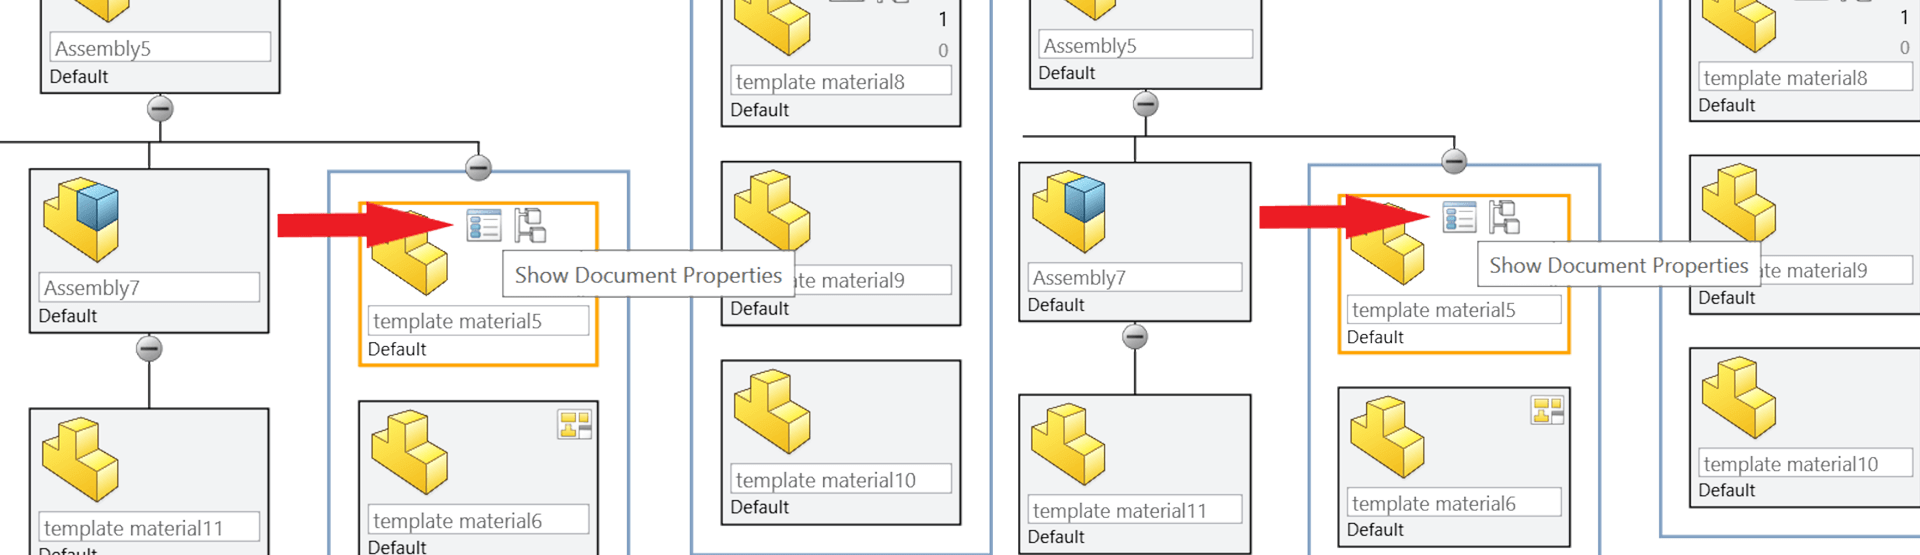
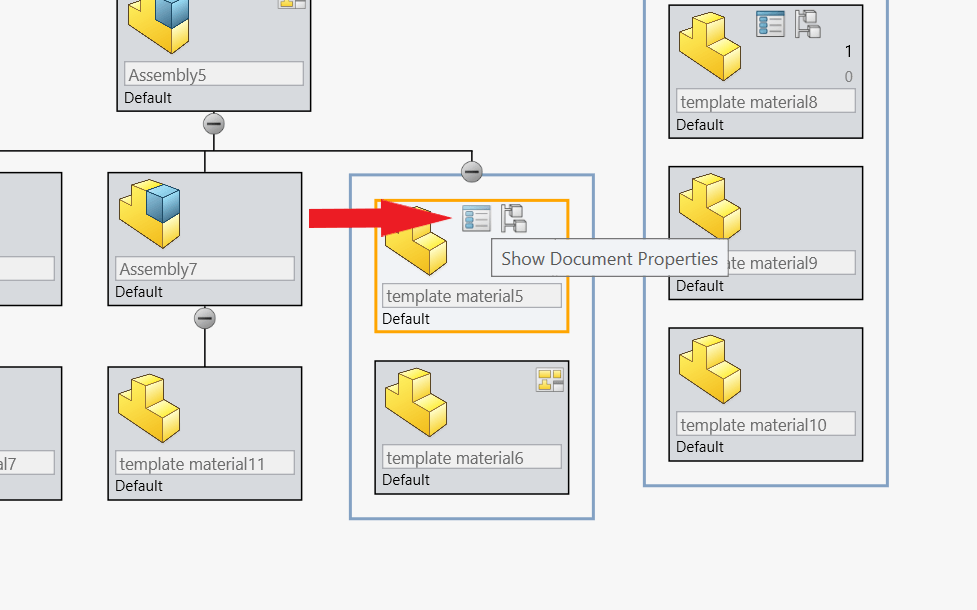
New to SOLIDWORKS 2019 is the ability to edit and add additional Custom and Configuration-specific properties. The document properties can also be viewed and edited by clicking on the ‘Show Document Properties’ icon on each tile (see below).
By clicking on the ‘Configurations’ icon, you can control configurations for each Assembly and Part file.
You can also make changes to the file name and document summary information such as the Author, Title and any comments in the document properties window. One of the most important fields is ‘File Location’. Make sure you’ve filled this in because SOLIDWORKS needs to know where to save each file when you export the Treehouse structure!

One of the best ways to build up an assembly structure is to use the Ctrl+Drag+Drop method, by Ctrl selecting an already existing tile and dragging and dropping it. This creates a copy including all properties and information that are applied to it.
Using existing files in Treehouse
You can drag existing files into Treehouse from File Explorer, this is very useful for reusing existing assemblies, parts or drawings. To do this, simply click on the ‘Existing File’ icon on the left-hand side and drag in the required file.
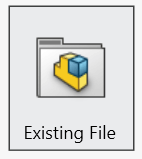
‘Existing File’ can also be used to manage and maintain existing assemblies. To do this, simply drag the top-level assembly into a new Treehouse document.
How to export from Treehouse to SOLIDWORKS documents
Once your assembly structure is complete, you can ‘Export to SOLIDWORKS Documents’. It will produce the required assembly, part and drawing files and save them in their desired location. You’ll find the ‘Export to SOLIDWORKS Documents’ icon on the top toolbar in Treehouse.

You can now see every SOLIDWORKS file that you’ve created in the file location(s) that you’ve specified.
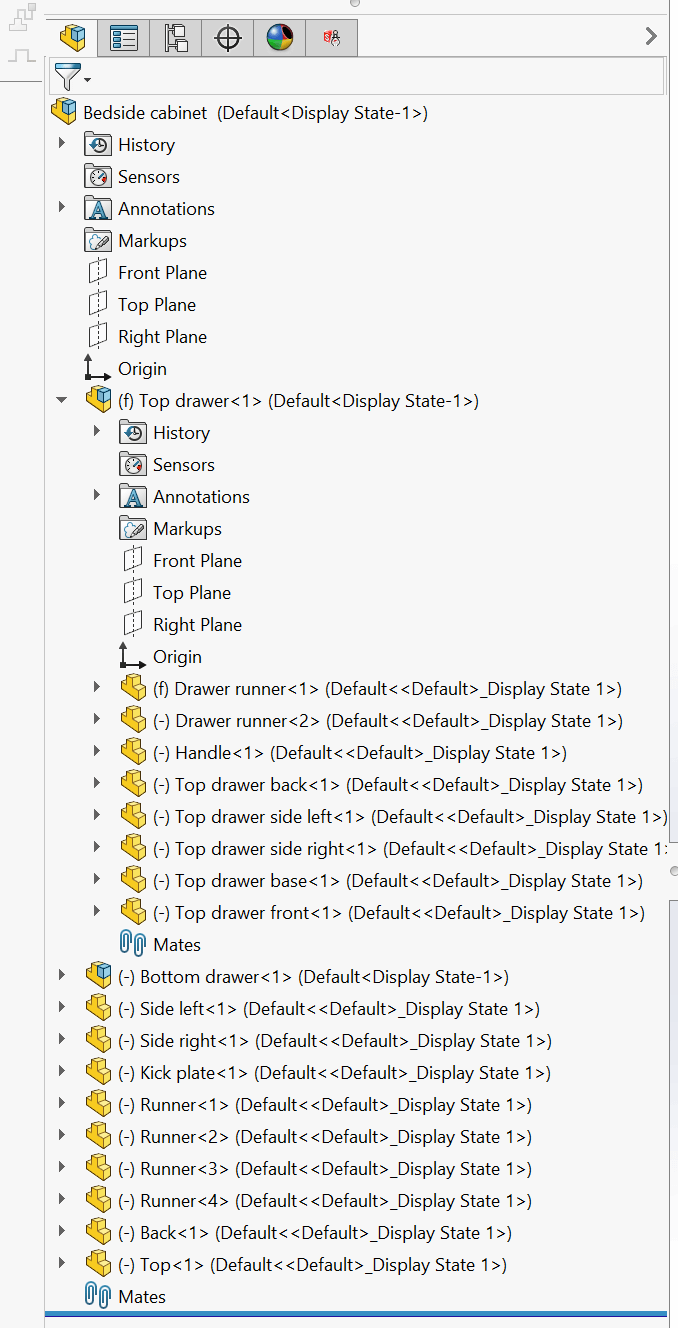
If you open the top-level assembly file, you’ll see in the Feature Manager Tree all the subassemblies and parts contained within. There are no mates or geometry associated with these files, which is a good basis to begin developing components/assemblies.
We hope you enjoyed reading this SOLIDWORKS Treehouse Tutorial.
Have you seen our blog archive where we have posted plenty of helpful tutorials and news articles? We also have a fantastic video library filled with easy-to-follow videos on a number of topics inspired by other SOLIDWORKS users – take a look. Also, don’t forget to follow Innova Systems on Twitter for daily bite size SOLIDWORKS tips, tricks and videos.


