
In this Halloween Pumpkin SOLIDWORKS Tutorial, we’ll be demonstrating some of the tricks you can utilise to build complex and organic geometries, for those times when simply extruding blocks just doesn’t do the job. These methods will particularly help when reverse engineering geometries, or when trying to transition a 3D shape from your head to a part onscreen.
As an extra treat, we’ll be using our go-to rendering package, SOLIDWORKS Visualize to bring our pumpkin model to life.
In this article, we’ll be using:
- Sketch Picture
- Splines and Style Splines
- Lofted Surface
- Surface Knit
- 3D Sketching
- Projected Curves
- Autotrace
- SOLIDWORKS Visualize
Let’s get started with our Halloween Pumpkin SOLIDWORKS Tutorial…
Sketching from a picture
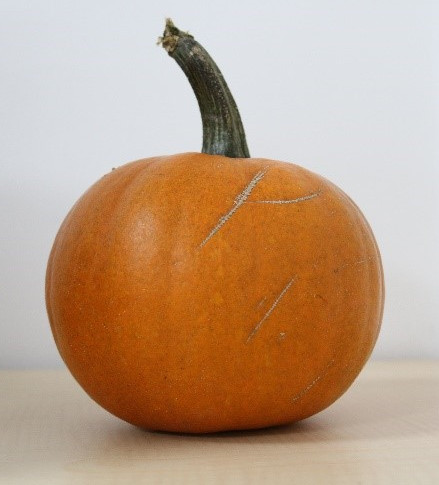
SOLIDWORKS Sketch Pictures are a versatile tool. You might use them to replicate concept sketches or 2D drawings. For this project, we’ve photographed our pumpkin from two angles and will trace its curvature to get us started.
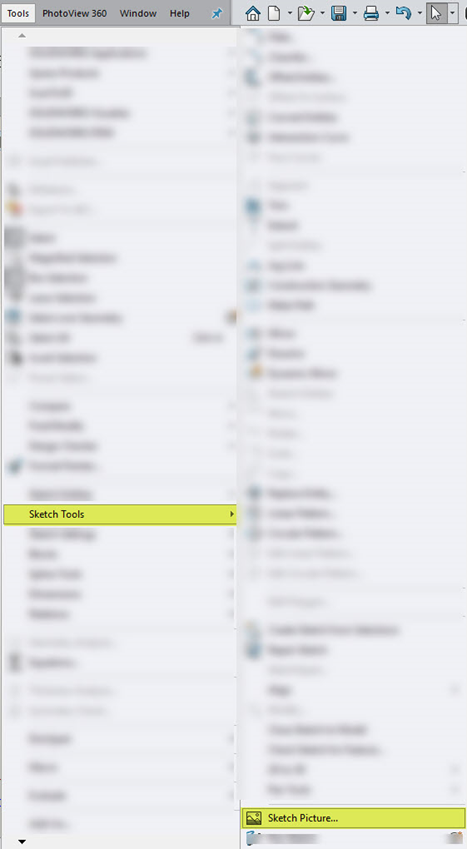
You’ll find the option to add a picture to your sketches under Tools > Sketch Tools > Sketch Picture
A few tips for using Sketch Pictures:
- Keep pictures in a separate sketch to your sketch geometry to keep things tidy and easy to edit.
- Compress and crop your images as much as you can before inserting. Importing images can be heavy on resources. We recommend compressing as far as is possible without losing the clarity of the geometry which you’re planning to use.
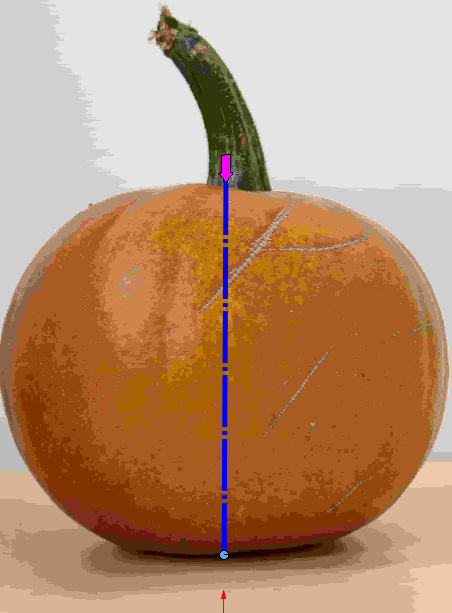
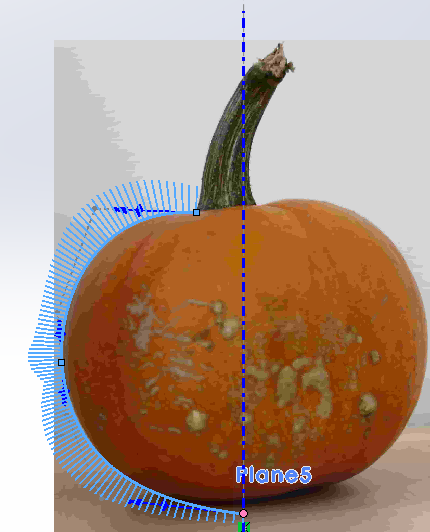
- You can use the blue Scale Tool (shown) by dragging the top and bottom handles so that you have a line between two significant points on our Sketch Picture. You’re then given the option to define a distance. Here, we’re using this feature to scale the height of the pumpkin in one of our images to the actual measured size.
B-Splines and Style Splines
Splines can seem hard to pin down when you first start working with them but are nothing to be afraid of. They’re a form of polynomial curve which we can use to define continuously changing curvature. Importantly for our purposes, they can be fitted closely to any curved shape with a little manipulation.
The standard splines in SOLIDWORKS are B-Splines. These are built of overlapping curves and have a large number of degrees of freedom. Style Splines, introduced in 2014, give us more restricted and better-behaved Bezier curves.
When modelling, we generally want to follow the desired shape, but with a nice, continuous curvature. Fluctuating curvature doesn’t necessarily stand out during modelling, but will affect the quality of the surface.
To avoid this:
- Use as few spline points as you can.
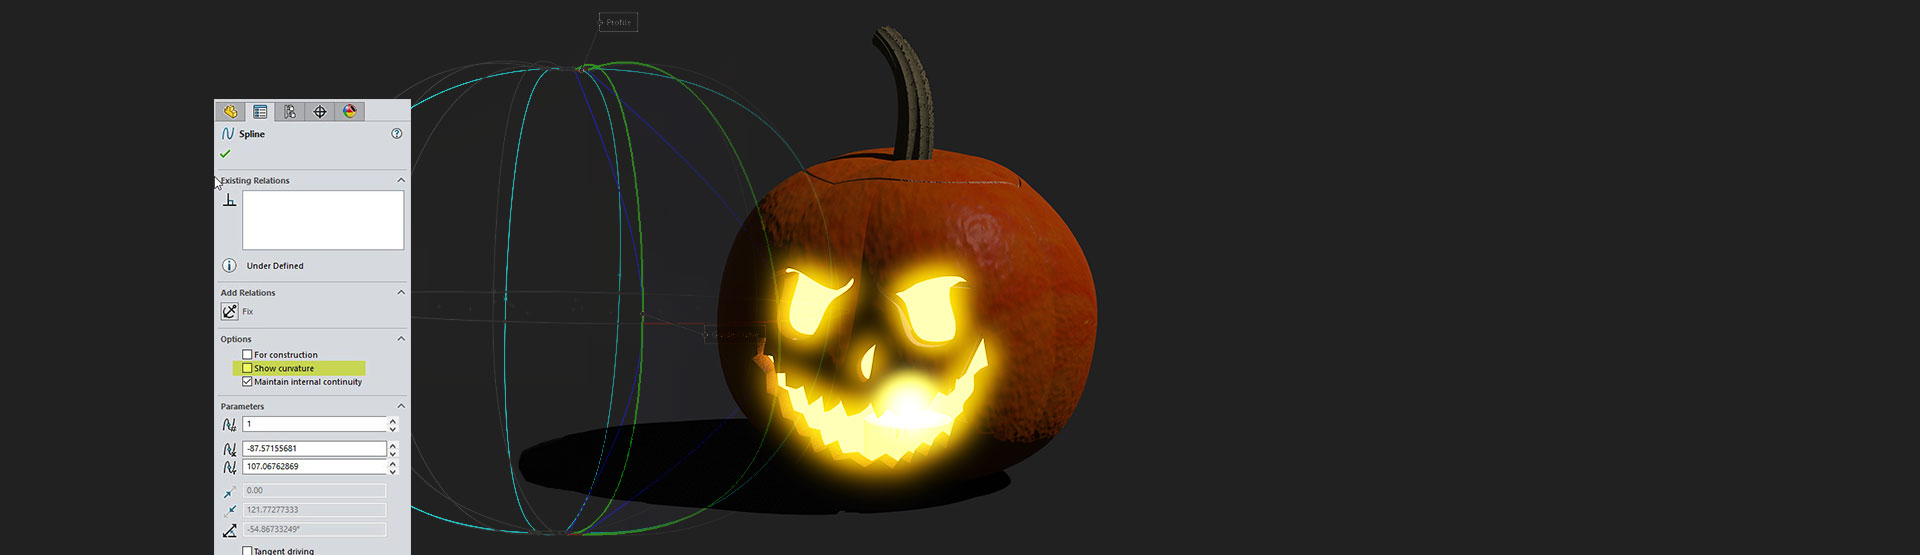
- Examine the curvature lines (With Spline selected: Tools > Spline Tools > Show Curvature).
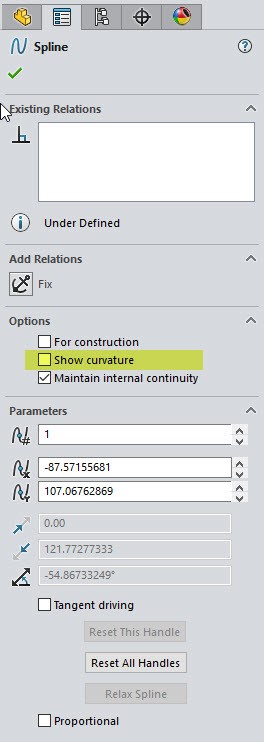
Below are two examples of curvature lines. For the first, we used a B-Spline, and we can see some wobbliness in the curvature that would ordinarily require tidying up.
The second is a Style Spline. Here, the geometry is defined by a bounding control polygon only, and forms a single, generally smooth curve. These are also easier to fully define. This would be our recommended go-to option for most purposes. Here, we want the slightly uneven surface geometry to give a more organic feel to our render, so we’ll be using unrefined B–Splines in a somewhat rustic manner!
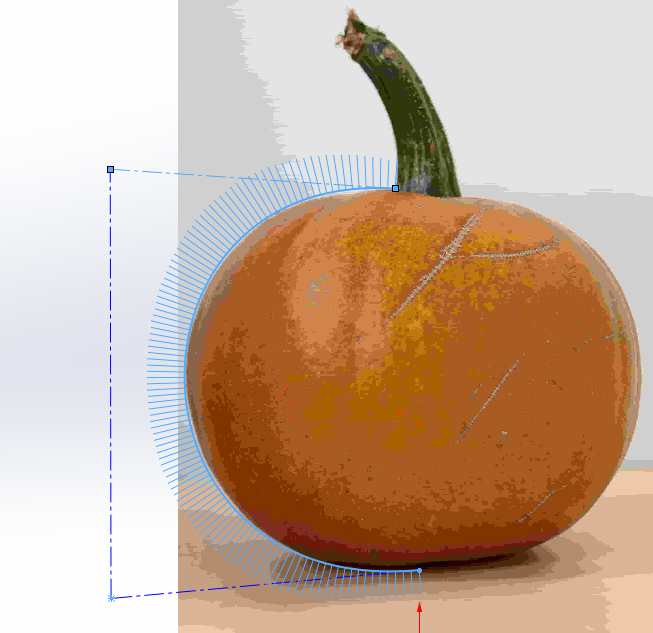
Three spline points are plenty for the curves that we want. Having traced two photos on angularly offset planes, we can jump in and draw the curves spaced at angles which will become our pumpkin body.
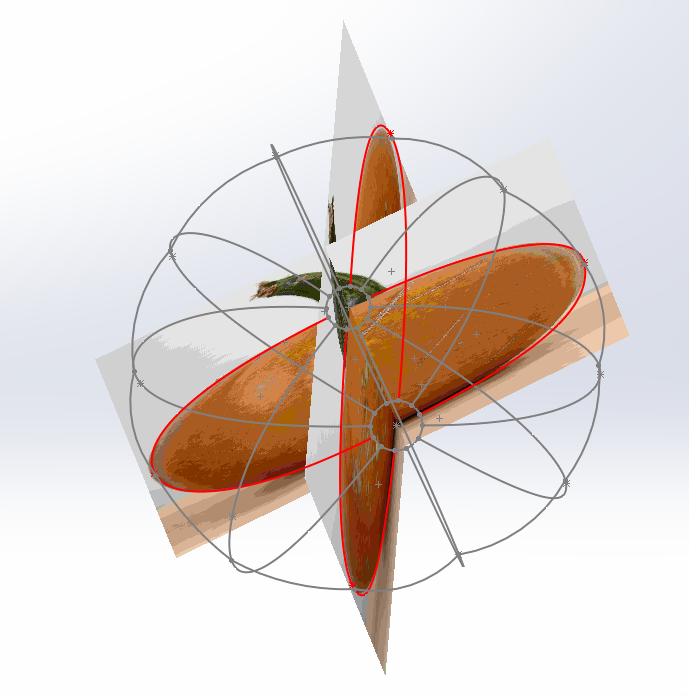
Lofted Surfaces
Much like a Lofted Boss/Base, a Lofted Surface blends multiple profiles into a continuous shape. For lofted surfaces, a surface is built from multiple contours. Guide Curves can be used as rails, defining the edges of the surface between profiles.
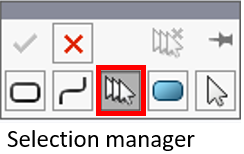
Here, getting the contours we want requires the use of the selection manager and choosing Select Group. This allows us to pick individual sketch entities one by one without our selection propagating, for example, around the circle.

Complex surfaces can be connected together using Surfaces > Knit Surface. I’ll check the Create Solid option, giving me a single solid, enclosed by the surfaces I’ve built.
Spline Curves in 3D
To make our pumpkin stalk, we will use two methods of producing 3D curves, giving an organic looking Loft feature. A Lofted Boss / Base will blend smoothly between two profiles.
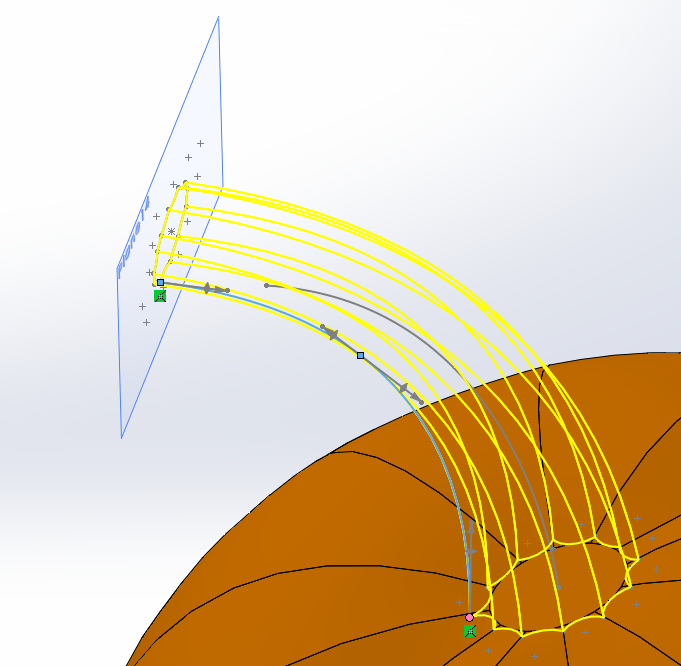
Projected Curve:
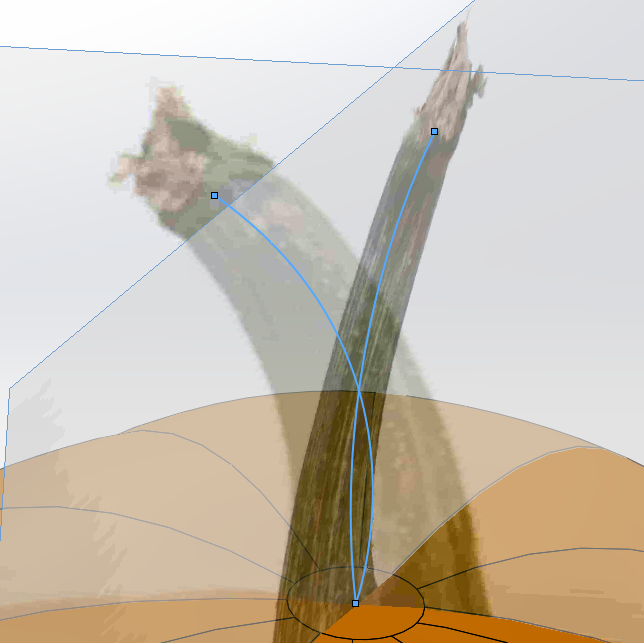
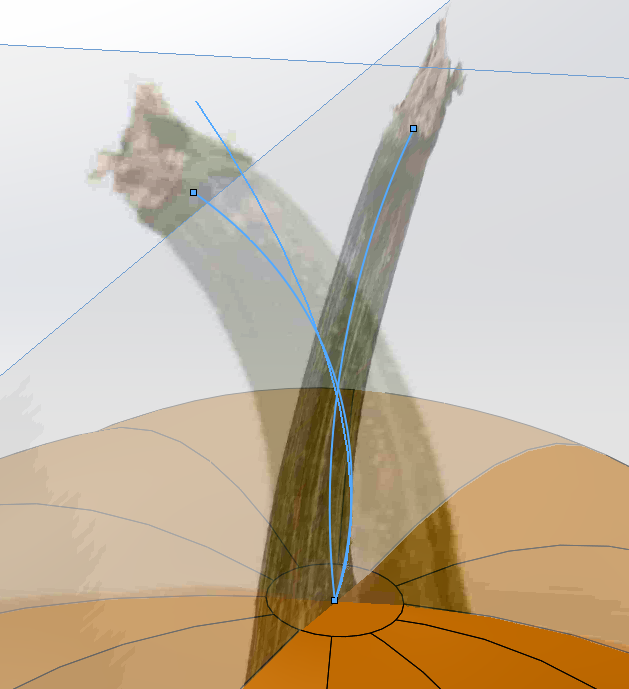
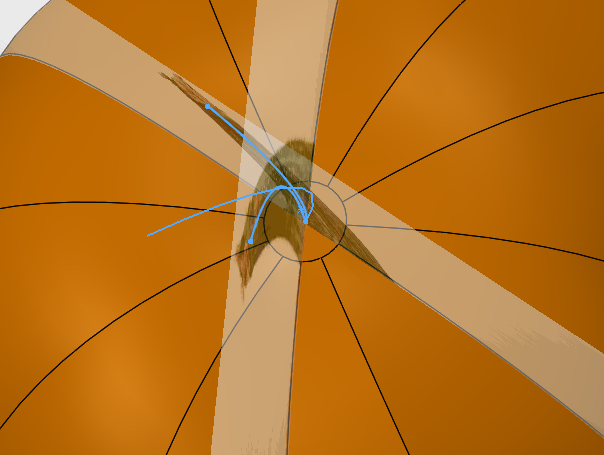
First, we create splines following the stalk on the two planes where we previously placed our sketch pictures. Then, we use Insert > Curve > Projected, to create a new curve the at intersection of the two. Imagine the curves being projected outwards, normal to their respective planes and a new 3D curve being created, in space, by the intersection.
We’ll create a profile sketch at the bottom of our projected curve, and another on a plane at the top of our curve, to produce our loft. The top profile is copied, pasted, and modified from the bottom profile. We’ll also need to control the feature with a Guide Curve.
3D Sketch:
After selecting Sketch > 3D Sketch, we define a two-point spline with endpoints on each of the two profile sketches. Note that these sketch planes are at angles to each other in all three dimensions. With these two constraints locked in, we can drag our spline freely in 3D space to shape our guide curve.
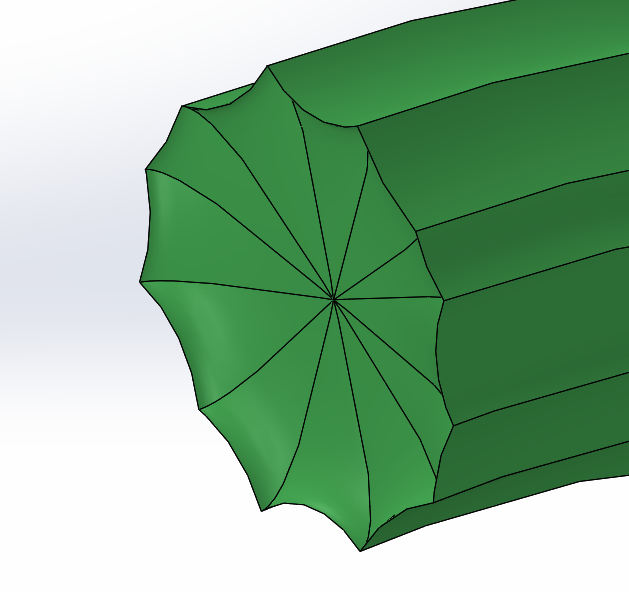
Insert > Features > Dome (continuous unchecked) gives a stylised finish to our top Loft surface.
Autotrace
As we’ve mentioned, we’ve never been the most accomplished artists here at Innova, so we’ll let SOLIDWORKS carve our pumpkin on our behalf! We’ve taken an image as a template and inserted it as a sketch picture.
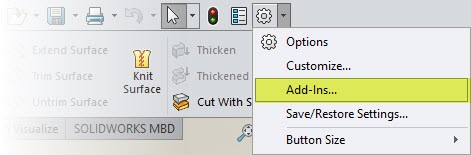
Autotrace is a SOLIDWORKS Add-In, so it needs to be enabled before you can use it. Do this in the menu shown below.
Once enabled, we’ll get a new, second page appearing in the Sketch Picture dialogue. Play with the Adjustments sliders to get the result most true to your intent. Like all feature recognition, the result can be imperfect depending on the image used, and manual tweaks may be needed. In our case, pumpkin carving is a messy process at the best of times, so we’ll proceed to extrude a cut from this sketch, with only minor adjustment needed.


This is our model after adding a candle and a cut around the top:

SOLIDWORKS Visualize
Here, we’ll only scratch the surface of the kind of image creation that’s possible in SOLIDWORKS Visualize. We just want to show how you can quickly and easily bring a model to life, creating something a lot more aesthetically impressive than simply showing a part file.
The most important techniques that we’re using here are Bump Maps and Emissive Surfaces.
With Bump Maps, black and white image files are used as a map of the small displacements which SOLIDWORKS Visualize then applies to a surface to give it texture. These, in conjunction with another image file for the colour map, are how we’ll the produce pumpkin outer surface.

To produce the light from the candle, we chose Palette > Appearances > Appearance Type > Emissive for the inner walls and candle flame.

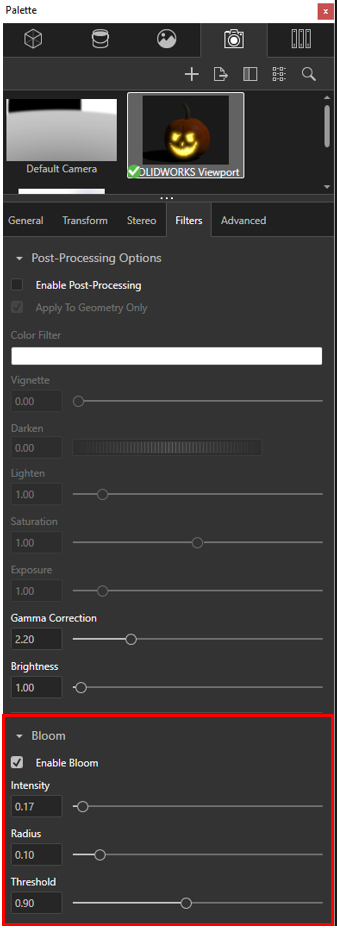
To apply a finishing touch, we used Cameras > Bloom > Enable Bloom to give the glowing effect of the candle light.
And that’s it. Happy Halloween from the Innova Systems team!
We hope you found that useful!
Have you seen our blog archive where we have posted plenty of helpful articles? We also have a fantastic video library filled with easy-to-follow videos on a number of topics inspired by other SOLIDWORKS users – take a look. Also, don’t forget to follow Innova Systems on Twitter for daily bite size SOLIDWORKS tips, tricks and videos.


