
The PDM Client is the software which lets you access the SOLIDWORKS PDM Standard and Professional environment from a windows explorer interface known as the Local Vault View. The PDM Client types are as follows.
SOLIDWORKS PDM Standard
- CAD Editor: Add-in for SOLIDWORKS – Supports working with SOLIDWORKS, DWG/DXF format, Microsoft Word, and Microsoft Excel files. All file formats, that Office plug-in handles, behave in the same way in SOLIDWORKS PDM Standard except Preview.
- Contributor: Standalone – Supports working with SOLIDWORKS, DWG/DXF format, Microsoft Word, and Microsoft Excel files.
- Viewer: Allows read-only access to file vaults. User can transition files through a workflow, but user cannot add or modify (check out, check in, update values) files.
SOLIDWORKS PDM Professional
- CAD Editor & Web*: Supports working with all file types, including enhanced management and previewing of CAD formats such as SOLIDWORKS. CAD add-ins allow users to access SOLIDWORKS PDM Professional from within the CAD application. Remote users can search vaults and perform basic functions over the Internet using the Web and Web2 clients.
- Contributor & Web*: Supports working with all file types, including CAD files. However, the CAD add-ins are not supported on this client type. Remote users can search vaults and perform basic functions over the Internet using the Web and Web2 clients.
- Viewer: Allows read-only access to file vaults. User can transition files through a workflow, user cannot add or modify (check out, check in, update values) files or use CAD add-ins.
How to install the SOLIDWORKS PDM client
Follow steps one to five of this PDM Client installation process if your computer already has SOLIDWORKS, or if you are installing/upgrading a major version of SOLIDWORKS. You can skip step three if you just want the PDM Client installed standalone.
n.b. you must have administrative permission to install the PDM Client. If you don’t have admin rights, please speak to your administrator/IT department before proceeding with this tutorial.
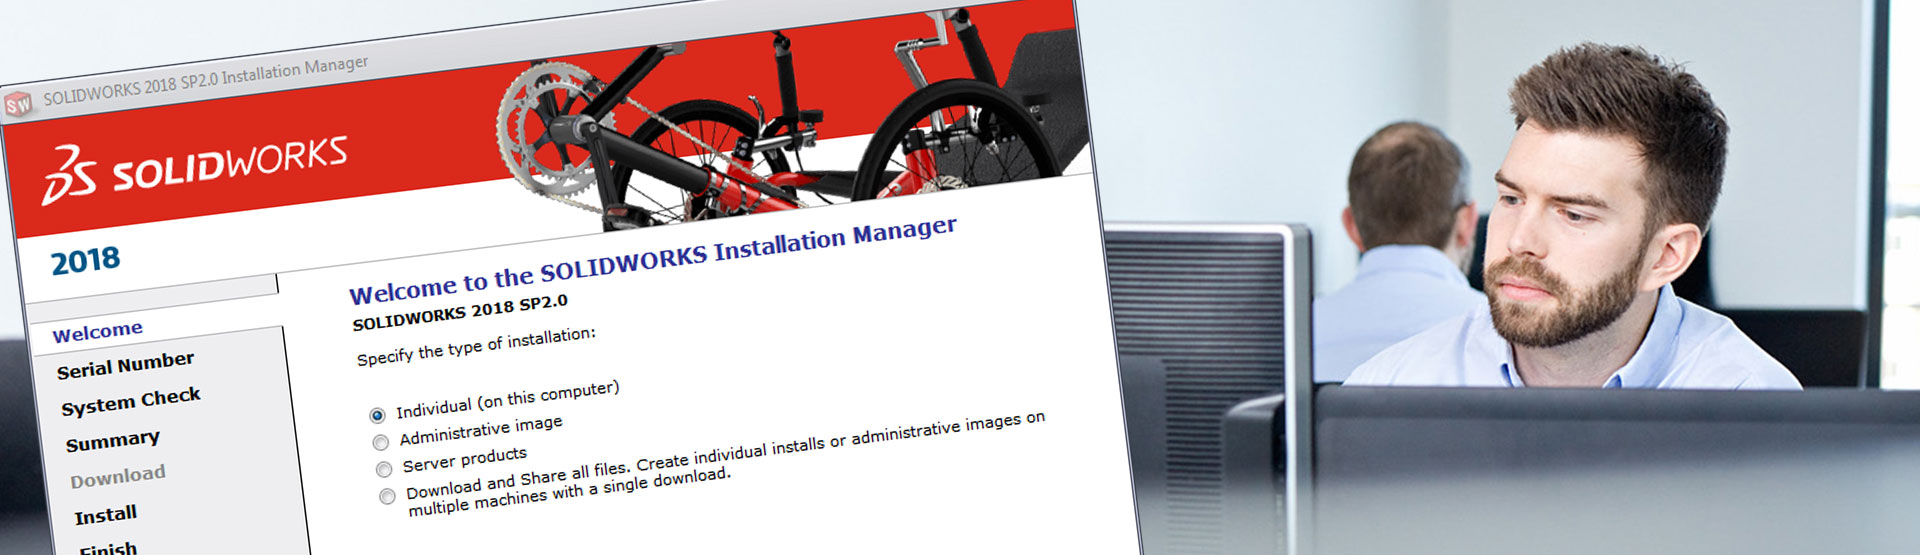
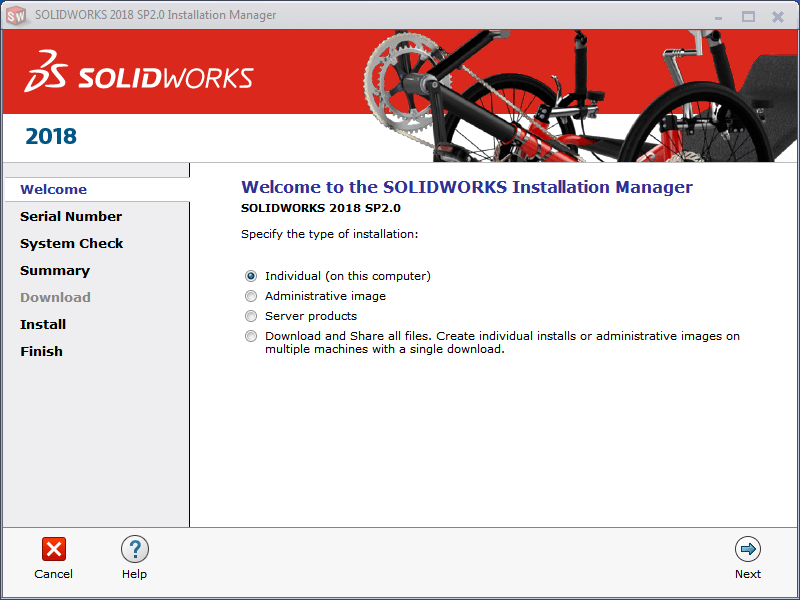
Step one: Open the SOLIDWORKS setup.exe from an installation file set or the software DVD provided by your SOLIDWORKS reseller.
Step two: Choose the ‘Individual’ installation if your installing for the first time, or ‘Modify’ if you’re upgrading.
Step three: Enter your serial number. This will be auto-completed for you if you’re upgrading.
Step four: If upgrading the major version of SOLIDWORKS choose the ‘Upgrade’ option.
Step five: On the products to install/add page, make sure ‘PDM Client’ is ticked. You will have to click ‘CHANGE’ on the summary page to find this.
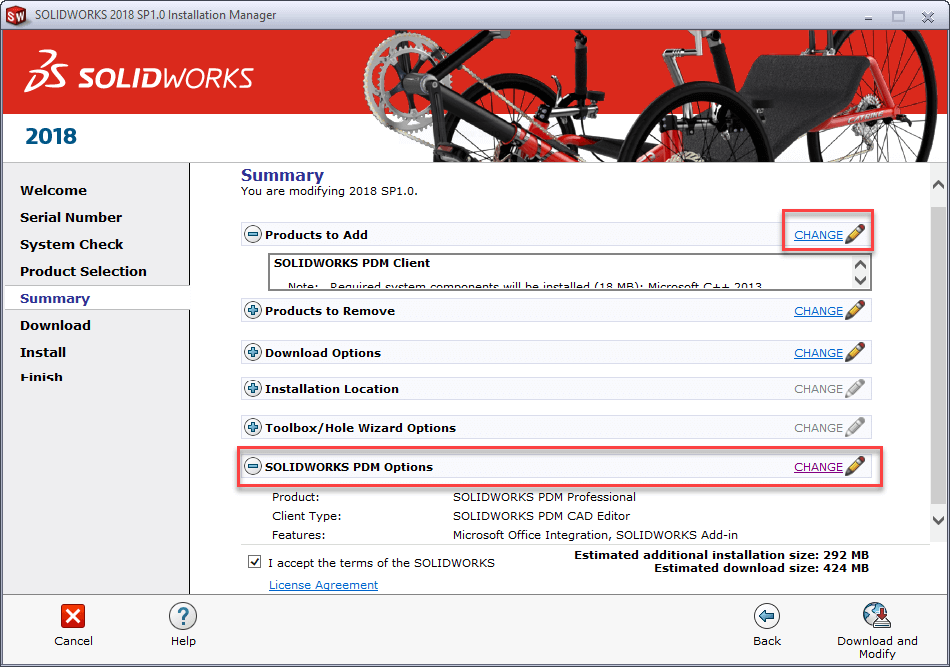
Step six: Once turned on a section appears for the configuration of the client, this is called SOLIDWORKS PDM Options. Click ‘CHANGE’ on here, too.
Step seven: On the following page you will have to select the PDM product you are using (Standard or Professional). It’s important you get this right, so check with your PDM administrator or SOLIDWORKS reseller if you’re unsure!
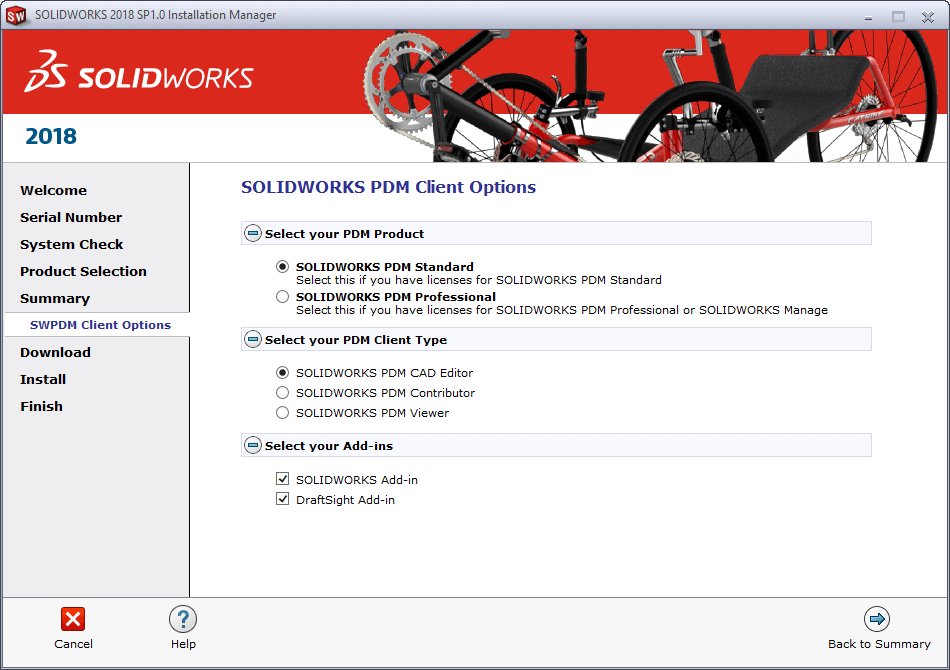
Step eight: Now select the ‘your PDM Client Type’, there are three options here:
- For SOLIDWORKS use you will need to select ‘SOLIDWORKS PDM CAD Editor’.
- For non-SOLIDWORKS users who want to Check-in/out files or change the workflow state on documents choose ‘SOLIDWORKS PDM Contributor’.
- For users who only want to view, but not change files choose ‘SOLIDWORKS PDM Viewer’.
Your choice here dictates what license type is selected from the central SNL server. Again, check with your PDM Admin/Reseller to see what you have access to. These choices can be changed at a later point by using the Administration tool.
Step nine: In the ‘Select your Add-ins’ section, it’s worth ticking all the available add-ins, they’re quite small installs and can come in useful when using different files in PDM.
Step ten: Click ‘Back to Summary’ once you’re happy.
Step eleven: Finally accept the terms and click ‘Install Now/Modify’.
Step twelve: That’s it! PDM Client will now be installed. For information on how to configure your setup please see our “How to access your PDM Vault” blog post.
We hope you found that useful!
Have you seen our blog archive where we have posted plenty of helpful articles? We also have a fantastic video library filled with easy-to-follow videos on a number of topics inspired by other SOLIDWORKS users – take a look. Also, don’t forget to follow Innova Systems on Twitter for daily bite size SOLIDWORKS tips, tricks and videos.


