
The SOLIDWORKS Boundary Boss Base tool is an often overlooked, but very useful tool found on the features toolbar. It’s very similar to the lofted boss base tool and it’s possible to create pretty much the same geometry (with subtle differences) with both. We think it’s worth investigating…
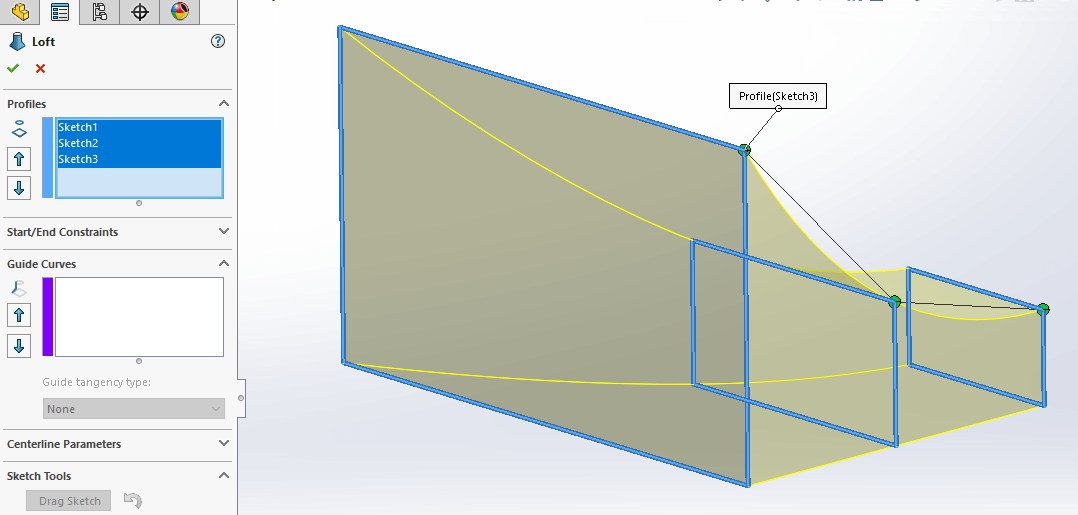
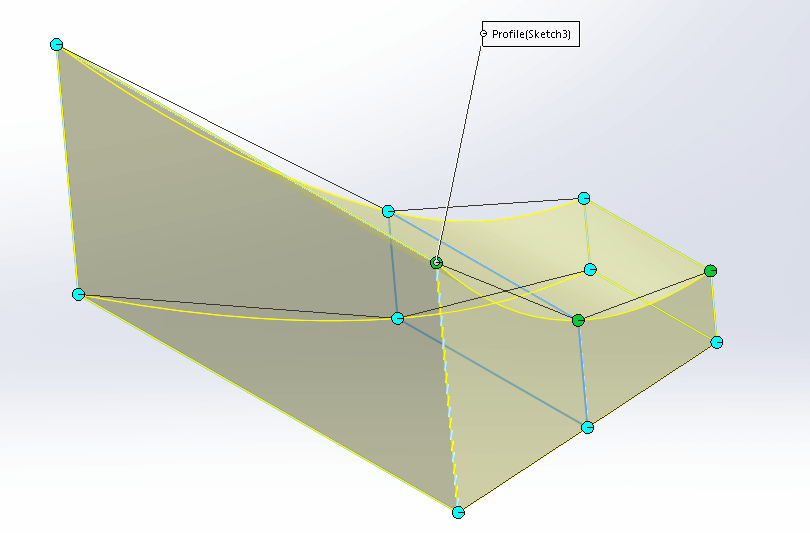
If we start by looking at the loft tool, you can see it allows us to create geometry by making transitions between profiles. In the below example we have 3 different size rectangles on 3 sketch planes offset from each other – SOLIDWORKS essentially ‘joins’ these profiles together:
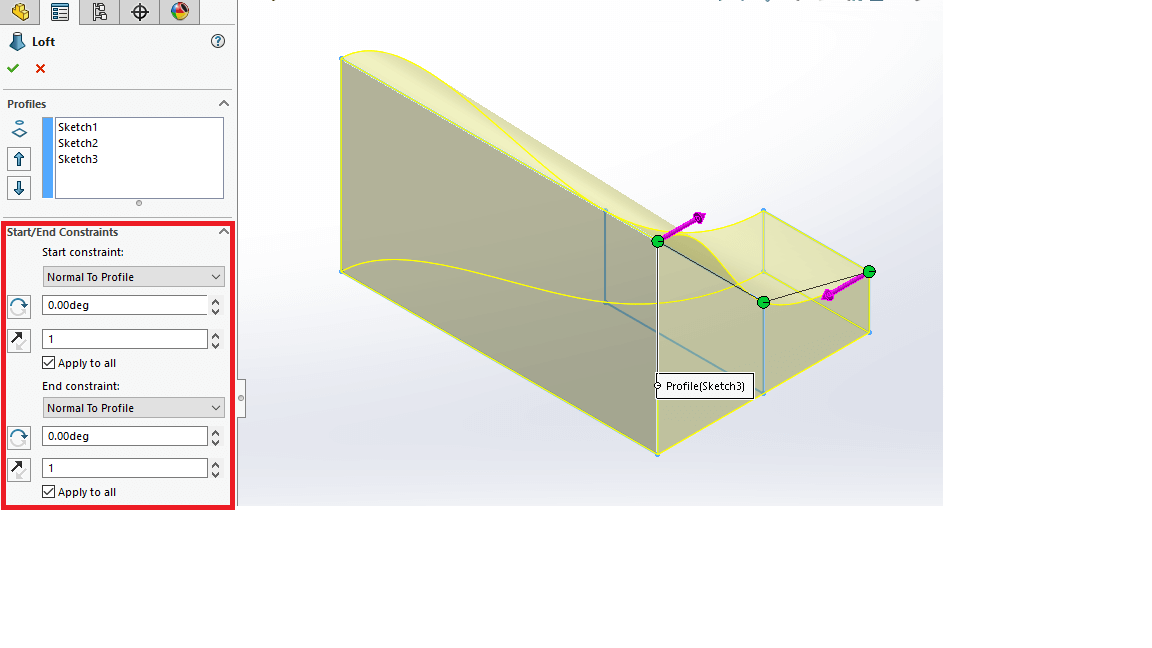
It is possible to influence the way the geometry transitions from one profile to another and there are a few ways we can do this. One way is to define start and end constraints. There are various different options to choose here, but essentially it will influence the way the geometry transitions from the start or end profile to the next profile.
Below we have chosen ‘Normal To Profile’, which means the geometry projects out ‘Normal’ to the sketch plane before transitioning to the next profile.
You also have the option to introduce guide curves, which will also influence how the geometry transitions between profiles. As you can see below the loft is following the guide curve as it transitions between profiles.
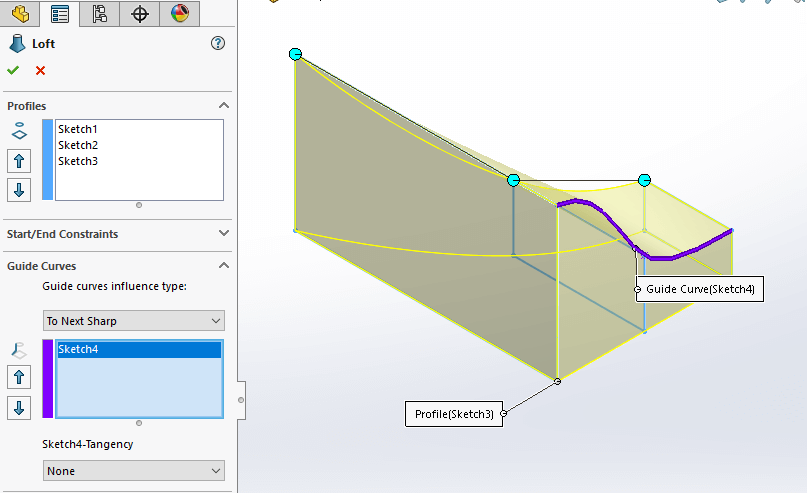
There are also various options on how your guide curves influence your loft. When creating a loft, a point on one profile is connected to the corresponding point on the next profile using connectors which can be seen in the image below:
It is possible for us to have our ‘Guide Curve Influence’ affect all connections (global) or just the connector where the guide curve resides.
There are many other options within the loft that allow you to influence the shape of your loft. However, because we are making a comparison against the Boundary Boss Base feature, we will be mainly focusing on the 3 items mentioned:
- Profiles
- Start/End Constraints
- Guide Curves
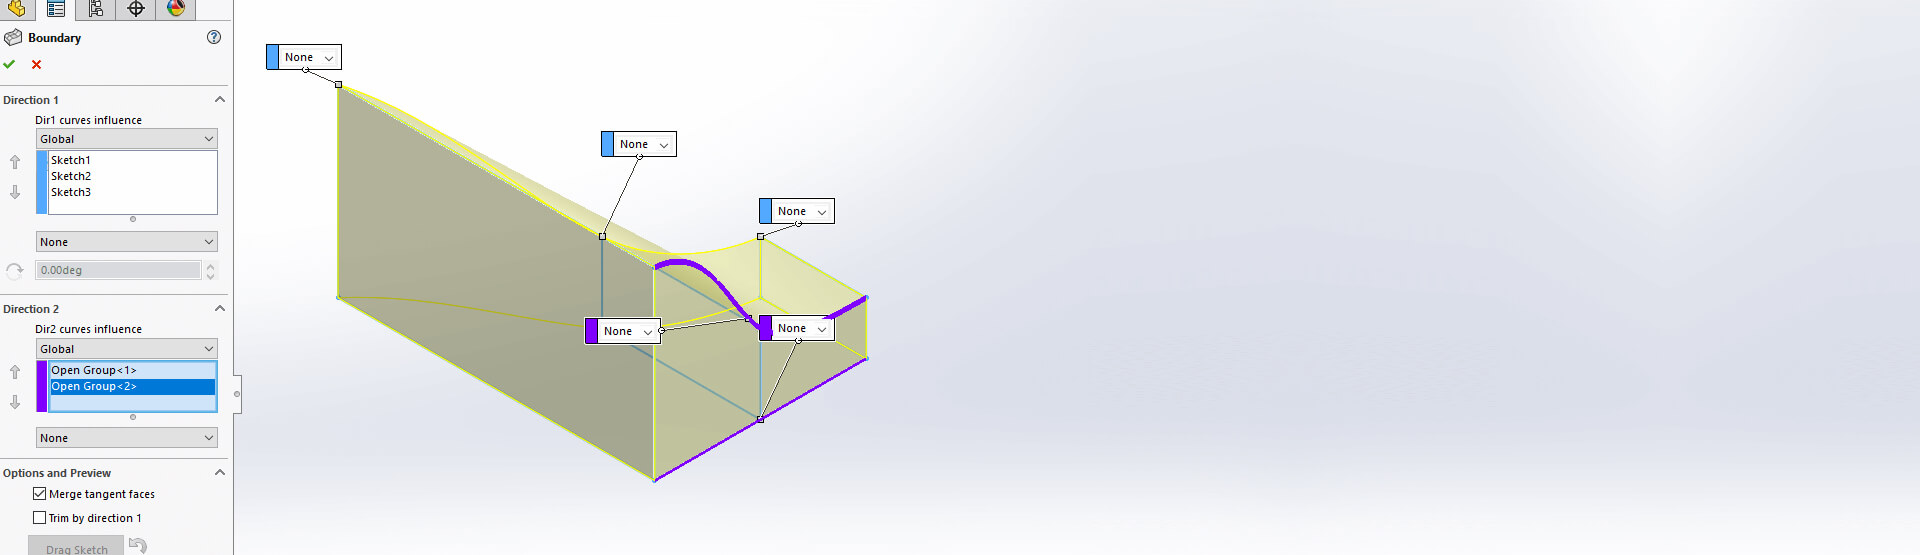
Moving on to the Boundary Boss Base tool – the first thing we will look at is the property manager. Instead of having the options to define profiles, we are presented with a ‘Direction 1’ and ‘Direction 2’ Dialogue box. We can select our profiles in either one of these boxes. We’d suggest selecting your profiles in the ‘Direction 1’ box.
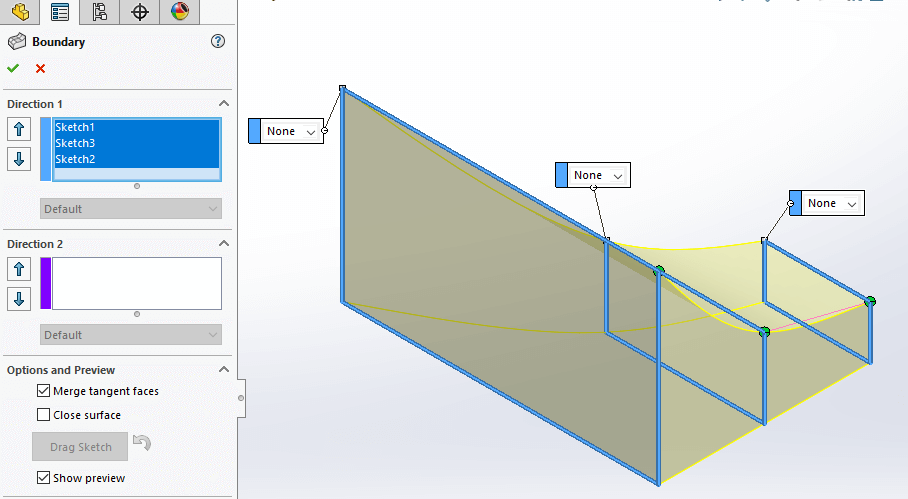
We’ve selected the same three Sketch profiles that we did in the loft tool, which yields a similar result to the loft tool shown in our very first image.
‘Direction 2’ in a Boundary Boss Base is very similar to selecting guide curves in a loft when creating a solid.
If we look at the below image, we have generated 2 separate sketch lines that have been selected as curves in ‘Direction 2’, and are influencing the transition between the profiles that have been defined in ‘Direction 1’.
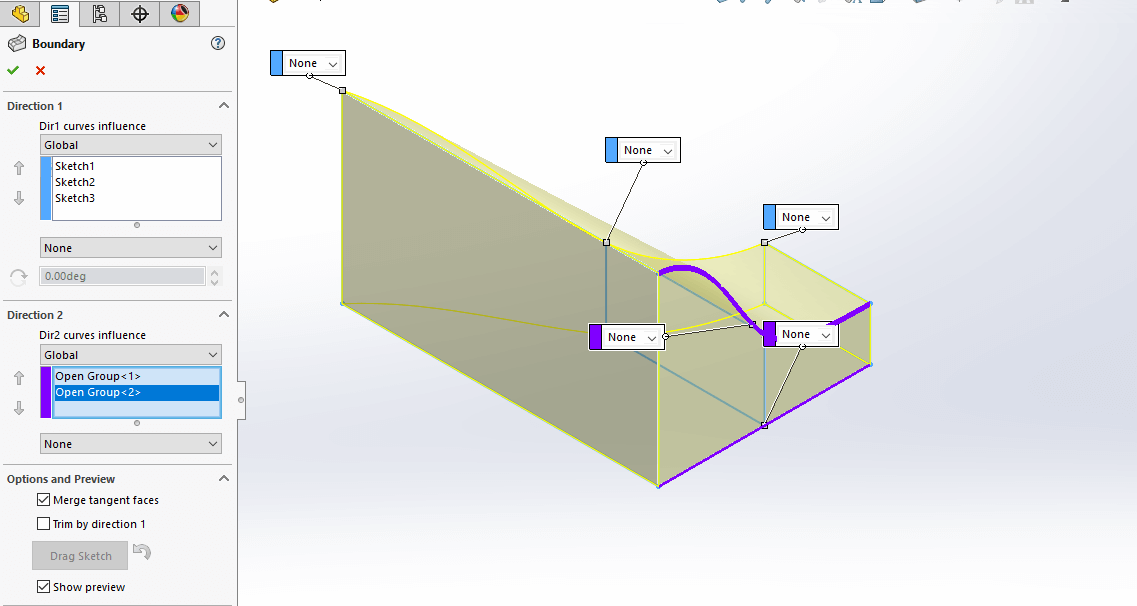
There is an additional option in the above image for ‘Dir 2 curves influence’ which is similar to ‘Guide curves influence type’ in the loft property manager.
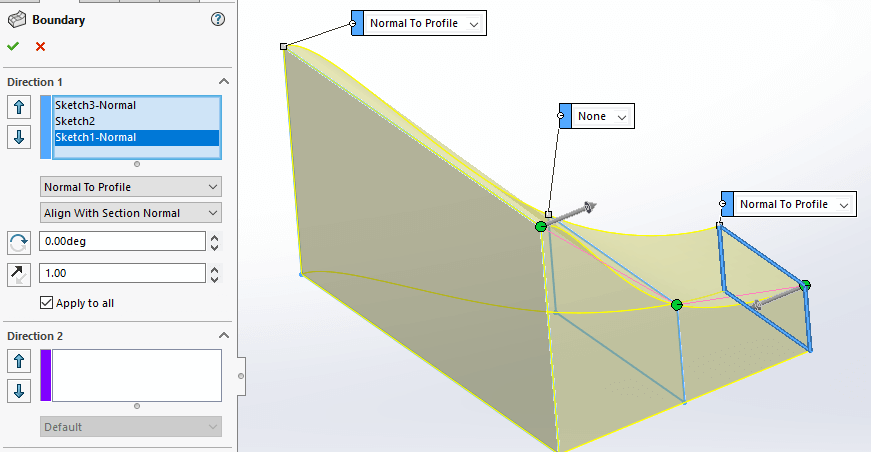
We also have the option within the Boundary Boss Base property manager to define a ‘Tangent type’. This is similar to defining a ‘Start/End Constraint’ within the loft.
In the below image we have set the ‘Tangent type’ for the 1st and 3rd profile as ‘Normal To Profile’. This can give us a very similar result to where we set the start/end constraint to ‘Normal To Profile’ within the loft.
One of the key differences we see within the Boundary Boss Base tool vs the Loft tool, is the ability to define a ‘tangent type’ for each profile, whereas in the loft tool we can only specify a ‘Start/End Constraint’ for the start and end profile.
In the below image, we’ve set the tangent type for all 3 sketches in ‘Direction 1’ to ‘Normal To Profile’:
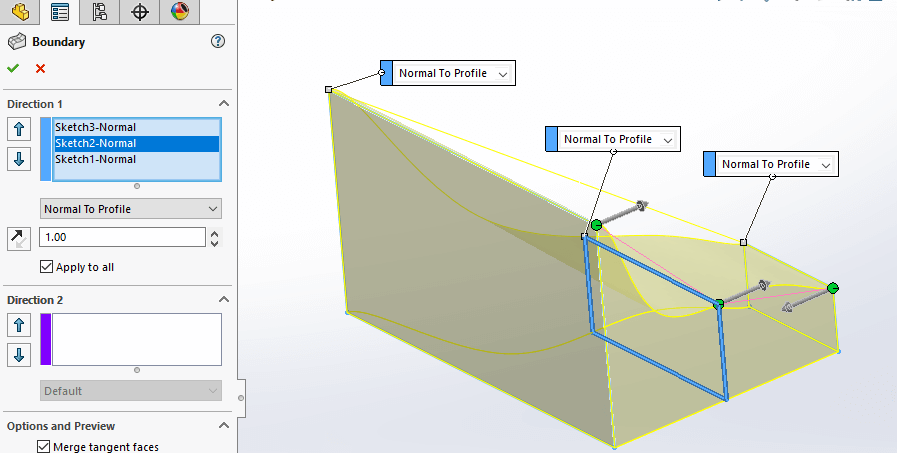
We wouldn’t be able to create the same blend between the profiles in the loft tool without having additional geometry (guide curves, etc) selected.
In summary: The Boundary Boss Base tool is similar to the Loft tool, however there are some differences which may affect which one you to choose to use. The Boundary tool is more commonly used when creating surface geometry. This is because both sets of boundary curves (defined in direction 1 & 2) can have a tangent type applied to them, which allows you to make the edges of the boundary surface tangent to surrounding surfaces. You can also control the influence of tangency type in both directions, which is great for patching open areas in a surface model.
We hope you found that useful!
Have you seen our blog archive where we have posted plenty of helpful articles? We also have a fantastic video library filled with easy-to-follow videos on a number of topics inspired by other SOLIDWORKS users – take a look. Also, don’t forget to follow Innova Systems on twitter for daily bite size SOLIDWORKS tips, tricks and videos.


