

We always recommend SOLIDWORKS service pack installation as soon as possible after release. As well as providing minor enhancements and new features, this ensures maximum stability and the reduced likelihood of bugs. However, when upgrading to a completely new release of SOLIDWORKS, extra care needs to be taken to avoid mistakes.
Let’s take a look at the most common upgrade errors reported to the Innova Systems technical support team…
1. Upgrade existing/Create new installation – which one?
There are two installation options within the SOLIDWORKS installation manager – ‘Create a new installation’ and an ‘Update’ option, as per below:
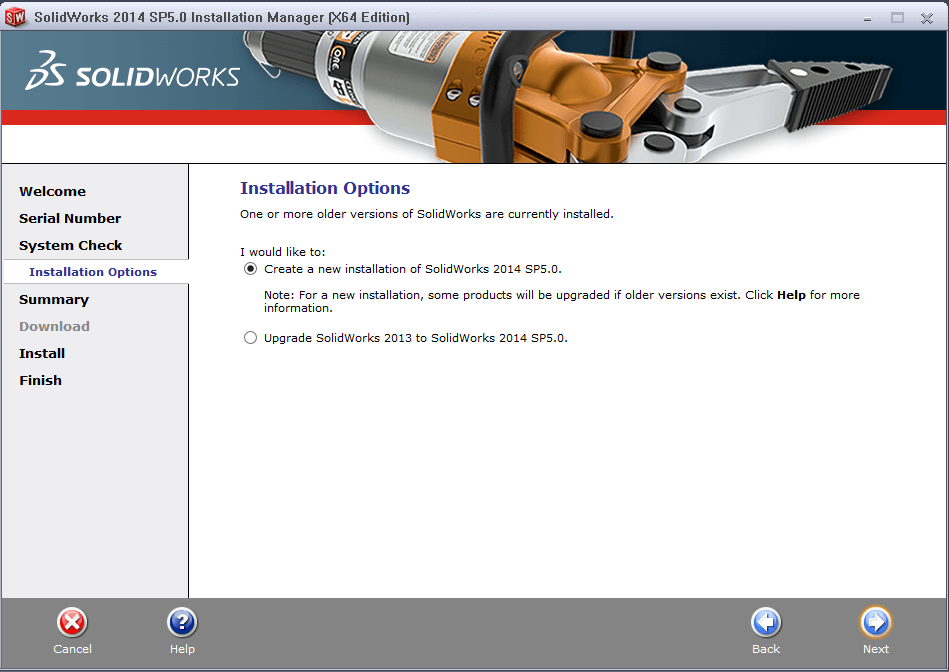
Option 1:
If the ‘Create a new installation…’ option is selected, the installation manager creates new folders and files, which can take a while to complete. Other than a single new/fresh install, this method is predominantly used when multiple versions of the software are required on the same machine.
n.b. when installing multiple instances of SOLIDWORKS, it is recommended that you add a suffix to the SOLIDWORKS Corp and SOLIDWORKS Data. This prevents potential confusion with the many folder instances.
Option 2:
If the ‘Upgrade…’ option is selected, the installation manager will find already installed files and folders and upgrade them where they are. A much faster option for obvious reasons.
2. Toolbox installation
Ignoring the toolbox settings (see below example) can cause some functionality issues that the user will be warned of before confirming. Please be aware that the toolbox is not backwards compatible, so selecting the same location as a previous toolbox will break it in all previous versions when updated!
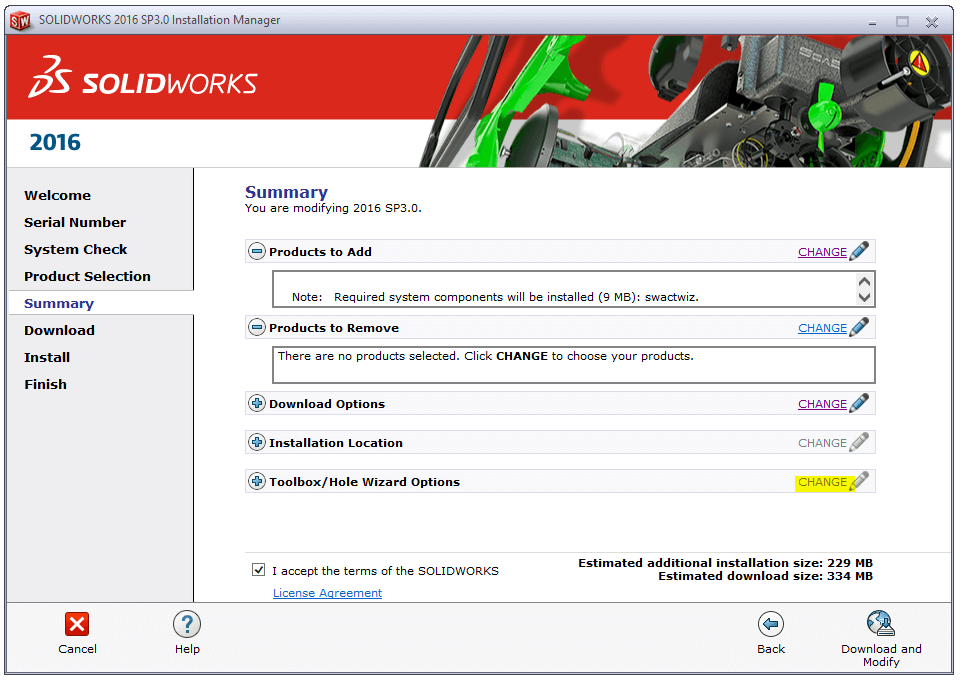
The method of installation chosen in the previous step (new or upgrade) determines which selection is made with the toolbox. e.g. the user would create a new toolbox installation if they chose to create a new installation of SOLIDWORKS and vice-versa.
If the user skips over this option and would like to create a new installation of the Toolbox after the installation process is complete, they would have to re-point the toolbox/hole wizard location accordingly within SOLIDWORKS itself (see point 3 below on how to do that).
This is the kind of error message likely to be received if the toolbox location has not been set correctly:

3. How to “re-point” locations
Re-pointing locations within SOLIDWORKS is a fairly common and straight forward process. In a nutshell, SOLIDWORKS looks for templates, sheet formats, settings, design library, etc all within; ‘Tools>Options>System Options>File locations’ (with a few exceptions). These can be shown and altered, as per below:
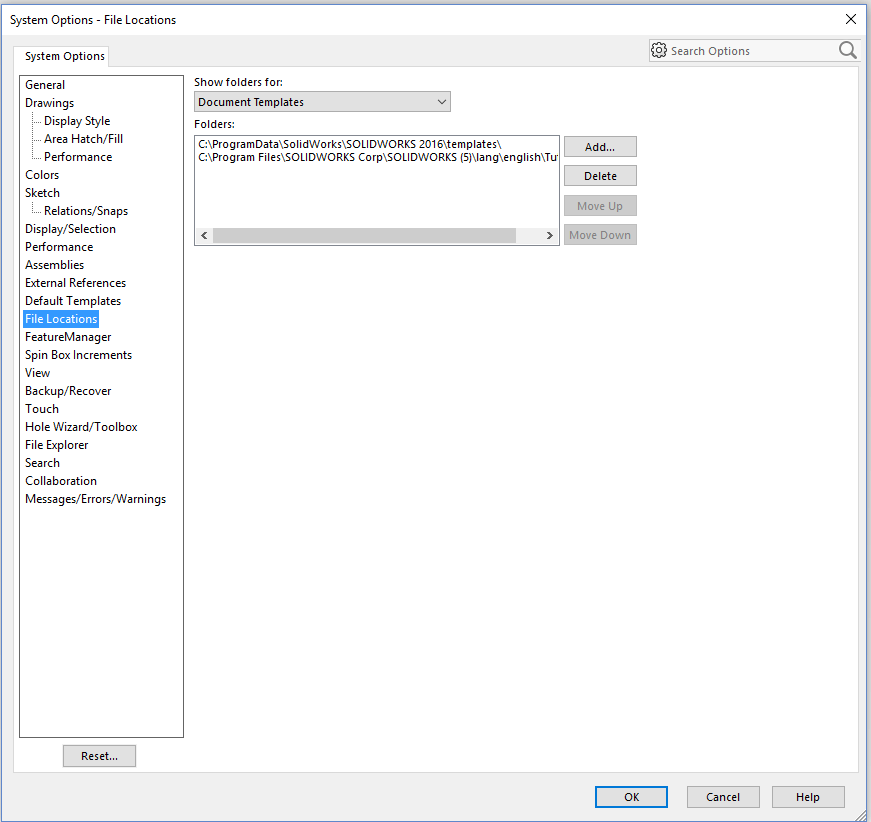
To alter, or to “re-point” the location, the user has to add the required settings manually. This would almost definitely have to be done if the toolbox location that SOLIDWORKS is looking at is incompatible (i.e. a future version). The toolbox is one of the exceptions whereupon the location is determined further down in system options, under Hole Wizard/Toolbox. This process can be repeated for anything else that may have been broken.
On a side note, the Copy Settings Wizard is a great tool which can be used to create a backup of all of the settings that are relied upon by the user within SOLIDWORKS. Using this helps reduce the amount of lost data when upgrading.
We hope you found that useful!
Have you seen our blog archive where we have posted plenty of helpful articles? We also have a fantastic video library filled with easy-to-follow videos on a number of topics inspired by other SOLIDWORKS users – take a look.
Also, don’t forget to follow us on twitter for daily bite size SOLIDWORKS tips, tricks and videos.


