
SOLIDWORKS Visualize is a powerful rendering tool, producing incredibly lifelike results. And, if you have a SOLIDWORKS Professional or Premium license with an active subscription, SOLIDWORKS Visualize Standard is available to download at no extra cost. In this tutorial, we’ll show you how to make use of the SOLIDWORKS Visualize settings to start creating your own amazing renders.
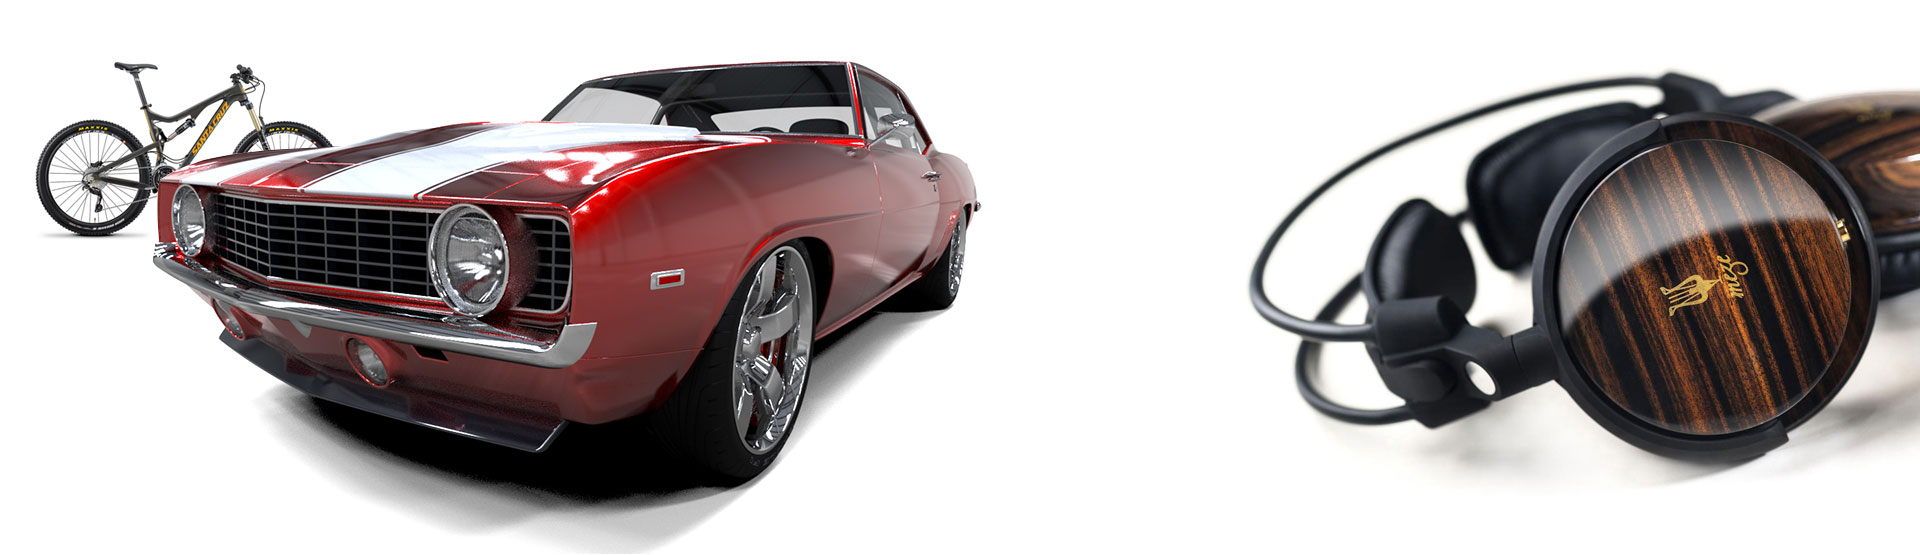
Look at what you can achieve using SOLIDWORKS Visualize:
Pretty impressive, right?
Their are seven main areas to consider when creating renders in Visualize: Objects, Controls, Libraries, Appearances, Scenes, Cameras and Render output.
When opening SOLIDWORKS Visualize for the first time, you will notice there are options to create or load existing projects on the main page. In this tutorial, a new project has been created, which gives you a blank workspace, inside of which a new model can be imported.
Objects
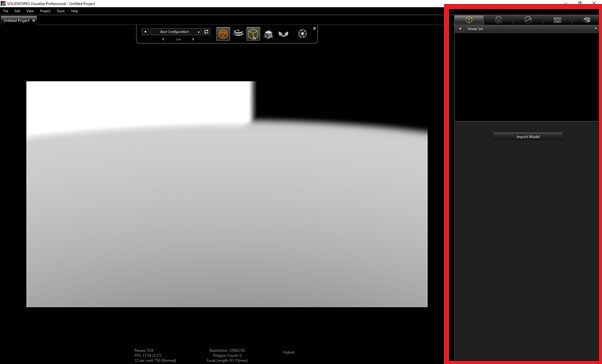
In the image above, there are a number of tabs on the right hand side. The first one of these is Objects, which is the term used to refer to your imported models and created geometry. The large Import models button shown can be used to open your SOLIDWORKS designs.
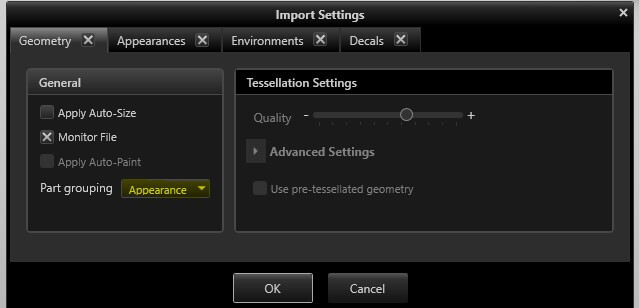
Before Importing, spend a bit of time in SOLIDWORKS applying appearances where you want them, as it has excellent controls for this. When importing models into SOLIDWORKS Visualize, group objects using appearances. This way appearances can be applied very easily inside of the software, using the predefined groups. After import, select the model in the objects tab and Snap to Floor, to put the model’s base on the scene floor.

Controls
To control the model in Visualize the Alt key is used. Hold it down while using:
• Left Mouse key to rotate
• Hold down the middle mouse button to pan
• Scroll the middle mouse wheel to change the perspective
• Right mouse key to zoom
You can also use the spacebar to switch between an “easy” and “advanced” display mode.
Libraries
The libraries tab can be found on the right, under the Objects tab. it stores libraries of the following items;
• Cameras
• Environments
• Images
• Appearances
• Models
• Plates
• Projects
• Textures
Content from the libraries can be applied to the model and scene simply by dragging and dropping into the graphics area.
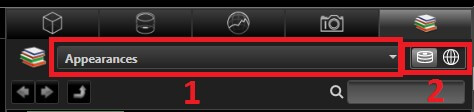
Items in the libraries can be applied to your model to make look more realistic. Looking at the image below, the first item is a dropdown in which the user can switch the library type. The second allows someone to switch between online, and offline libraries. When in the online mode, items with a green tick are already downloaded.
Appearances
As described above, appearances can be applied to models using drag and drop from a library. Once applied the appearances tab can be used to edit appearances. This is the second tab on the right
Alternatively new appearances can be created from the appearances tab, if no appearances are selected, there’s a button to create a new appearance.
When creating or editing appearances, there are a number of different appearance types with different “looks” allowing a user to create a very realistic result.
• Anisotropic – appearances which have a direction or grain, typically for brushed finishes on appearances.
• Backscattering – Backscattering is good for fabric, Bump map textures typically work well with this appearance type.
• Emissive – Emissive appearances emit light into a scene.
• Flat – do not react to light or shadows in the scene. Therefore, the Flat appearance has a constant colour regardless.
• Generic – Suitable for a range of appearances, allowing for full control of appearance settings.
• Glass – Does what it says on the tin, excellent for glass of varying types.
• Gem – similar to the glass appearances, but optimised for Gems.
• Matte – simulates matte surfaces, such as flat paint with no specular highlights.
• Metal – great for metal appearances, with finishes built to replicate these.
• Metallic Paint – great for car paint, and even some plastic finishes.
• Multi-Layer Allowing appearances to be stacked for complex finishes.
• Paint – Great for non-metallic paint.
• Plastic – The Plastic Appearance Type simulates many plastic types.
• Subsurface – High quality rendering modes only. Good for things like milk, teeth, some stones, and honey.
• Thin Film – Thin Film Appearance Type simulates items such as soap bubbles and oil slicks, with rainbow colour distortion on a thin surface layer.
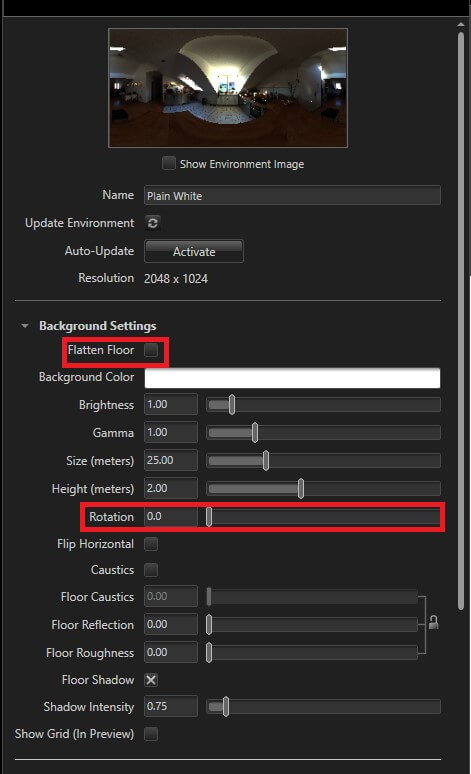
Scenes
Scenes provide most of the lighting for the model, through the Environment. And also the backdrop for the design. Either by using a Plate, or the Environment.
The Environment is similar to in Photoview 360, a HDRI file which can be applied for a range of different lighting types. Appearances will often change with different Environments.
A tip when working with Environments is to rotate them to pick up the best highlights on a model. The flatten floor option can also be used to flatten the scene floor, so the model looks like its sitting in the environment. All these settings can be found on the scenes tab
Plates, or Backplates provide a static image for the backdrop of a render. It can be slightly trickier to rotate the model to make it look like it’s sitting in the scene with these.
Both Environments and Backplates can be applied from the libraries tab.
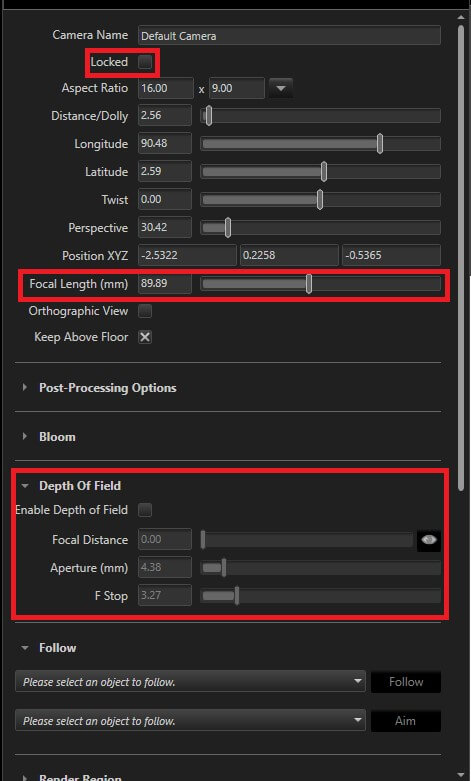
Cameras
Cameras can be created and loaded from the cameras tab, when nothing is selected.
Cameras allow a user to change the view you are taking on the model. They can be setup, and locked if desired from the tab. this will stop settings being changed by accident using the Alt key.
There are some useful controls here to allow depth of field to be applied to a render, adding to realism. This is effectively the same as changing the aperture on a lens. With F-stop settings representing this change, the lower the number, the less that’s in focus. The focal length can also be changed from this tab. This is the zoom level of a lenses. If desired, post processing can also be applied, much like applying a filter over a render.
Outputting Renders
Once the render is fully setup it can be run from the Tools>Render option in the menu.
When outputting a render, there are several options to play around with:
• Resolution – Changes the output resolution of the finished image. And the desired dots per inch (DPI) of the saved file.
• It is recommended to set the render settings to accurate, for the best results for things like reflections and refractions.
• The Render passes affects the number of passes the render engine makes over the image, the more passes, the better. However, you could set the render mode to time rather than quality if you only have a specific amount of time to achieve a result.


