
The new 3D Texture tool in SOLIDWORKS 2019 allows us to take an image representing a texture (the Height Map) and turn it directly into a Mesh body. This mesh can then be the basis of a solid body design or be used directly in 3D printing or rendering.
The capability to rapidly create intricate surfaces or geometric patterns opens up a plenty of design possibility. Ideas can be quickly realised, and geometry can be swapped out on the fly, saving you hours of work.
What’s a Height Map?
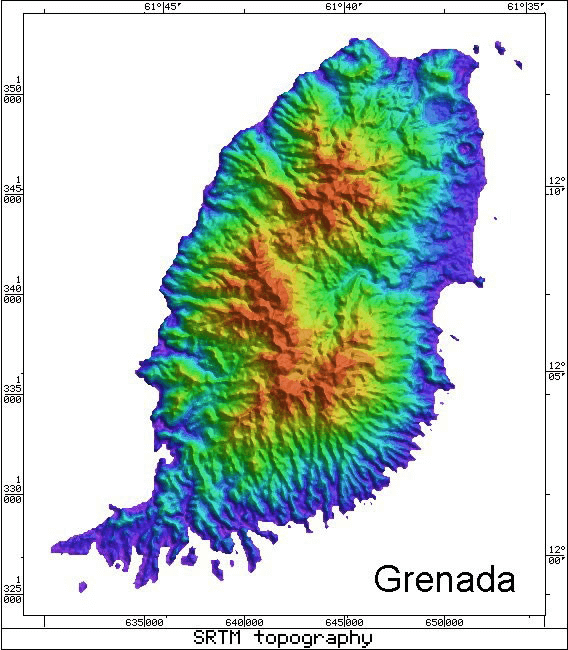
Sometimes known as a textural image, a Height Map is an image file which maps a displacement (z), across an x,y surface in greyscale. Black represents maximum displacement and white minimum, or vice versa.
Take a look at the below image. It’s a radar topographic image of Grenada and, as well as being contour mapped, it has a colour scale corresponding to height. A height map works the same way as this, using black and white.
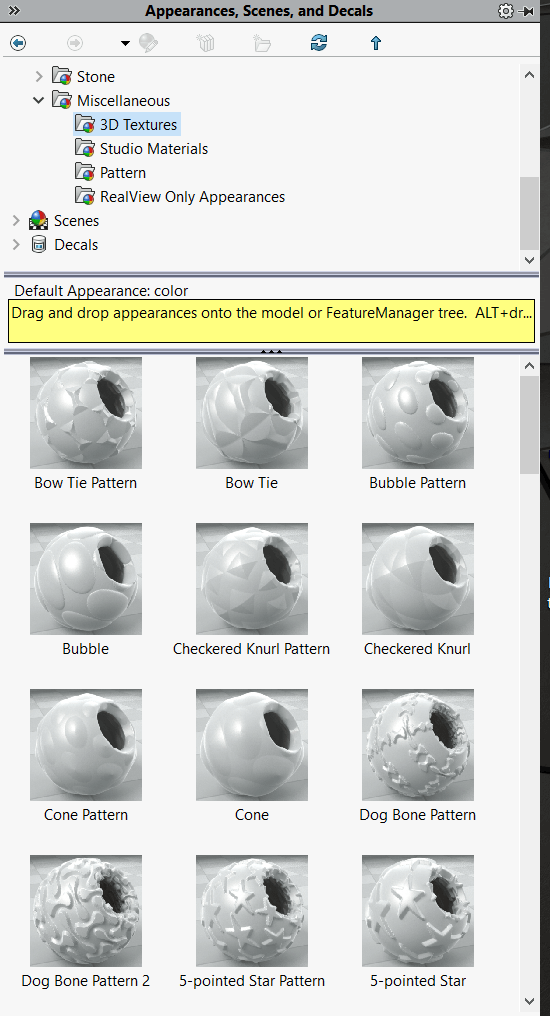
SOLIDWORKS Visualize users may already be used to using Height Maps to create surface displacements or bump mapping. In some cases, photos will capture the light and shadow of a surface well enough to be used as a height map and give an excellent result. SOLIDWORKS comes pre-loaded with a library of useful textures, and there’s a huge variety available online, too.
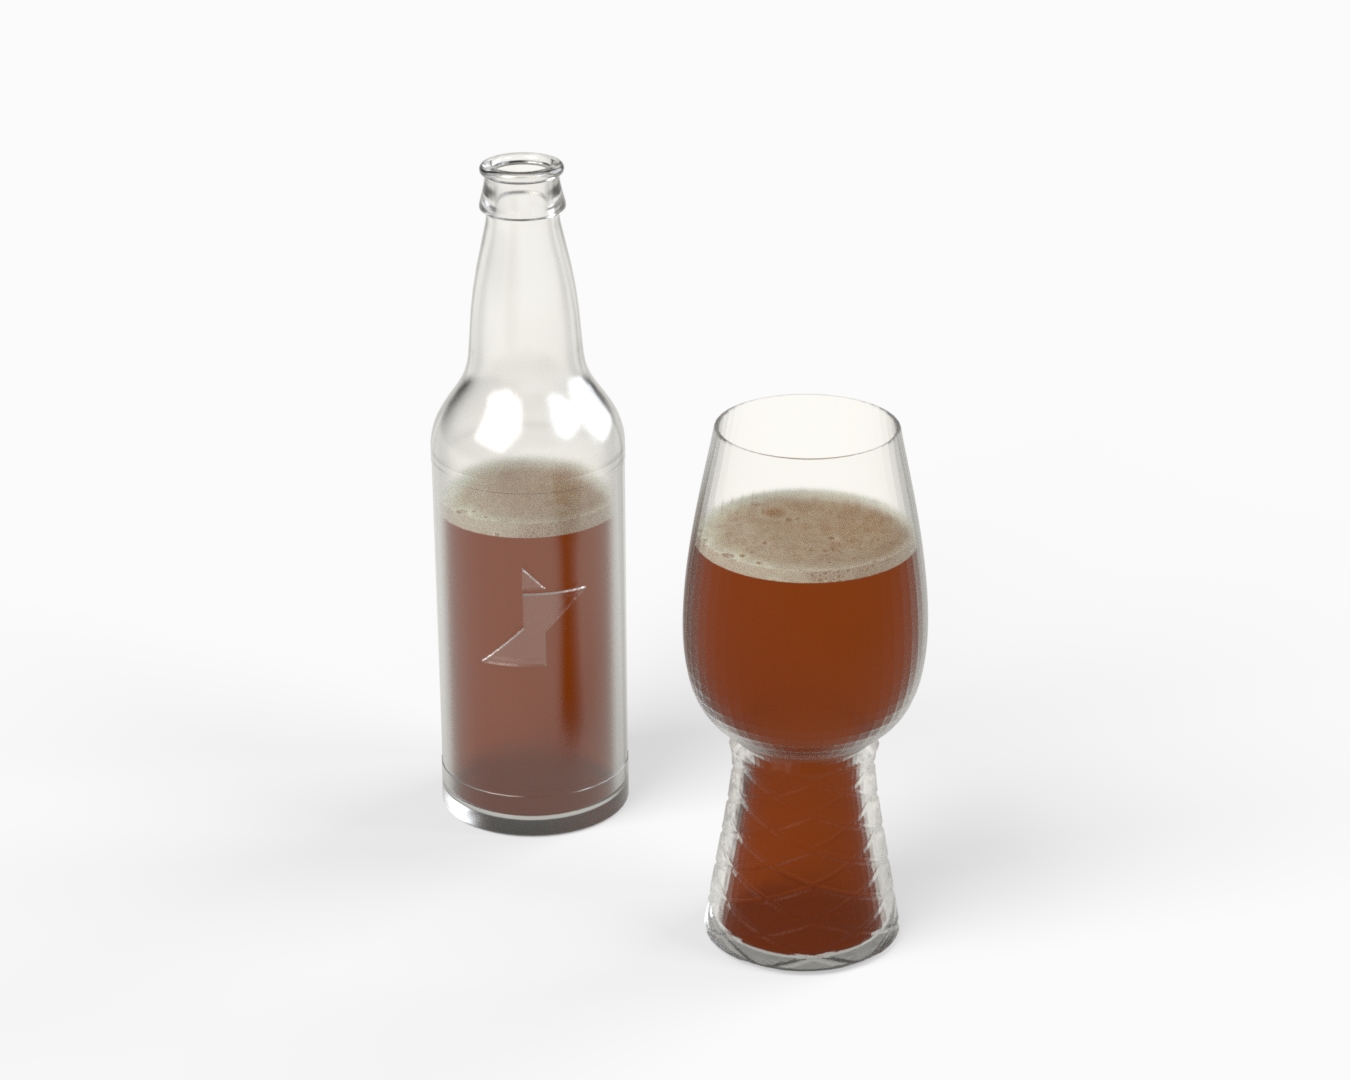
Innova Systems Pale Ale
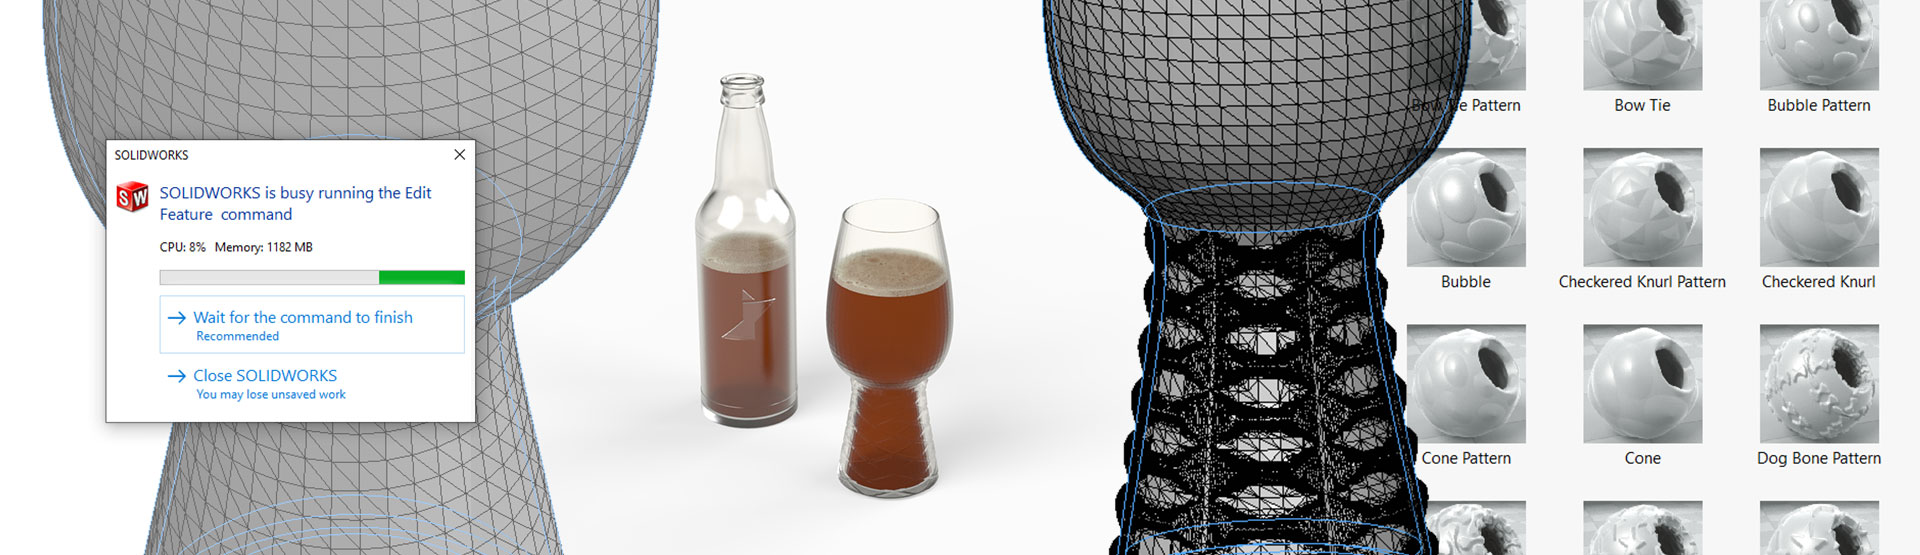
The 3D texture tool proved perfect for trying out some design ideas for glassware to go with our new Innova Systems themed Pale Ale. With a render environment set up in SOLIDWORKS Visualize, we can see our design ideas come to life in high quality, right from the very beginning.
Using the SOLIDWORKS 3D Texture Tool
We start by applying our Height Map as an Appearance. We can drag and drop Appearances from the right sidebar as usual
Images which we want to import can be added to our Custom – Appearances directory (see tools > options > System Options > File Locations).
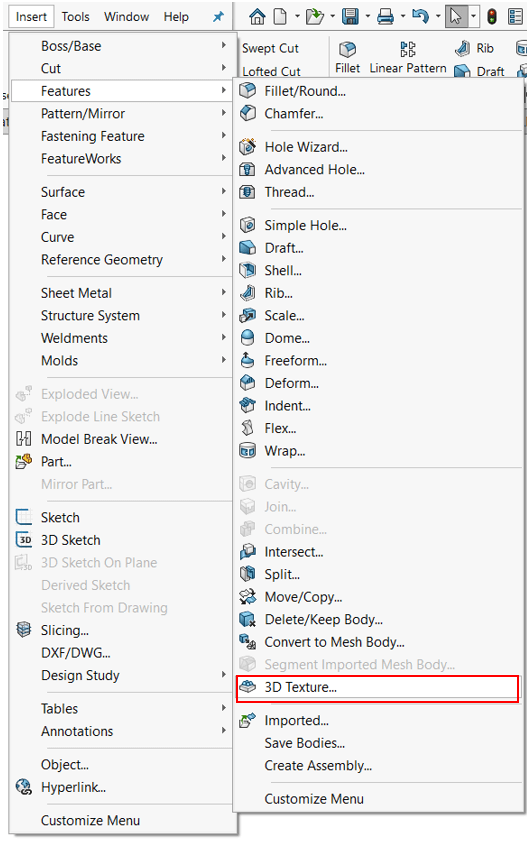
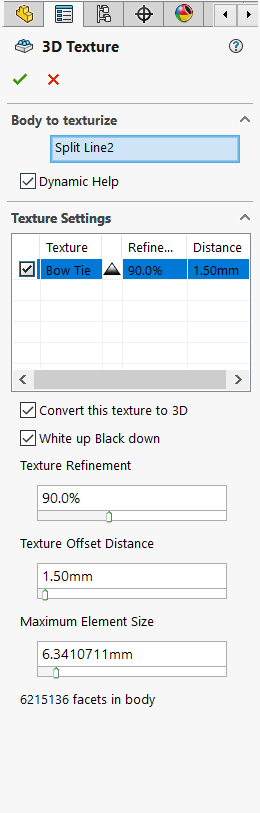
We can find 3D Texture in SOLIDWORKS 2019 under Features:
Within our 3D Texture PropertyManager, we can manipulate the mesh to give a good result.
The Body to Texturize can be a solid or a single surface.
The Texture Refinement sets the level of accuracy around detailed areas, creating greater element density as required. We can also set a Maximum Element Size across the whole body. It’s worth manipulating both until the mesh reaches the desired resolution in all regions. Here, we want the mesh to fit closely to the Height Map shape without excessive visible faceting.
The Texture Offset Distance gives the maximum up/down displacement of the mesh from the original surfaces.
Notice that the number of facets is given below the properties. This is significant, because dense meshes come with a performance overhead.
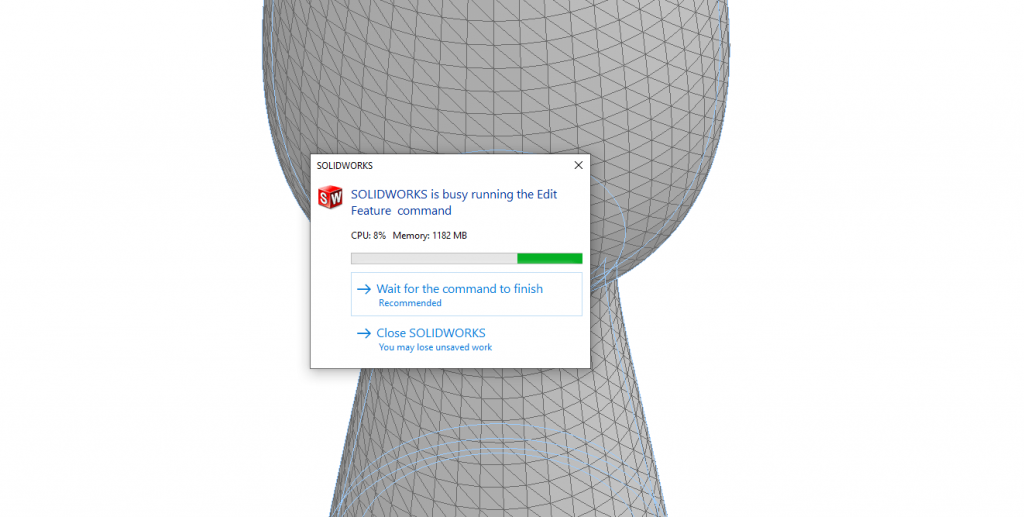
Generating a complex mesh may take some thinking time. Luckily, one enhancement in 2019 is that a Progress Bar now appears on screen so you can verify that the requested command is being carried out, and monitor resource usage. We can therefore see that the command is indeed running, and we need just need to give it a few moments.
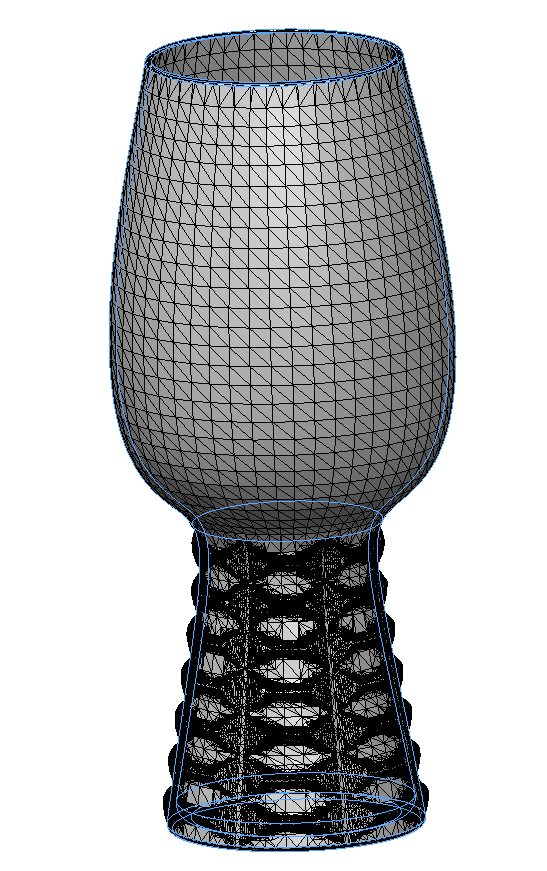
Our signature glass design
For our glass design, we can produce the crux of the desired shape by revolving a spline, but we want to add detailing around the base to make our design interesting. The pre-loaded 3D textures in SOLIDWORKS gives us a great library of options to get started with. So how do we do it?
First, we generate into the mesh:
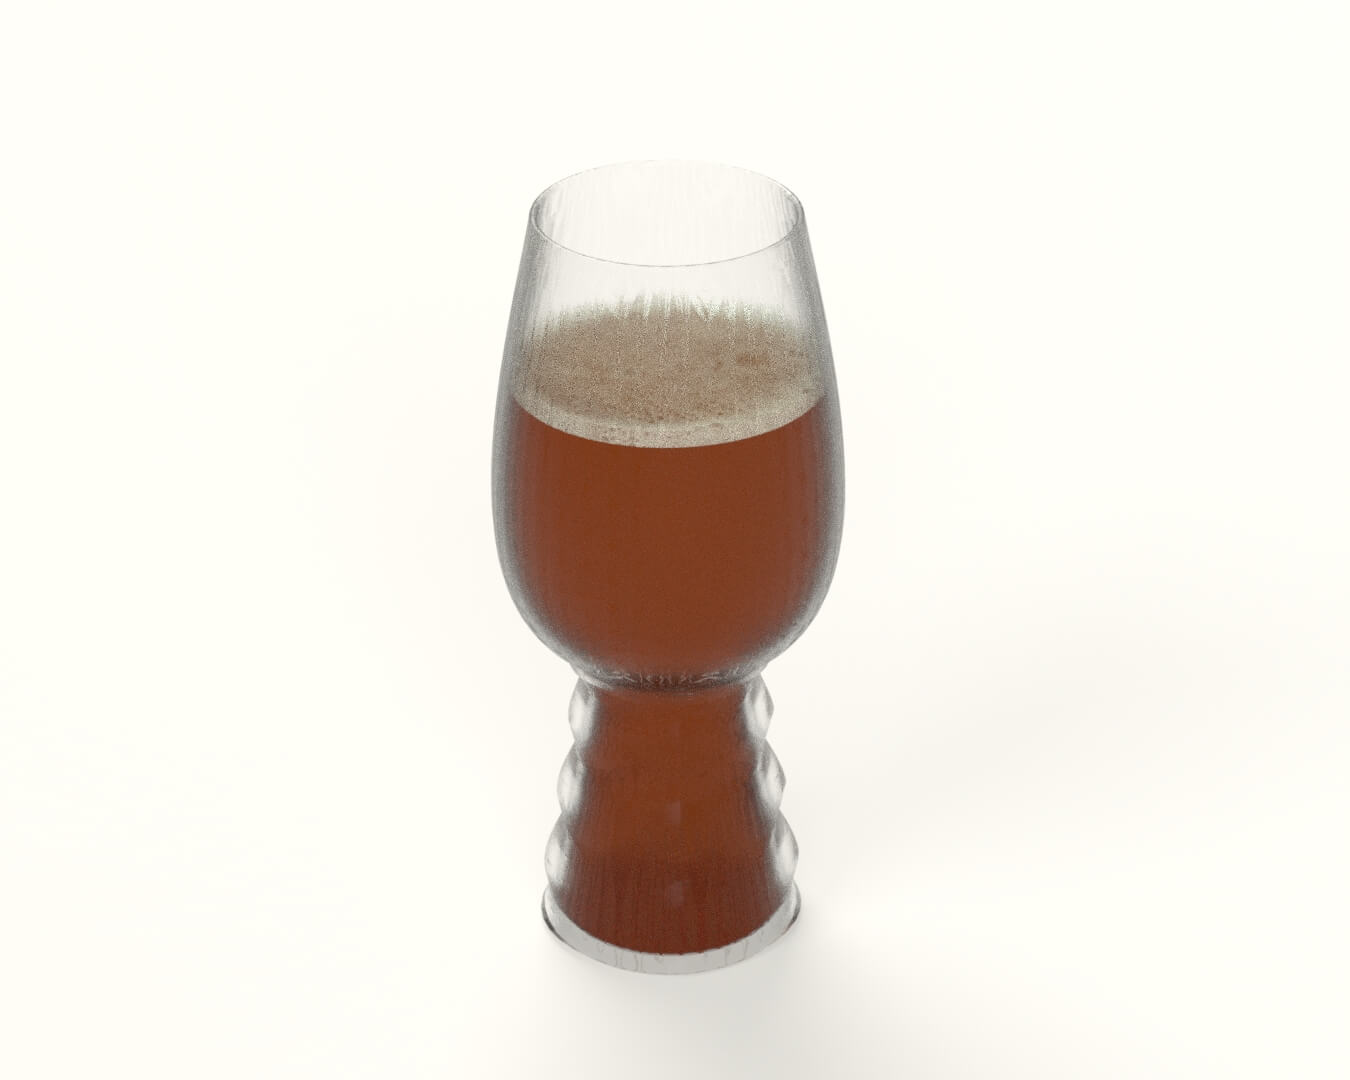
Then we bring our design over to SOLIDWORKS Visualize for rendering:
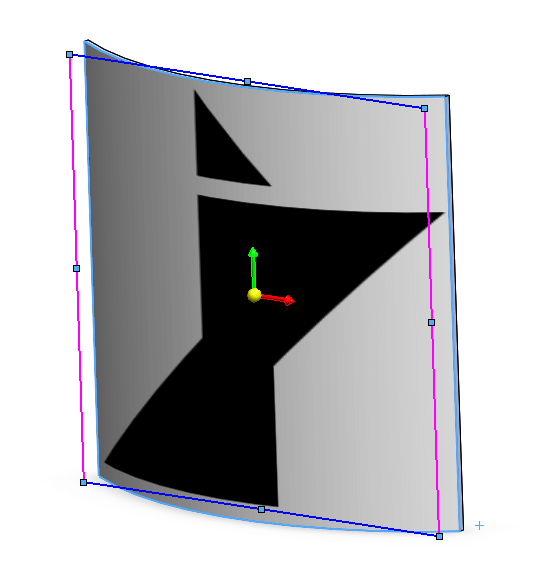
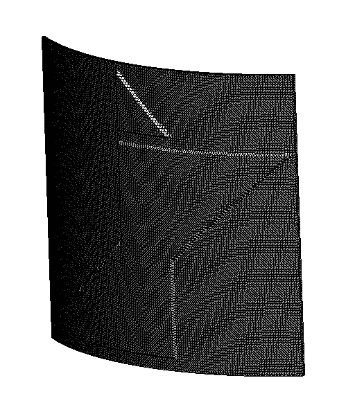
How to emboss a logo on the bottle
As well as patterned geometry, we can use the 3D texture tool to introduce a mesh based on an imported image. Here, we’ll generate an Innova logo to attach to our bottle, based on an image import.
The final result. Cheers!
We hope you enjoyed learning how to use the 3D Texture Tool in SOLIDWORKS.
Have you seen our blog archive where we have posted plenty of helpful tutorials and news articles? We also have a fantastic video library filled with easy-to-follow videos on a number of topics inspired by other SOLIDWORKS users – take a look. Also, don’t forget to follow Innova Systems on Twitter for daily bite size SOLIDWORKS tips, tricks and videos.


