
Let’s take a look at how to set up SOLIDWORKS Visualize to produce a quick and attractive render. The workflow shown here can be used across several models and scenarios, so it’s a great starting point for you if you’re just starting out.
Before loading up Visualize, it’s a good idea to open the model up in SOLIDWORKS to apply any initial appearances. SOLIDWORKS has some great tools for applying appearances to different models and it doesn’t really matter what you apply – at this stage it’s all about creating those appearance groups.

Once the appearances are applied, it’s time to move across to Visualize. If you have the Visualize add-in turned on you can move directly from SOLIDWORKS by clicking the ‘Export Advanced’ option. This will export your model, maintaining you current appearances.
Once inside Visualize you’ll often find that some of the appearances look good, while others don’t quite cut the mustard. No problem, because they can easily be amended.
If you press the spacebar you can bring up the Easy Mode toolbar. For new users it will simplify the user interface and show the stages required in SOLIDWORKS to produce a render. Very handy.
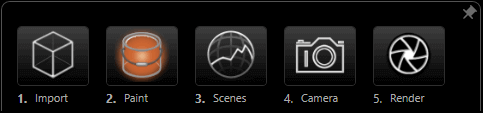
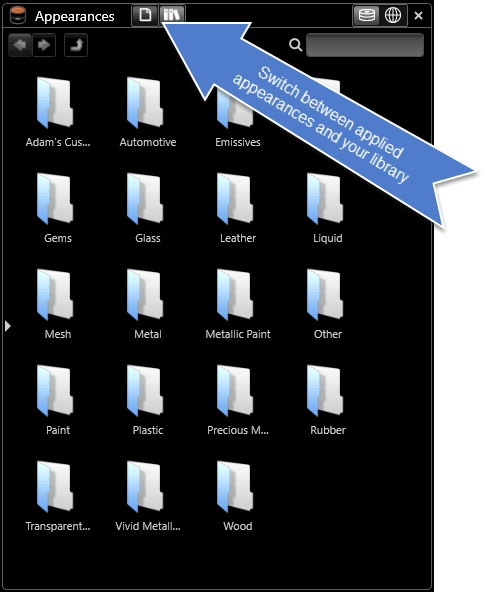
The model is already imported for this render. So the next step is to choose ‘Paint’, this will generate a new appearances toolbar. Here you can either access your appearances library, or edit already applied appearances.
By dragging appearances onto the model they’ll use the same groupings you set up in SOLIDWORKS.
You can also apply Decals, such as a company logo, if you have any in your library.
A small piece of advice: Choose the appearances which “look right” rather than the correct appearances listed in the categories. You’ll find that some appearances can work within several scenarios.
If you need to make any changes to your model, like the ones reflected above. You can go back to SOLIDWORKS at any time and just use the Update or Save Advanced button, and overwrite your Part/Assembly. Visualize will then prompt you when you return.

Now, having applied appearances, you can have a look at which scene will make your model look best.
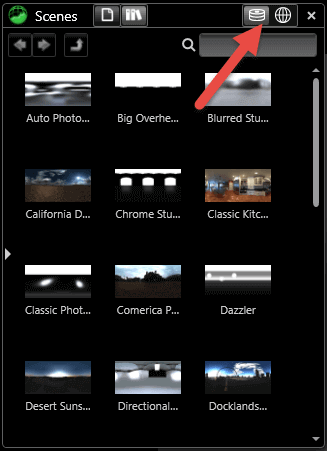
Using the Scenes button from the Easy Mode toolbar. This menu is much like the Appearances menu, with controls to switch between already applied scenes and your library.
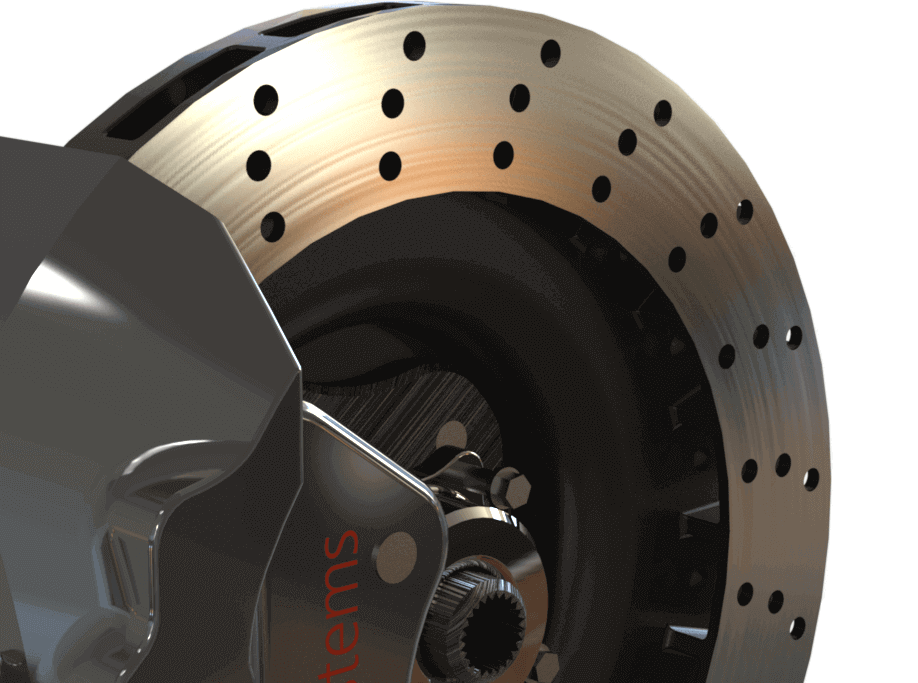
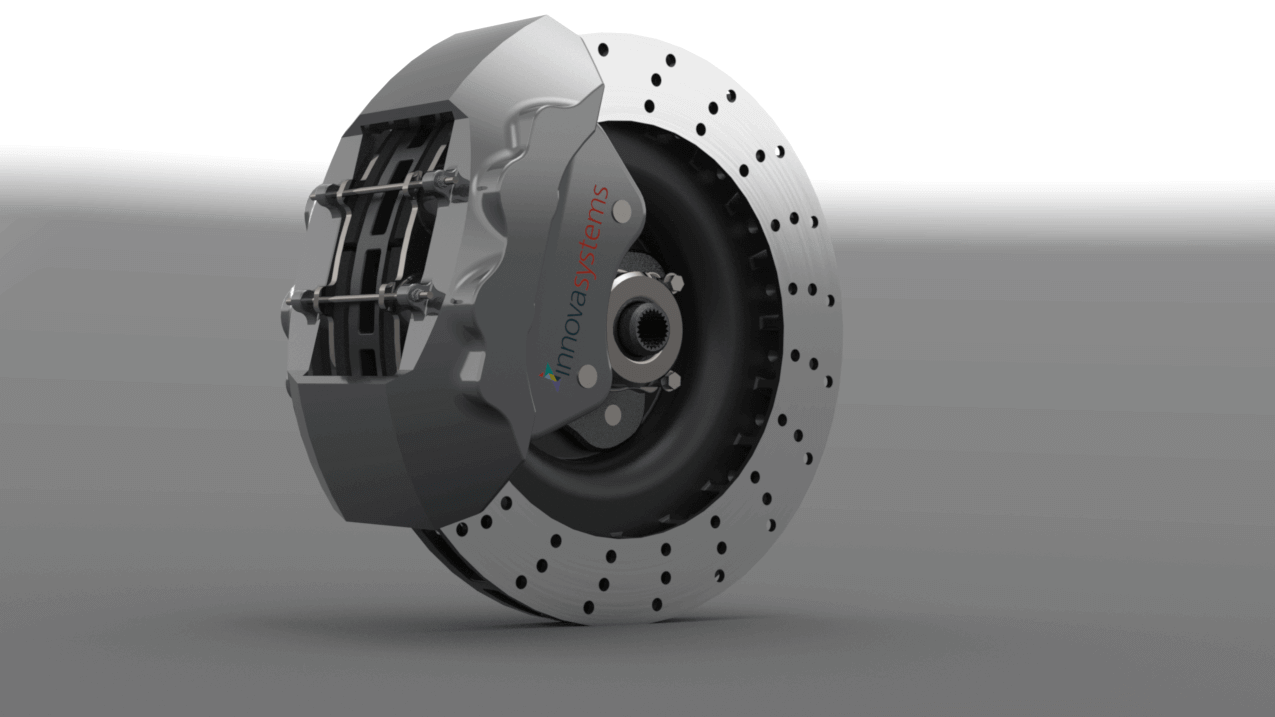
When you drag the appearances into Visualize you will find that it can change the backdrop, as well as the lighting. As a result the look of your model will change. The scene also provides any reflections that can be seen on your model.
In the top right of your Scenes and Appearances library, you can switch between local files and files on the web. You will see two buttons in the corner near the X. Files that are stored in the online library will be marked with a green tick if they are downloaded.
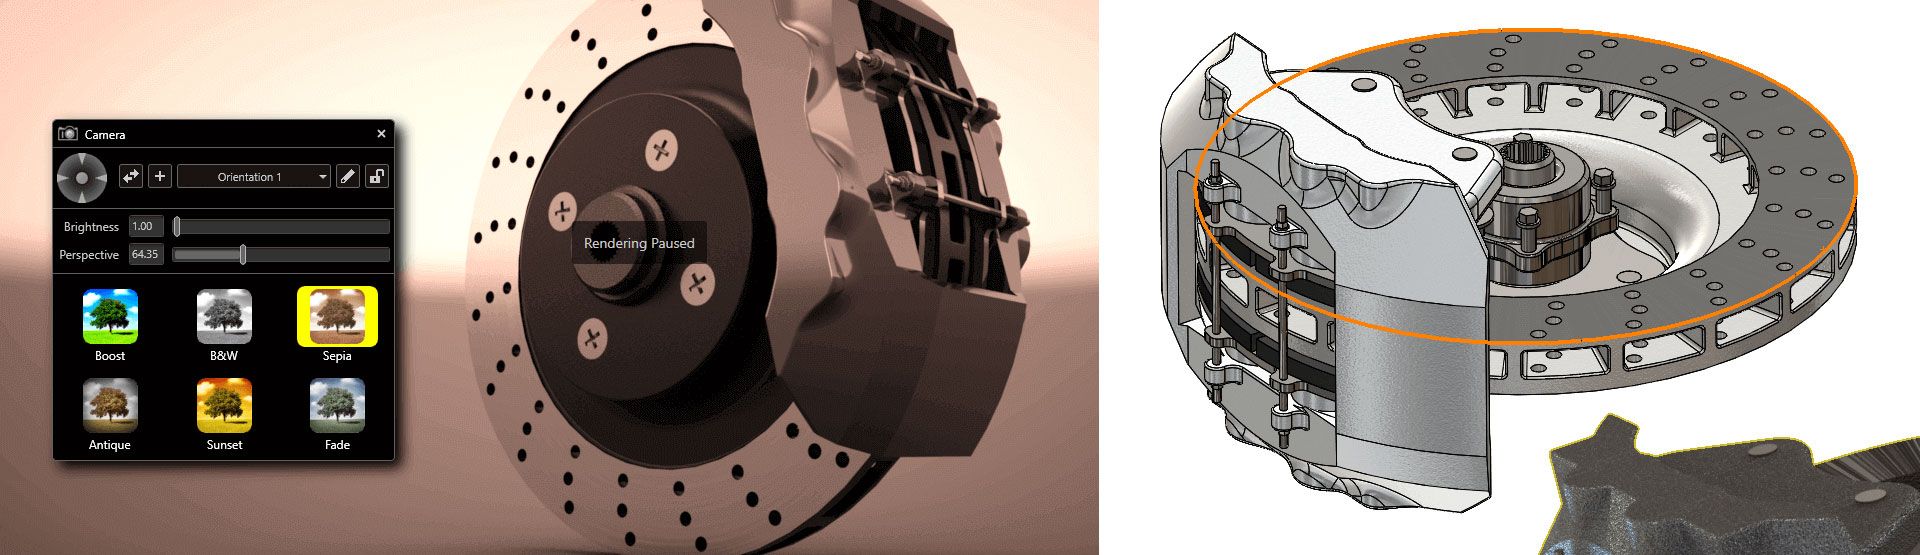
The final stage before rendering will be to set up the views you want to render. These can be set up as cameras.
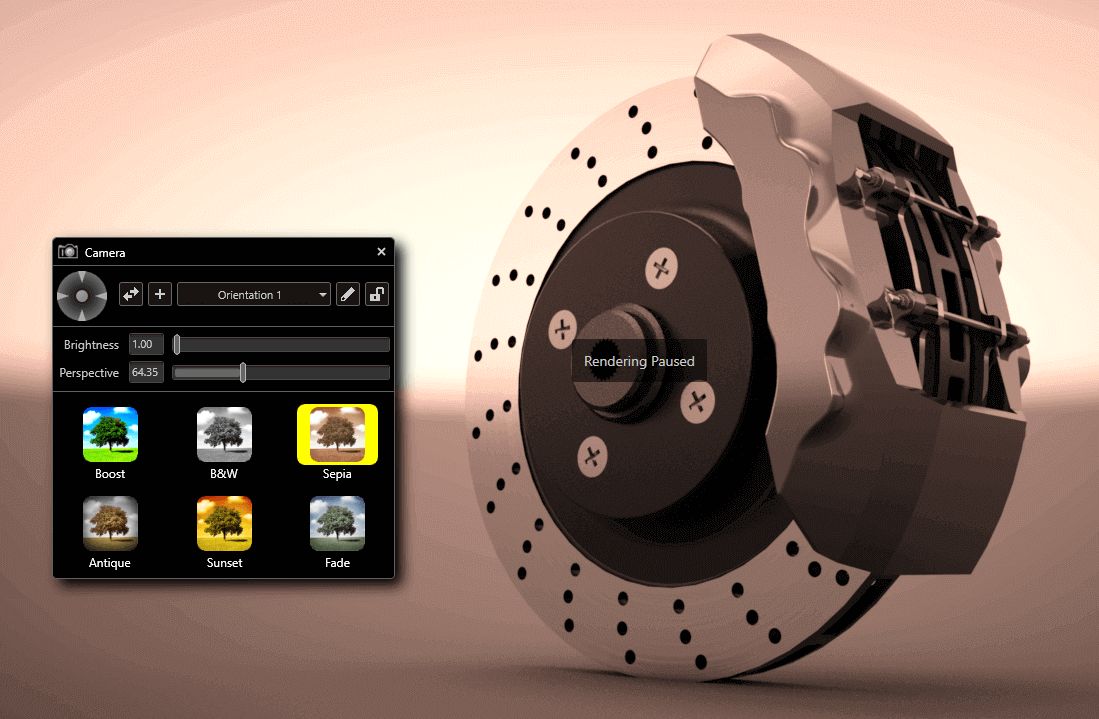
From number 4 in the Easy Mode toolbar you’ll find your cameras. These will allow you to change and record orientation, you can also apply filters to your cameras to give your renders a defined aesthetic. The cameras can be saved and accessed later. We recommend setting up the cameras you want to render and lock them so they cannot move. When outputting your render you can choose to render all cameras.

The output tools in SOLIDWORKS Visualize are accessed from the top toolbar (see above). From here you can customise the settings a little more than the option available from the easy mode toolbar.
If you’re unsure of the settings to use when outputting the render, we recommend that you use the profiles dropdown at the top. These allow you to choose from several predefined sets of options. You can also set up your own profiles if you need to.
Using the options available you can output to a queue and render later or render out immediately, depending on your requirements.

We hope you found that useful.
Why not take a look at our blog archive where we have posted plenty of helpful tutorials and technical articles like this one. We also have a huge video library filled with easy-to-follow tutorial videos inspired by real customer enquiries. Don’t forget to follow Innova Systems on twitter for daily bite size SOLIDWORKS tips, tricks and videos!


