
Multi step holes are commonly used in a variety of designs, such as mould tools and manifold blocks. With the introduction of SOLIDWORKS 2017, SOLIDWORKS gave us the ability to create these multi step holes, quickly and easily using the new Advanced Hole tool. In SOLIDWORKS 2018 you now can automatically create Callouts for those Advanced Holes, in much the same way you would create Hole Wizard hole Callouts. Let’s take a look at how to do it.
How to create the Advanced hole and Callout
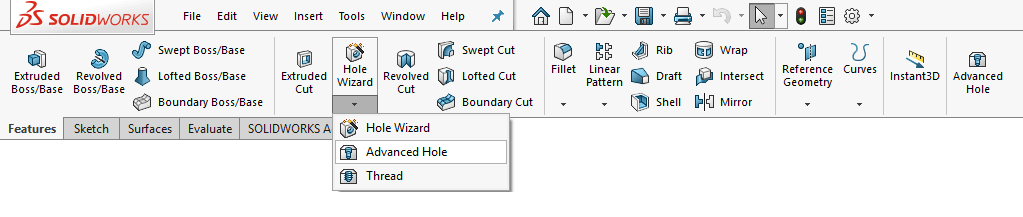
Firsty, start by activating the Advanced Hole tool, which can be found on the drop down of the Hole Wizard menu on the Features Toolbar.
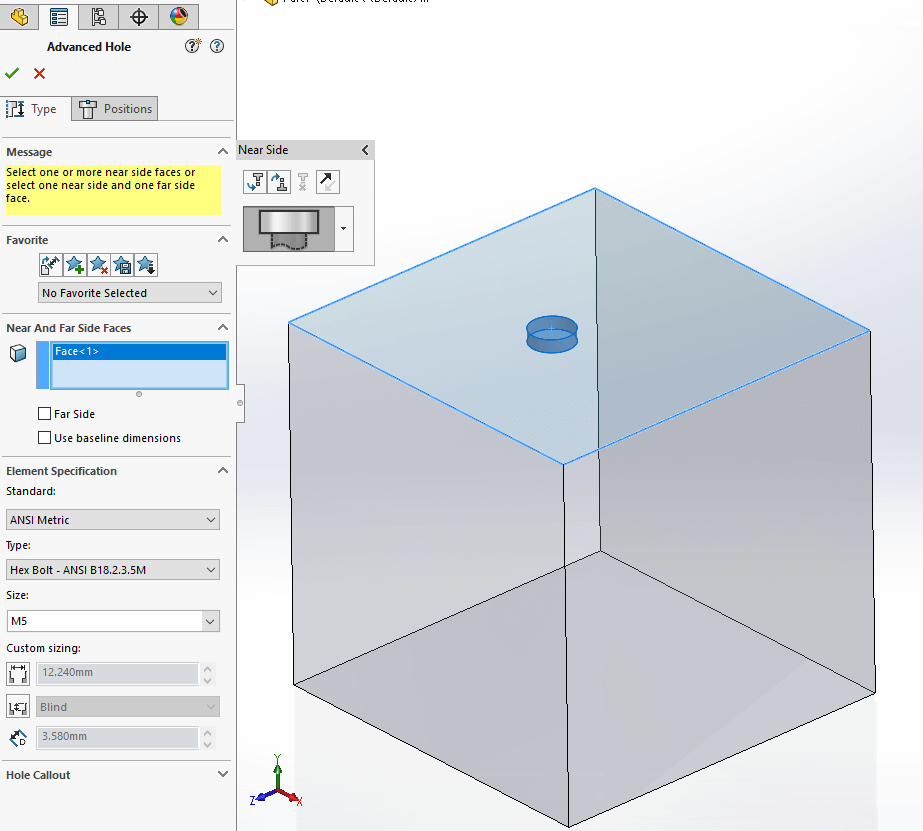
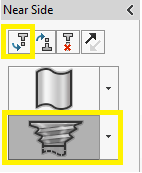
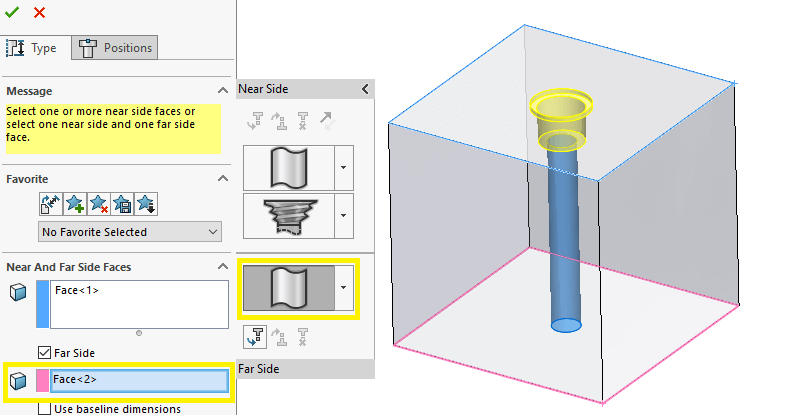
The property manager for the Advanced Callout loads and we begin by defining a near side face. As we click on the face we see a preview of the Advanced Hole as per the settings in Property Manager. This is the reason that you can see a preview of a counterbore head for an M5 Bolt as shown below.
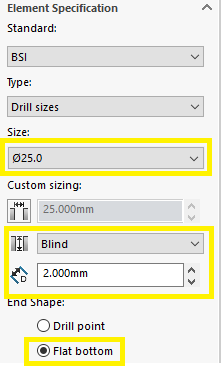
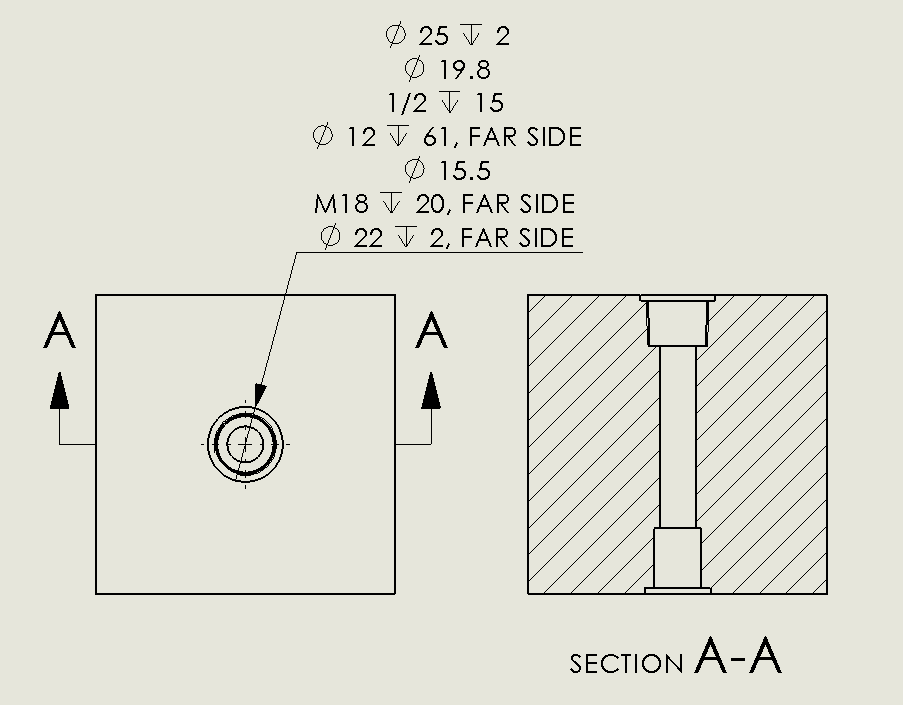
In our example we want to start with a Ø25mm by 2mm deep hole. To achieve this, simply change the element type to a hole.
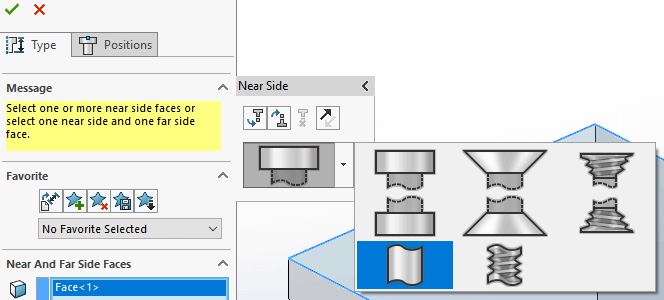
Next, we define the hole size as drill Ø25mm x 2mm deep with a flat bottom (rather than a drill point).
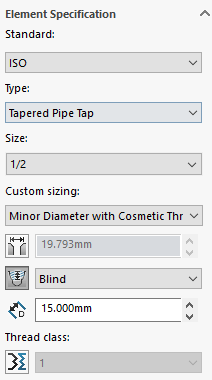
The next element in our advanced hole will be a Ø1/2-inch x 15mm deep tapered tap. To do this, we select the ‘Insert element below active element’ option and set the element type to near side tapered tap.
We then set the size of the tap to ؽ-Inch and the depth to 15mm.
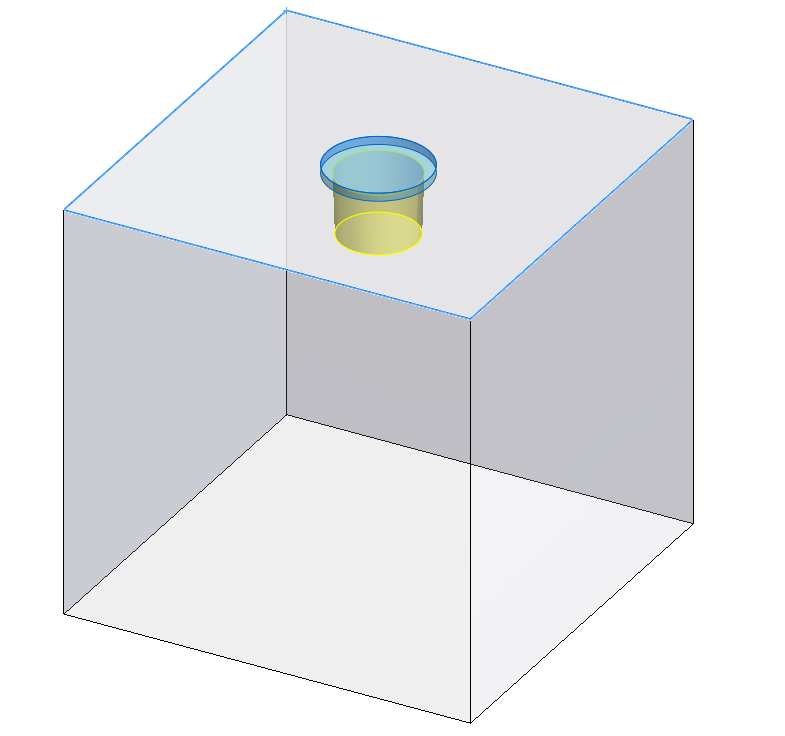
At this point the model preview looks like this.
Let’s say we want a 12mm hole running through our model. To achieve this, we define a face to use for the far side, which will be the base of the cuboid (please note the near side and far side must be parallel with each other) and set our element type to hole.
Following on, we define our hole size to Ø12mm and end condition to ‘up to next element’ this will ensure our hole terminates where it meets the near side tapered tap.
To complete the Advanced Hole, we use the insert element below active element to add an M18 x 20mm deep Straight tap and a Ø22mm x 2mm deep hole.
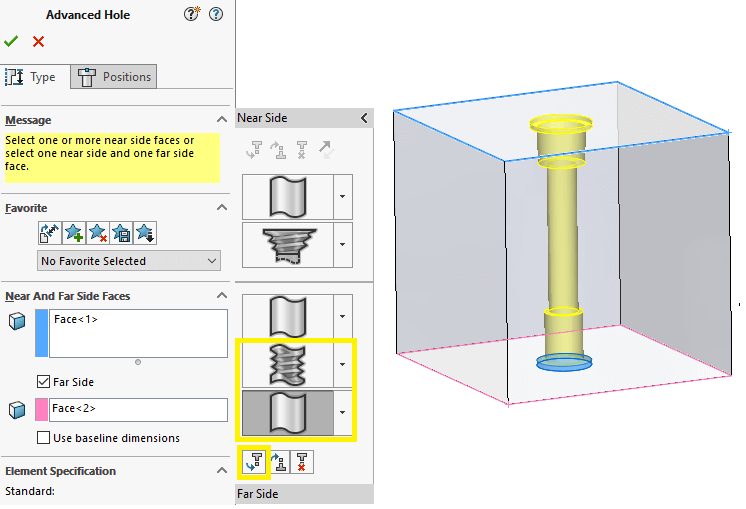
Now, we simply hit the green tick and complete the feature.
Useful to know…
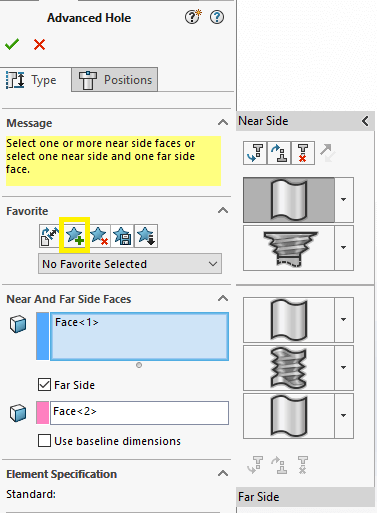
- We might regularly like to re-use the settings for this Advanced Hole on other models. Rather than having to launch the tool and define the elements each time, the Advanced Hole can be saved as a favourite for easy re-use, meaning you only need to define the near and far-side face on your new model.
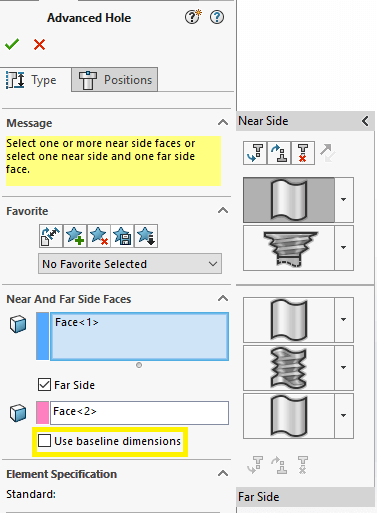
- There is an option to use baseline dimensions, meaning the values for the depths of all holes are calculated from either the near or far side face (depending on what side you are working on). These values will also show in your Hole Callout at drawing level.
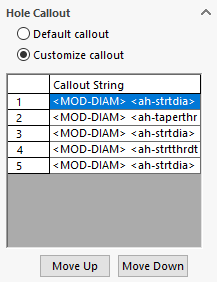
- There’s an option at the bottom of the Property Manager that allows you to customise the hole callout for each element that has been created. We can also re-order the callouts to suit using the ‘move up’ & ‘move down’ buttons. Our callout consisted of 5 elements, hence why we see 5 entries that we can customise.
This will be relevant when we use the hole callout at drawing level.
Hole callouts in SOLIDWORKS drawings.
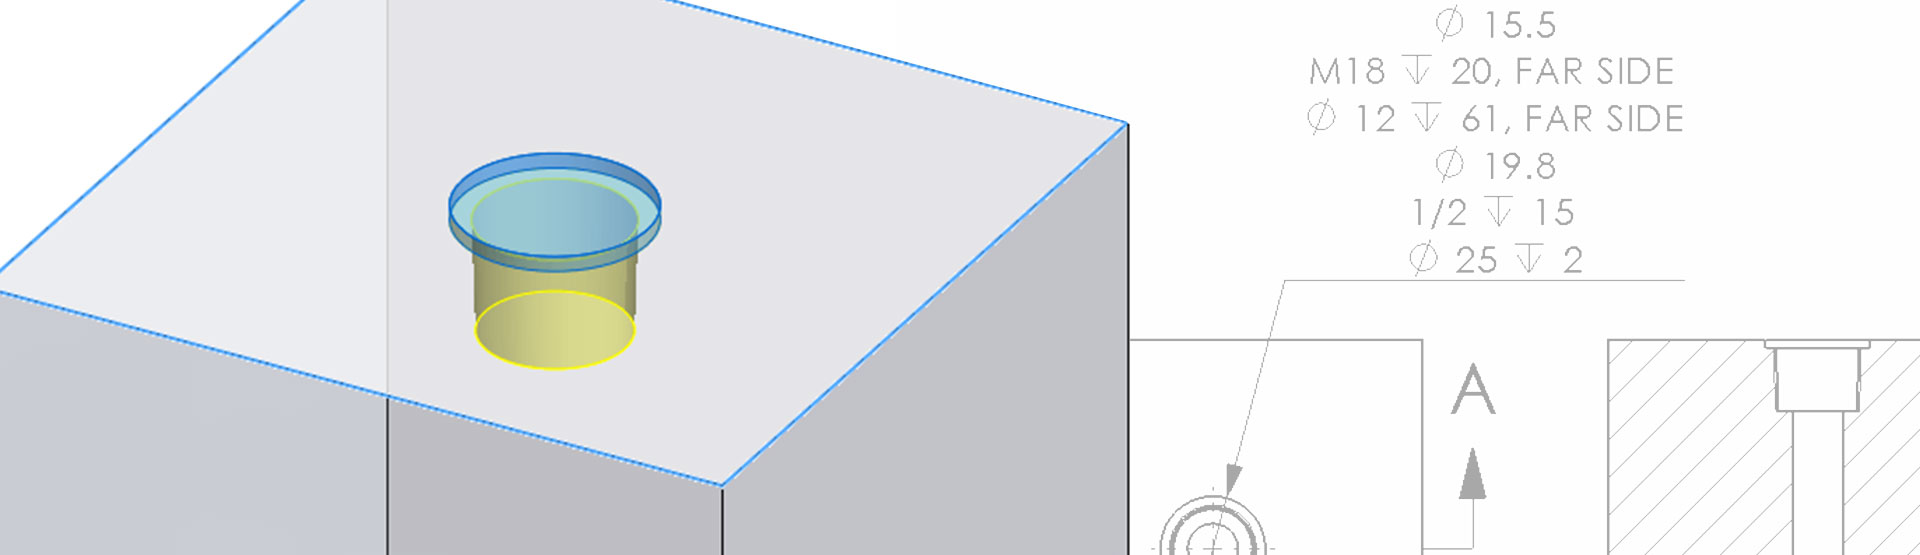
In SOLIDWORKs 2018, Hole Callouts can be created for Advanced Holes in much the same way as creating a Hole Callout for a Hole Wizard Hole. Simply select the Hole Callout tool from the Annotations Toolbar…

…and select an Advanced Hole diameter from your drawing view.
There are a couple of additional options within the hole callout property manager. These are:
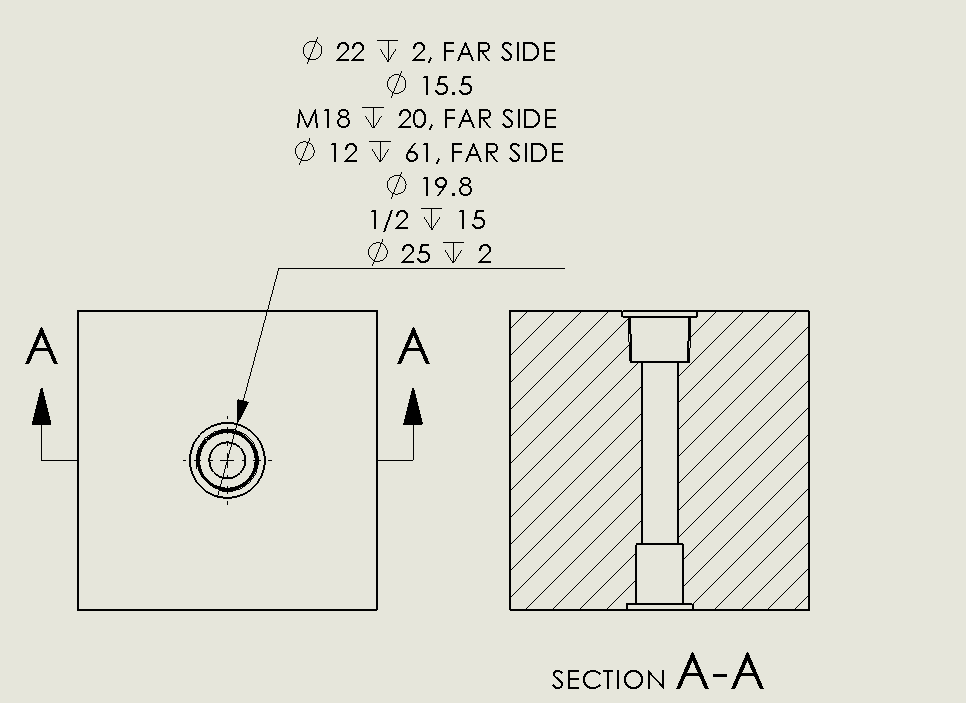
‘Reverse callout order’, which flips the order of the callout…
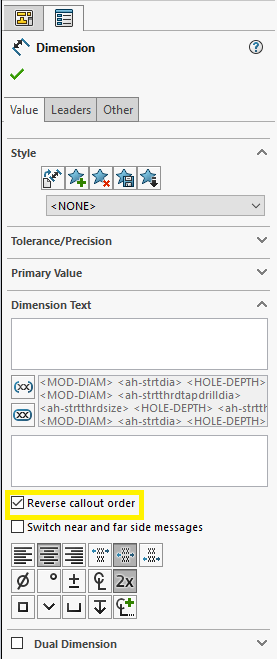
…and ‘Switch near and far side messages’ which switches the near and far side text strings.
We hope you found that useful!
Have you seen our blog archive where we have posted plenty of helpful articles? We also have a fantastic video library filled with easy-to-follow videos on a number of topics inspired by other SOLIDWORKS users – take a look. Also, don’t forget to follow Innova Systems on Twitter for daily bite size SOLIDWORKS tips, tricks and videos.


