
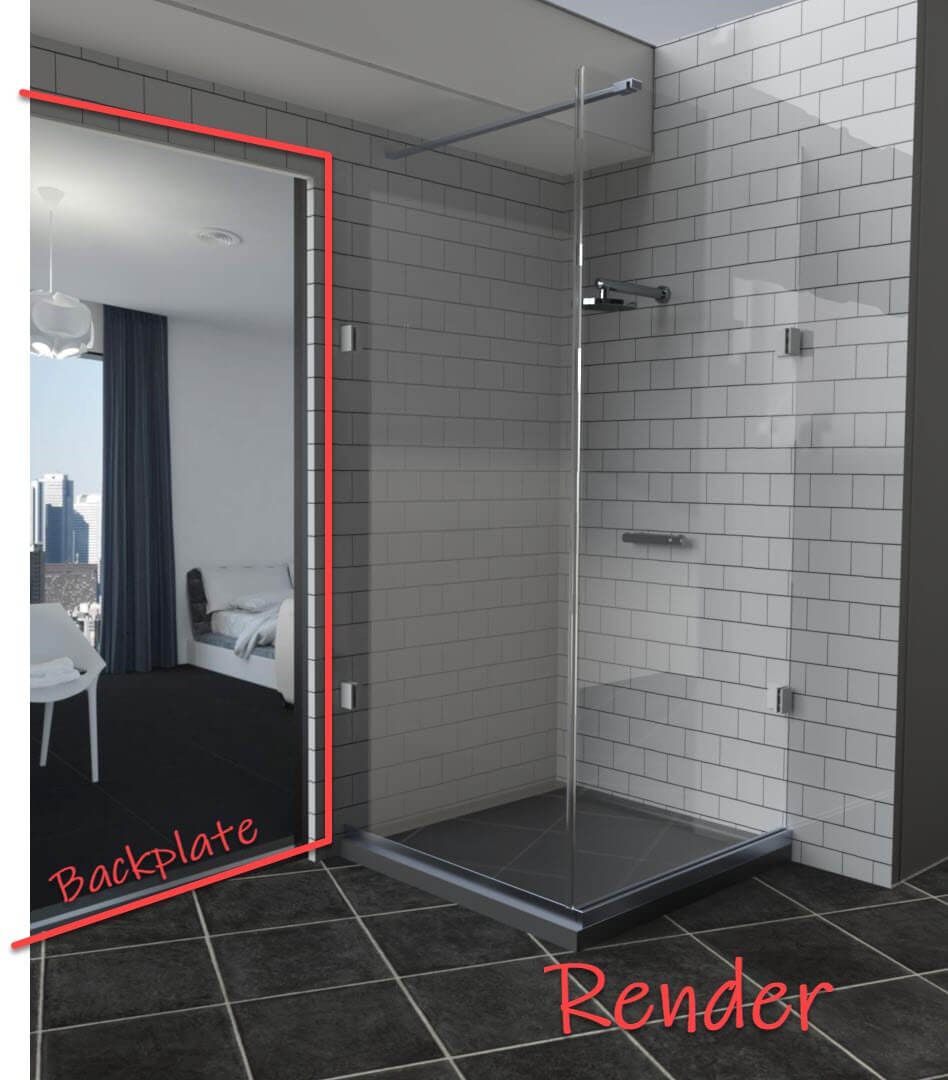
“Backplate” is SOLIDWORKS Visualize speak for what some people might call a backdrop or background. In this tutorial, we will show you how backplates can be used to improve the standard of your render. Let’s get started…
There are three steps you must take to create your Backplate. These are:
- Adding the Backplate
- Matching your model to the angle of the Backplate
- Matching the focal length and Perspective on the camera in Visualize
How to add a Backplate
To add the Backplate, navigate to the Environment Tab. You’ll notice a plus button near the top of the tab where you can browse for an image to use. When choosing an image, you must make sure that the image is of high enough resolution relative the output you want to achieve whilst rendering.

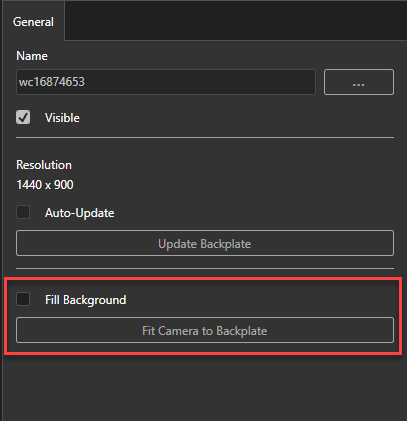
After inserting a Backplate you may find that the image doesn’t fully fill the camera view. If you select the item in the Environment Tab, you can either select to fill the background (stretching the image) or you can fit the camera aspect ratio to the Backplate.
Now we need to adjust the angle of the model, so that it matches the angle of the image you have selected for your Backplate.
How to adjust the angle of your model
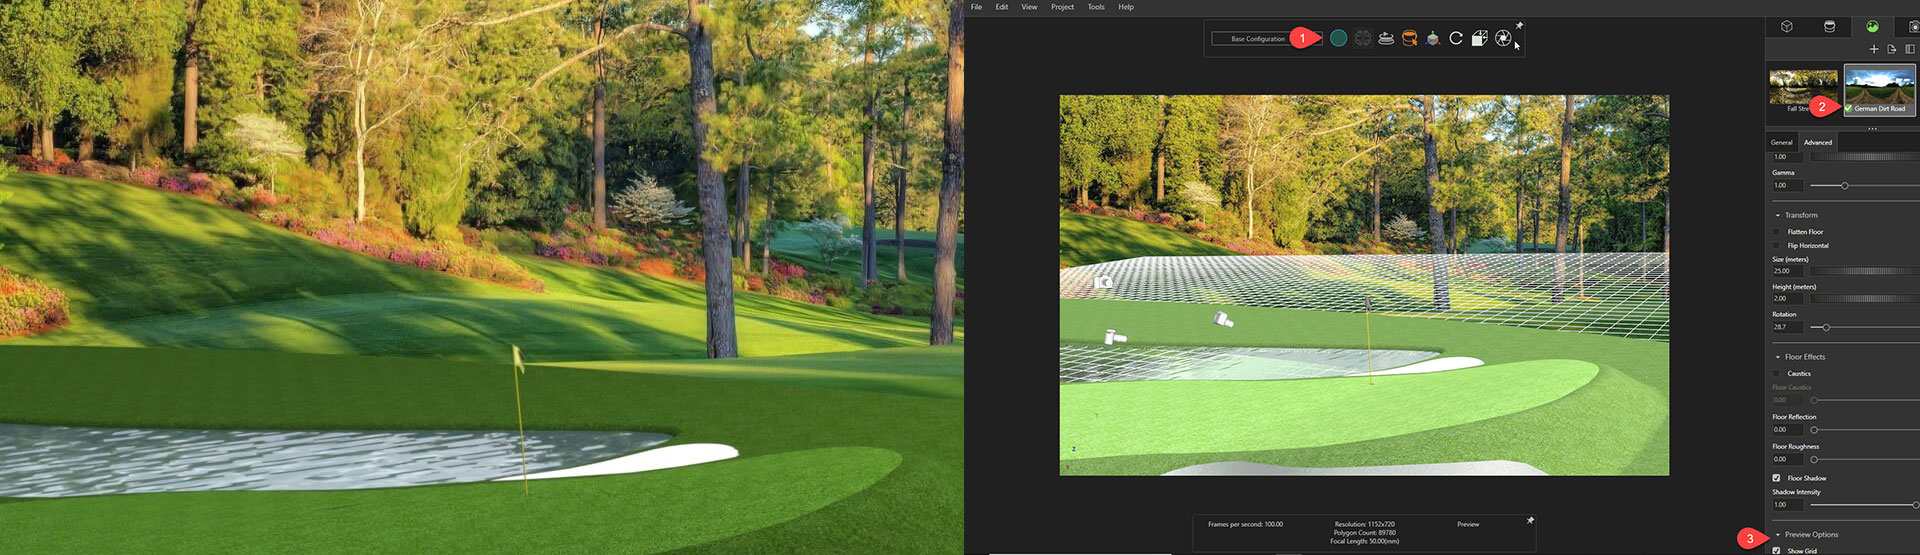
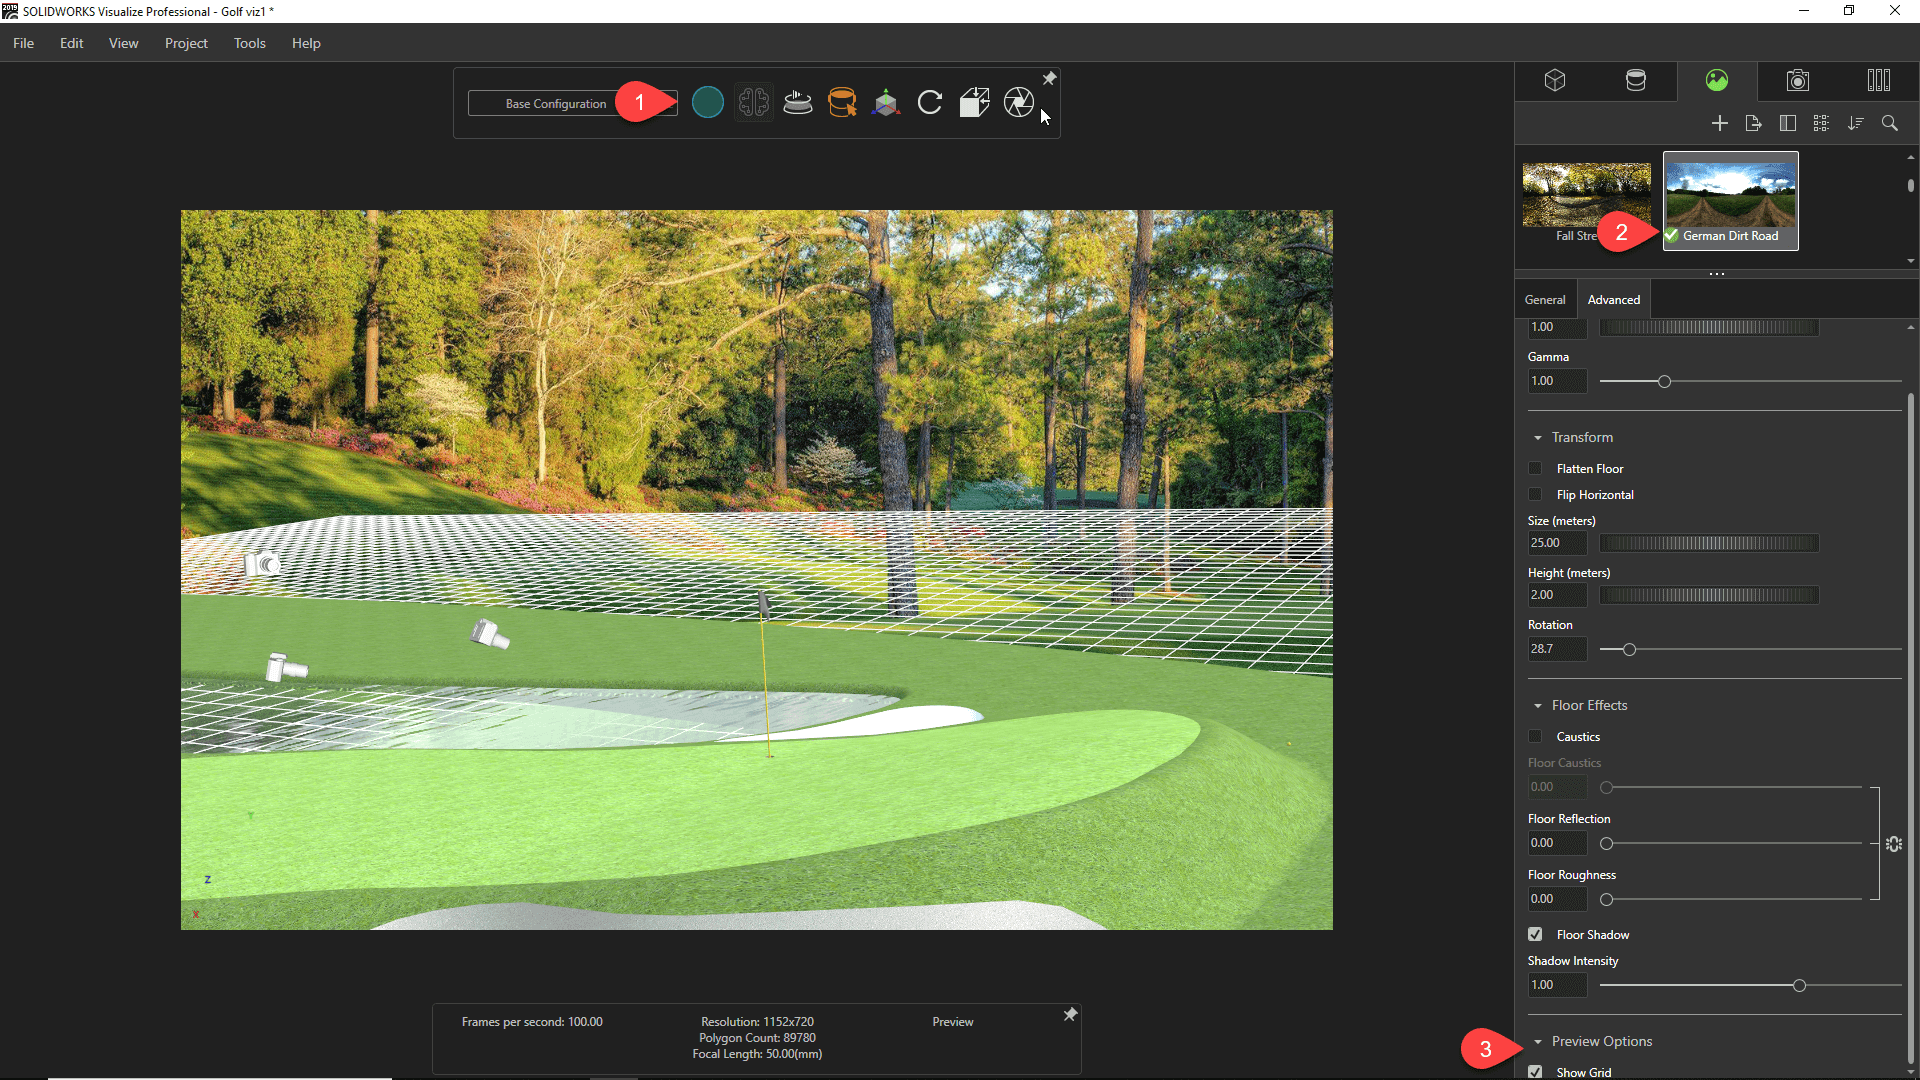
- Set your render mode to Preview
- Select your Environment
- Turn on the Grid
Doing this makes it far easier to line up the model with your Backplate image. This can take a while if you’ve not done it before, so stick with it. The results are worth it.
How to adjust the focal point and perspective of the camera
After this stage you may find that the perspective of your model doesn’t match the perspective of your Backplate. This is all controlled by your camera, so navigate to your camera tab and select your camera.
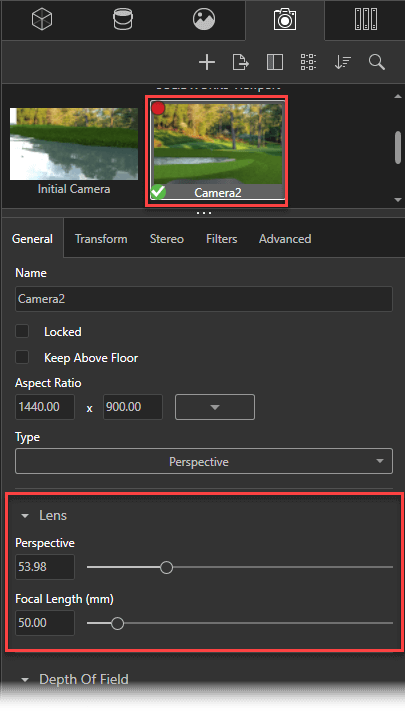
In the Lens information you can vary the perspective and focal length. These two parameters are linked and will change together.
If the Backplate image is a wide-angle image, choose focal lengths on the lower end of the scale. Alternatively, if your focal length is telephoto, and thus the perspective is more squashed, choose a higher focal length value.
You may need to adjust the focal length and angle of your model at the same time, so switch between the last two steps in order to get the image and your model matching.
The finished SOLIDWORKS Visualize video render!
Not bad if we do say so ourselves, but before you go…
Check out these related posts:
- Using bump maps in appearances
- Using displacement maps in Visualize
- Texture Mapping & Scaling in SOLIDWORKS Visualize
- Modifying your SOLIDWORKS models to add realism to your renders
We hope you enjoyed learning how to use Backplates in SOLIDWORKS Visualize.
Have you seen our blog archive where we have posted plenty of helpful tutorials and news articles? We also have a fantastic video library filled with easy-to-follow videos on a number of topics inspired by other SOLIDWORKS users – take a look. Also, don’t forget to follow Innova Systems on Twitter for daily bite size SOLIDWORKS tips, tricks and videos.


