
Applying textured appearances to surfaces in SOLIDWORKS Visualize can be performed in a number of ways. Employing the correct tool for the task will allow you to map any texture on to a face successfully. In many cases, matching the shape of an appearance properly onto a face will improve the realism of your render.
How to map & scale textures
First of all, let’s enable the appearance selection mode from the top toolbar. This will make working with the textures easier.

Setting the right Texture Mapping mode
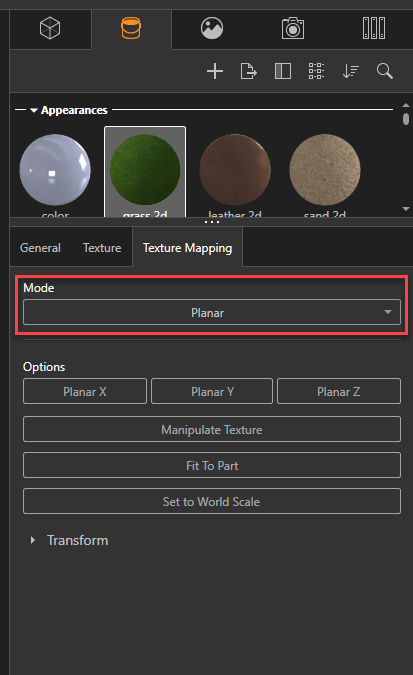
If you select an appearance after it is applied to your model you will see a texture mapping tab, which contains a Mode dropdown box to alter the way that the texture is applied to a model. There are several settings here to alter the way Visualize maps the appearance onto the model.
UV: Uses the geometry of your model to define the mapping, following the curves of a design. you sometimes won’t see anything in this mode.
Box: Great for cuboid shaped models, maps an appearance in a box around your model
Planar: Maps an appearance from a single direction onto your design
Spherical: for ball shaped designs, maps your appearance in a sphere around your model
Radial: for circular or disk-shaped mapping
Cylindrical: maps your appearance to your model in a tube shape around your model.
Perspective: maps the appearance from the current perspective of the camera. Can be updated by clicking fit to view
Remember to choose a mapping mode which most closely matches the shape of your model. It’s sometimes worth trying a few to get things as close as possible.
Matching appearances sizes appropriately
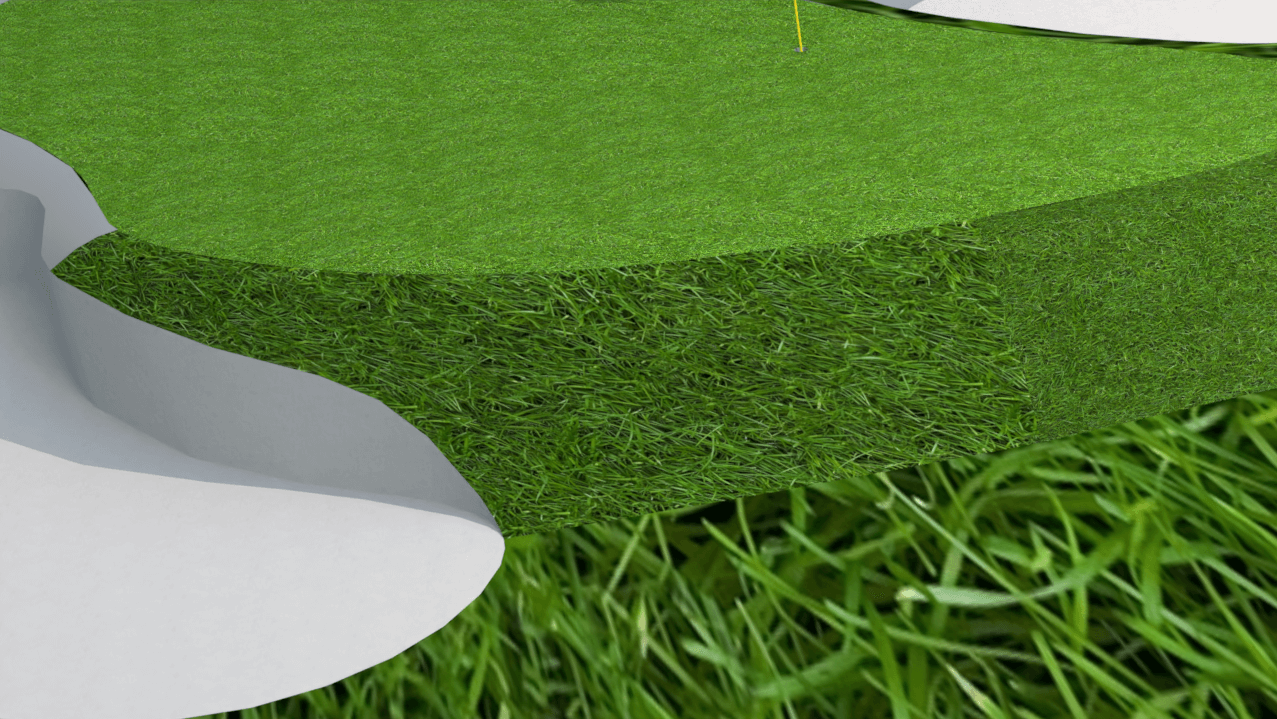
When applying appearances to a model in Visualize you will sometimes find that textured appearances come out at different sizes in separate areas of the model. In order control this, there are a few options you can adjust.
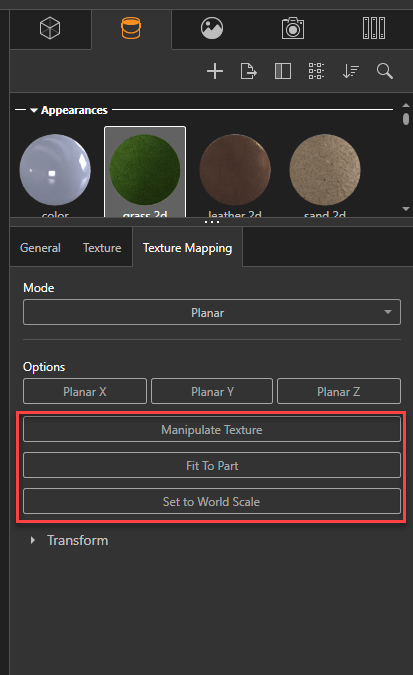
Fit to Part: This is a default scaling, which fits the texture to the bounding box of the part. It’s usually a good option to pick if your texture is only used in one place in the render.
Set to World Scale: This will apply a default scaling to your texture so that texture sizes are the same across the render. This is a good option to choose if your texture is used in several places. In the grass example above, choosing Set to World Scale for each face with this texture will solve the problem demonstrated above.
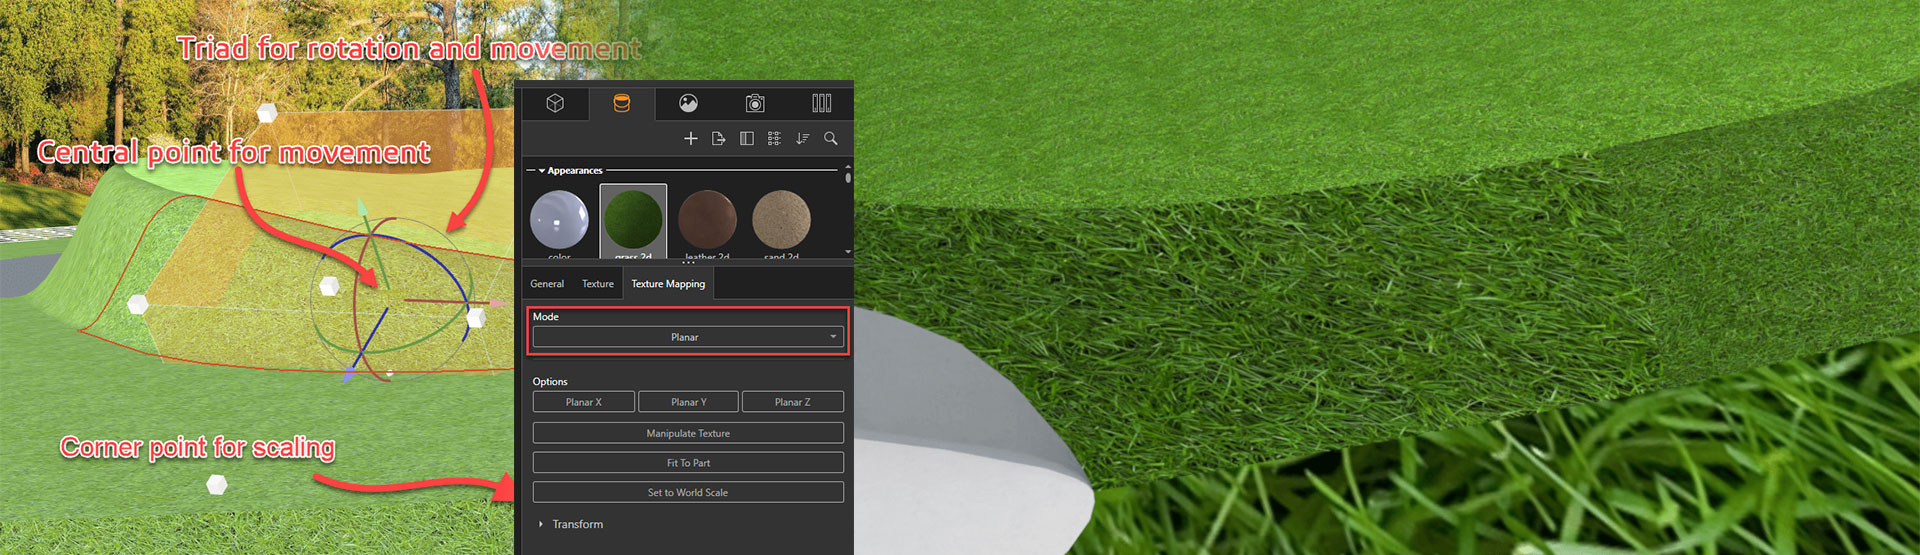
Manipulate Texture: Will show manipulation controls, which allow you to manually drag to change the location of your texture appearance. With some of the mapping options you can drag the square corners to change the size of your texture. The image below shows this in action.

We would normally use the controls here to change the location and scale of the texture if it’s only used in one place in the render, or if it needs to be scaled and positioned independently.
The options shown below can set how many times your appearance is tiled, controlling an appearance globally if it’s used in several places in your render.
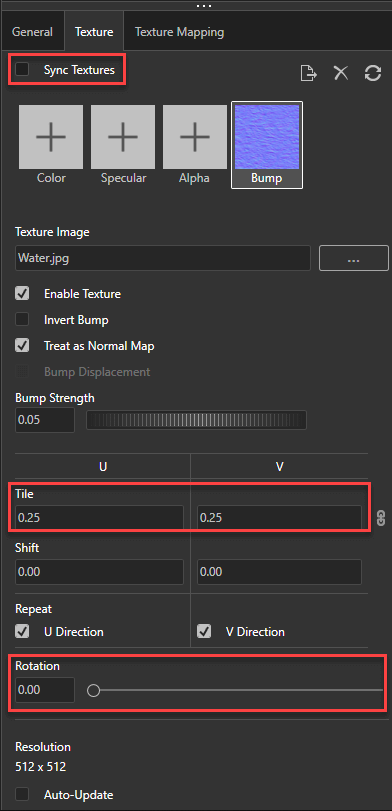
Ticking Sync Textures ensures that any changes made will be replicated over all textures (Colour, Specular, Alpha, Bump) at the same time. Meaning you don’t have to enter the same numbers in four places.
The tiling options will allow you to adjust how many times your texture images are titled on the surface you have applied them to. The higher the number the more times the image will be tiled and the smaller it will appear on your render.
Rotation will allow you to spin the image tiles around an axis to change the orientation. This is handy for things like wood grains.
As you can see there are a number of options when it comes to controlling your appearances in SOLIDWORKS Visualize. Hopefully this blog will have cleared up some of the confusion.
Now go and produce some amazing renders!
Before you go…
Check out these related posts:
- Using bump maps in appearances
- Using displacement maps in Visualize
- Using backplates when rendering in SOLIDWORKS Visualize
- Modifying your SOLIDWORKS models to add realism to your renders
We hope you enjoyed learning about Mapping & scaling textures in SOLIDWORKS Visualize.
Have you seen our blog archive where we have posted plenty of helpful tutorials and news articles? We also have a fantastic video library filled with easy-to-follow videos on a number of topics inspired by other SOLIDWORKS users – take a look. Also, don’t forget to follow Innova Systems on Twitter for daily bite size SOLIDWORKS tips, tricks and videos.


